


How to Attach a Minimal Bike Bell
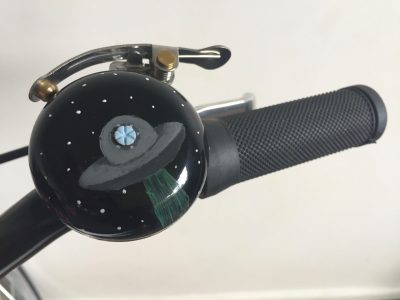
This minimal bell (the Knog Oi) allows you be safe and be heard without the fuss and size of a traditional bicycle bell
Supporting you and your family to SMILE when you ride.

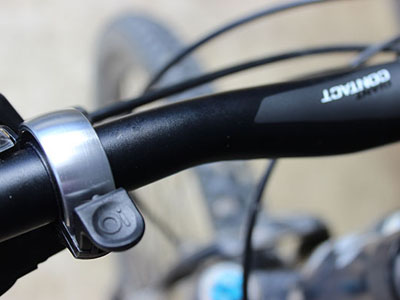
Welcome. Understand if a minimal bike bell will fit on your bike and how to attach your bell. Knog Oi Bicycle Bells are designed to be fitted to standard round bicycle handlebars that range in width from 22.2mm (small) and from 25.4 to 31.8mm (large) in diameter. This bell is not compatible with aero bars.
Where does it attach
Knog Oi Bicycle Bells can be placed anywhere along your handlebar where you have room. You need to decide where it will go before you buy your bell so that you get the correct size as some handlebars have different diameters along their length. The Oi also has space for cables to run through it.
Once you have decided where it will go work out whether you need a SMALL or a LARGE Knog Oi.
If you are unsure of the diameter of the handlebar you can use a flexible measuring tape and measure around the circumference of the handlebar.
The SMALL Oi bell fits a 22.2mm handlebar diameter (that is a 69.74mm handlebar circumference)
The LARGE Oi fits a handlebar diameter from 25.4 to 31.8mm (that is a 74.77mm-99.9mm handlebar circumference)

What will you receive and what tools will you need
You bell will come in a box and all the components you need will be attached to the bell
What tools will you need? An allen key. A 2.5mm Allen key

Allen Key part of a multi tool or a coloured allen key set
How does it attach
The bells use a simple screw bracket system that clamps onto handlebars.
![]() Remove the Hex Bolt ( screw) using the allen key so that you can open the Knog Oi
Remove the Hex Bolt ( screw) using the allen key so that you can open the Knog Oi
![]() Attach to Handlebars:
Attach to Handlebars:
Manually open the mouth of the mount, and push over the handlebar. If you can, fit it around your cables, there’s a space just for them.
If you have the Large Oi but a 23.8, 25.4, or 26mm diameter bar you’ll need to put the appropriate spacer on your bar to make Oi sit flush. Make sure the gap faces straight up. If your bar is 23.8mm, place the rubber tape provided inside the larger spacer.
Position on a cylindrical part of the handlebar that you find comfortable, but is not curved or tapered We think close to the handle/grip, so your thumb can comfortably flick the hammer
Screw in the hex bolt, firm enough to prevent any rotation, but don’t overtighten (this can affect the sound quality).

![]() Check that it works: Simply flick the hammer and enjoy the magical sound of your ringing bike bell. Learn a bit more about appropriate use of bike bells in our story Be Heard with a Bike Bell
Check that it works: Simply flick the hammer and enjoy the magical sound of your ringing bike bell. Learn a bit more about appropriate use of bike bells in our story Be Heard with a Bike Bell
Things to watch out for
What about the handle-bar cables? No worries. Built into the shape of the mount is a cable management system. So not only does it allow the bell to look and sound uninterrupted, it also helps gather your cables (for the organiser inside us all).

We’re here to help. If installing your bike bell has raised some questions for you. Please call us on 021 025 15576 or 0800 44 33 77 or CONTACT us via email
What is the bike bell solution for you? Your success is different to others… use our stories and support, get the right solution
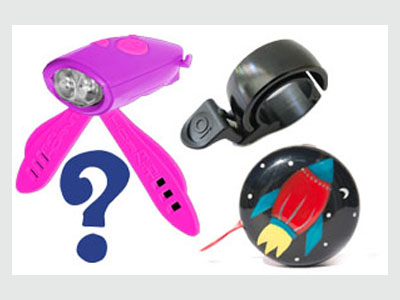
Bike Bell Buying Guide
What is the best bike bell solution for you? There are many factors to consider in your decision. Use our Buying Guide to get the right solution.
How to attach your Traditional Bike Bell
Read our guide on how to attach and learn if a traditional bike bell fit on your bike?
How to attach a Minimal Bike Bell
Read our guide on how to attach and learn if a minimal bike bell will fit on your bike.
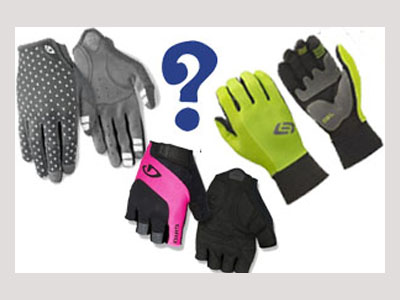
Bike Gloves Buying Guide
What is the best bike glove solution for you There are many factors to consider in your decision Use our buying guide get the right bike gloves.

Ride More Places
Read stories about NZ trails, tracks and parks. find out what other families and riders are doing. Be inspired! Is this ride an option for you or your family?

Handlebar Grip Buying Guide
What is the best handlebar grip for the type of riding you do? There are many factors to consider in your decision. Use our Buying Guide to get the right handelbar Grip.
Want more from your riding?
Be supported to Ride as a Family, Progress Your Riding and/or receive Seasonal Inspiration. So you can SMILE when you ride.
All new members are automatically entered into our Seasonal Prize Draw.
SMILE when you ride
Support & Inspire other riders and families
Share your riding outings, adventures and experiences on our quick and easy question and answer forms. Join us in helping others ride bikes.
All entries are automatically entered into our Seasonal Prize Draw.