


How to Attach a Lock on Handlebar Grip
Changing your handlebar grip is a simple process. Have the right handlebar grip on your bike for the type of riding you do… so you can SMILE when you ride.
Supporting you and your family to SMILE when you ride.

Welcome. Handlebar grips attach onto the ends of your handlebars to provide comfort, control and protection. Grips can attach in 2 different ways
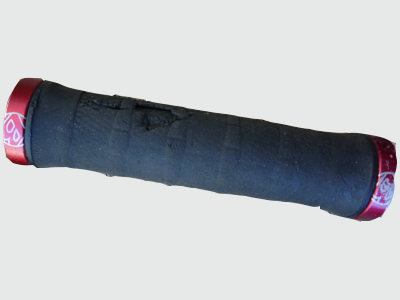
![]() Lock on – a clamping mechanism is screwed to your handlebars
Lock on – a clamping mechanism is screwed to your handlebars
![]() Slide on – as the name suggests by sliding the grip over the ends of your handlebars. Common with kids handlebar grips.
Slide on – as the name suggests by sliding the grip over the ends of your handlebars. Common with kids handlebar grips.
For more information see Features of a Handlebar Grip
Comfort on your bike can be influenced by your handlebar grips. Having the correct support & cushioning can improve your riding experience. Grips get worn down reducing their security, cushioning and compromising your safety and comfort. Check your grips regularly and replace when wearing is showing.
How to attach a ‘lock on’ handlebar grip.
You are simply going to replace the grips on your handlebars with new ones…
What will you receive and what tools do you need?
Grips are sold in pairs so you will have one for each side. Lock on grips come with a screw system at one end, usually the inner side to tighten them onto your handlebars.
What tools will you need? You will need an Allen Key, the size of the Allen Key will vary depending on the grip you need to attach but these screws are generally small so 3,4, or 5mm.

Allen Keys – available is part of a multitool

Allen Keys – as part of a Allen Key set
How does it attach?
![]() Remove your old grips. Remove the grips that are currently on your handlebars…
Remove your old grips. Remove the grips that are currently on your handlebars…
Lock on grips will need to be unscrewed and pulled off.
Slide on grips will need to be cut off or slid off using a lubricant – bike lube or dish wash detergent will help.
Spanner required to undo nut
![]() Attach the lock on grips. Slide your new grips all the way onto the handlebar ends. Pay attention to grips that have textured surfaces they may need to be positioned in a particular rotation meaning you will have right and left side specific grips.
Attach the lock on grips. Slide your new grips all the way onto the handlebar ends. Pay attention to grips that have textured surfaces they may need to be positioned in a particular rotation meaning you will have right and left side specific grips.
Rotate the grip until it is in the correct position for your hand. Aligning any support areas or grip surfaces so they match places on your hand/fingers. The example in the video – the small Race Face grips – have letters that need to be where the ends of your fingers grip the bars.
Find the small hex screws on the ends of the grip and tighten the screws with an Allen Key. This RaceFace Grip (in the video) has screws at both ends of the grip not all lock on grips are double locks like this.
![]() Testing you have installed correctly: Your grips shpuld not move or rotate once they have been secured.
Testing you have installed correctly: Your grips shpuld not move or rotate once they have been secured.
Things to watch out for
- Your grips should not move or rotate when they are secure so make sure they have been tightened well
- If your screws have any covers keep them on or in place as this keeps dirt and grit out of the screw head
- If your grips are too long, you may have to unscrew your brake/gear lever system and slide it along your handlebar to create the room needed to safely screw your grip on
We’re here to help. If installing your Lock on grip has raised some questions for you. Please call us on 021 025 15576 or 0800 44 33 77 or CONTACT us via email
Your bike riding success is different to others… use our stories and support, get the right solutions.

Handlebar Grips
View all goRide stories on Handlebar Grips in an easy to navigate page

Handlebar Grip Buying Guide
Learn about handlebar grips and what would be the right solution for the type of riding you do.

How to attach a lock on handlebar grip
Use our how to attach guide and video so you feel comfortable changing your lock on handlebar grips.
When do grips need replacing
A grip will wear out and for your comfort and safety it is important to replace them

How to grip your handlebars
How you grip your handlebars is important to your comfort on the bike. You might be surprised what you learn

Features of a Handlebar Grip
There are a wide range of handlebar grips to choose from. Learn about the features of a handlebar grip to understand what you need.

Ride More Places
Read stories about NZ trails, tracks and parks. Find our what other families and riders are doing. Be inspired! Is this ride an option for you or your family?
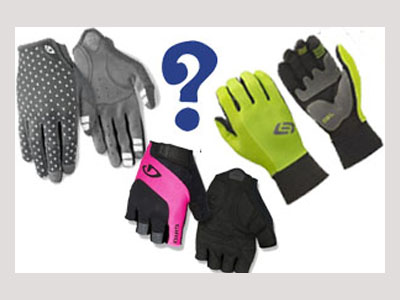
Bike Glove Buying Guide
What is the best bike glove for the type of riding you enjoy? There are many factors to consider in your decision. Use our Buying Guide to get the right bike glove solution.

Why are Bike Gloves Important
Learn why a pair of gloves may help your riding be more comfortable and safe.
Want more from your riding?
Be supported to Ride as a Family, or receive Seasonal Inspiration. So you can SMILE when you ride.
All new members are automatically entered into our Seasonal Prize Draw.
SMILE when you ride
Support & Inspire other riders and families
Share your riding outings, adventures and experiences on our quick and easy question and answer forms. Join us in helping others ride bikes.
All entries are automatically entered into our Seasonal Prize Draw.