

Understand more about the features of Bike Lights. Be safe by riding with bike lights that match your riding needs.
Supporting you to SMILE when you ride.

Bike Lights attach to different parts of the bike, a bag or your clothing
- a front light has a white beam that is attached to your handlebar or helmet so it shines forward in front of you
- a rear light has a red beam that can be attached to a bag, a seatpost, the back of your jacket, the back of your helmet so it shines behind you
- side lights have orange beams and are usually attached to your front wheel forks but can go on outside leg pockets or tabs and shine laterally out to the side of your bike & body
Bike lights come with a whole lot of different features. Do you understand what those features are? Do you understand what features you need to keep you safe and how you should use your lights to get the best out of them?
Let’s take a quick and simple look at the different features in a bike light so you can use the best bike lights.
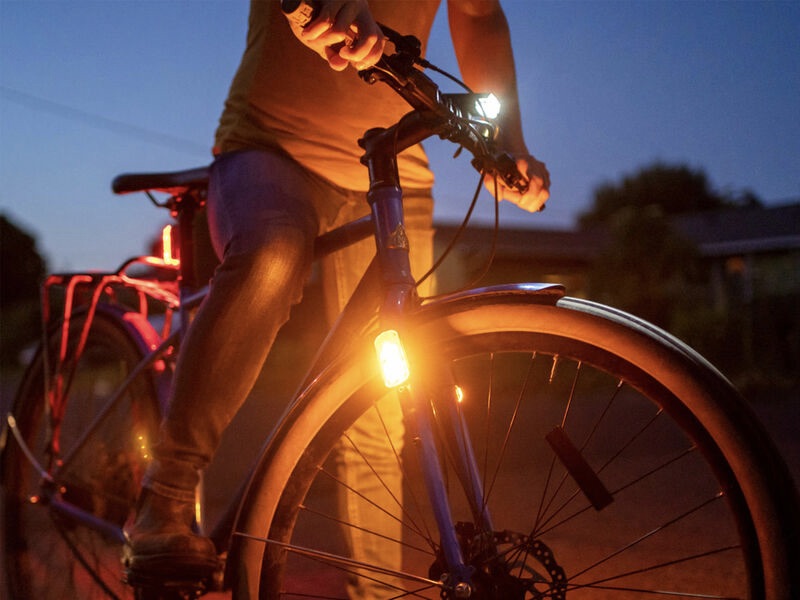
The Strength of a Bike Light…
The strength of the light is measured in lumens and basically determines how bright that light is. The higher the lumen strength the more you can see and the greater the distance a driver will be able to see you from (though a too strong a light can reduce visibility by blinding them).
Front Light – the strength of the light is important to be visible to any type of on-coming traffic and to help you to see where you are going – help avoid obstacles, hazards etc in your riding path.
Rear Light – important for visibility for any type of traffic behind you or when riding in a group off road so the rider behind you can judge how far in front you are.
The Mode of a Bike Light…
The mode of the light is how the light is being displayed e.g. steady versus flashing. There are different reasons why you would choose to use a different mode.
Steady mode: They help drivers judge how far away you are and how fast are you traveling because they are steady. Steady front lights are important when they are lighting your environment so you can see where you are going.
Flashing mode: Anything that is flashing or strobing will attract the eye, which is great in poor visibility or situations where you think drivers are not expecting to come across a bike or need help seeing the bike (child in traffic). The drawback of the flashing mode is that flashing makes it difficult for drivers to judge exactly where you are and how fast you are traveling.
Combining modes can be very effective to give other users the best information about you on your bike. Help them see you. Help them recognise how far away you are. You do this by vertically stacking your lights. Have 2 front lights one on steady one on flashing in 2 different locations – the handlebars and the helmet. Have 2 rear lights one on steady one on flashing in 2 different locations – the seatpost and one attached to your bag.
The Beam of a Bike Light…
What does a wide or narrow beam of light do? Why would you use it?
This is about where you need to see. If you just need to see what is in front of you then a narrow beam will provide intense light in the direction you are going. Don’t require that intensity of light but need to see a wider area then a wide beam will provide a more diverse light illuminating a wider area.
Batteries Used in Bike Lights…
Disposable versus rechargeable. Some lights run on disposable alkaline batteries but many can be purchased with built-in or detached rechargeable batteries.
The rechargeable batteries are generally Lithium Ion or Lithium Polymer – these are smaller, lighter and more powerful than disposable alkaline batteries making them perfect for bike lights. Lights with these batteries do cost more in the initial purchase but without the need to purchase additional batteries they become more cost effective over the life of the light. These batteries are designed to be recharged after use and regular charging will not deteriorate the battery.
Most rechargeable cycle lights charge via a USB port, and some lights even feature a built in USB connector – so you don’t need a cable to charge them. The lights can take a lengthy time to recharge so it is important to be aware of this as it does require some forward planning.
The battery life is very important with this type of light. If the battery is built in… you can’t replace the battery when you are out riding. You need to ensure that your lights can give you the power output you need for the length of your ride/s. Lights fitted with battery life indicators are very useful to give you some indication of how much power/time of light you have available. Having a good understanding of the modes of the light available and their power requirement can help you maximise the output of the light prior to recharging
Attaching the Bike Light
Bike lights need to be mounted to something that will make them visible to others. Other motorists, cyclists, pedestrians etc. Bike lights come with different mounting systems. They can be;
- Fixed – two piece. An O ring that is permanently attached to the bike – usually either the handlebars or seat post depending if it is a front or rear light. The light clips on and off the mount.
- Fixed – one piece. The light and mount are an all in one piece. This means the light will be permanently attached to the bike
- Flexible. Easy to use flexible rubber O rings that allow mounting in seconds without the need of tools.
The mounting system affects and determines where you can mount the bike light.