


goRide’s Quick and Easy Guide to Bike Tools. Let’s gain some knowledge about tyre levers. Learn what they are, why you would use it and how to use it.

What is a Tyre Lever Set
A small plastic tool design to help you get your tyre off of your wheel. There are several different styles on the market and you may need more than one depending on how you need to use it (see How do you use it? below). I use the black tyre lever with knuckle guard, in the photo below, at home. It has a great knuckle protection feature which saves your skin when you are forcing that little bit too hard and the whole thing slips, leaving you punching the wheel spokes. I carry the blue set on my bike, in my bike tool kit. The three levers are designed to slide together making them compact for carrying. A tyre lever is an essential part of even the most basic bike tool kit – if you get a puncture it’s impossible to fix without getting your tyre off and thats what tyre levers do.

Why you would use it.
There are 2 main uses for a Tyre Lever
Removing a tyre To remove your tyre from the wheel rim
Putting a tyre back on: To get the last little stubborn bit of your tyre back on the rim.
Examples of when you need to do this are
- when you have a flat tyre (puncture in your tube) to get access to the tube so you can replace it or patch it
- changing your tyre because the tread has worn out
- changing your tyre to improve grip e.g. in winter you may want a bigger tread on your tyre to deal with mud or wet tracks/roads.
How do you use it.
There are three ways to use a tyre lever depending on your tyre and how hard it is to get off/on. The first thing to do so you can get your tyre lever into position is to deflat your tube completely.
#1. Popping and sliding. You will need one tyre lever.
Now you need to get the curved end of the lever under the edge of your tyre then sit the lever on the wheel rim to get leverage to push it down and “pop” the tyre over the edge. Have a quick look at the curved end of this tool – it curves up and away from you. Below the curve it has a step where it gets thicker – this part should sit on your rim. Have a look at the photo of the blue set of tyre levers stacked together to help you understand what I’m talking about here (above).
Now depending on the fit of your tyre – how tight it is – you may or may not be able to run the lever around the edge of the wheel rim, “sliding” the tyre edge out as you go, removing that whole side of the tyre from the wheel. If the answer to that scenario was, no I can’t move the lever without it being pushed completely out or off the wheel rim, then you have need for more than one tyre lever as you have a tight fit to deal with.
#2. Fixing then sliding. You will need a set of tyre levers with a hook end.
OK, get that first tyre lever under the tyre, pushing it down to pop the edge over the rim. Now keep pushing all the way down until you can use the hook on the opposite end to securly “fix” the tyre lever to a spoke on your wheel. With that job done, pick up your next lever. Again we are working with the curved end which needs to be pushed under the tyre edge right next to your first lever. Get that lovely step sitting on the wheel rim now attempt to “slide” that lever along the rim pushing the tyre out and over as you go…. If your tyre is tight this will not be smooth or easy. When you can slide it no more fix it, then reach for your next lever. You may need to use all the levers in your set to get your tyre off the wheel rim.
#3. Push back on. You will need one tyre lever.
When putting your tyre back onto the wheel rim it can get tricky making the last little bit pop over the rim. This is when you can choose to use a tyre lever. Insert a tyre lever and push it up flicking the tyre over the rim. Opposite action to taking it off.
Remember next weeks story will take you through the process of changing your tyre – the bike lever is an essential tool for this job and these techniques are shown in the story.
That’s the basics of a tyre lever covered. I hope it helped you gain a little more understanding of the mechanics of your bike.

The different parts of a tyre lever.
The curve of the tyre lever placed under the edge of the tyre and pop the tyre of the rim of the wheel.
Your bike riding success is different to others… use our stories and support, get the right solutions.
Carrying Gear Buying Guide
Use the full range of gear carrying options to get the right solutions for you and your family.

Ride More Places

Carrying Gear Stories
See the full range of stories & support relating to carrying gear on your bike. Presented on an easy to navigate page.
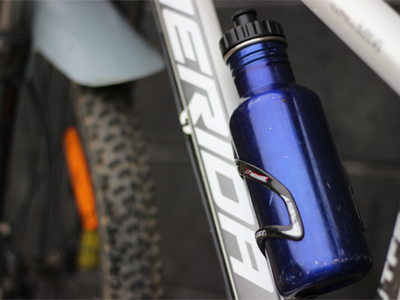
How Much Water Do You Need?
Hydration is a really important part of riding a bike. This story covers all you need to know about water.

Recreation/Trail Riding - Am I Safe?
When you go out for a ride what will keep you safe? Do you need to plan or prepare in a better way? Lets find out.

Types of Riding Stories
Want more from your riding?
Be supported to Ride as a Family, Progress Your Riding and/or receive Seasonal Inspiration. So you can SMILE when you ride.
All new members are automatically entered into our Seasonal Prize Draw.
SMILE when you ride
Support & Inspire other riders and families
Share your riding outings, adventures and experiences on our quick and easy question and answer forms. Join us in helping others ride bikes.
All entries are automatically entered into our Seasonal Prize Draw.