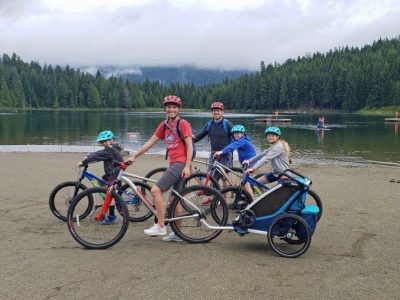
Getting to ride anywhere with your toddler or children in a bike seat is so much fun. Exploring your neighbourhood or local bike trails by bike is just great for everyones mood and energy. As your family grows the options do to.
Have a read of the information we have gathered from years of experience working with each type of attached or towed bike seat and begin the process of choosing what is best for your family.
Supporting you and your family to SMILE when you ride.
There are a huge amount of options when it comes to riding with your children from a very young age. This story gives you a quick overview of all the products that can be currently found in the NZ market. We have split them into two sections. Attached to the adult bike and Towed by the adult bike.
AttachedSolutions:
There are three places a kids bike seat can be attached to an adults bike…
Front Mount Seats – often called Minis
Mid Mount Seats – often have no harness
Rear Mount Seats – often called Maxis for 1-6yr olds or Juniors for 4-10yr olds
TowedSolutions:
There is quite a variation in towing solutions in terms of the age or ability of your child…
Bike to Bike Connectors – Kids Riding Their Own Bike – Tow Rope, Tow Bar, Tow Frame
Enclosed Bike Trailers – recreation, off road, multi sport – single or double seat
Trailing Half Bikes – standard or reclined seat
Attached Solutions:
Front Mount Seats 1-3yr Olds
This seat sits right behind the handlebars so the child is in between your arms. Kids love this as they can see where they are going. This seat provides the best interaction between you and your child as they are right in front of you and you can see what they are doing.
It’s also a good multi child option as it leaves the back of the bike for more children – if your riding is up to it!!
Best Bike Match = town/cargo bikes. Any type of step through bike frame that puts the adult rider in an upright body position. Will work with other types of medium to large frames. Read more about this in our Buying Guide, link below.
Max weight is 17kg, generally children 1 to 3yrs, child must be able to sit unsupported to be put in this seat, height up to 110cm. The limiting factor to beginning to ride witha child under 1yr of age is the helmet. The smallest helmet on the market has a 45cm head circumference.
The biggest issue is space… Do you think you will be able to reach your handlebars around this seat?
FRONT KIDS SEAT BUYING GUIDE – Read through all our advice and thoughts on front seats in our Buying Guide. Compare front seats and begin to understand if this is a good option for your family
FRONT SEATS – frequently asked questions. Read through the questions we get asked the most about front seats.
RIDING SAFELY WITH A FRONT SEAT – This story helps you to understand what safety elements you need to think about when riding with a child on your bike attached at the front.
Mid Mount Seats 2-6yr Olds
This mid mount system is attached directly to your bikes top tube or via a bar/adaptor that creates a top tube. It gives great interaction and good protection in between your arms. Most mid mount seats have no harness (exception WeeRide). These no harness systems are great for kids who have ridden balance bikes from a young age. Mid mount seats are also a good match to bike path/trail riding.
It’s also a good multi child option as it leaves the back of the bike for more children – if your riding is up to it!
Best Bike Match = all bikes. We are lucky here in NZ as we have two companies specialising in designing these types of seats. DoLittle where first on the scene and their mid mount seat suits a lot of bikes (there are some exceptions). Shotgun have chosen to focus on mountain bikes so are the best option for this type of bike.
Max weight is 25-30kg, generally children 2 to 5-6yrs, child must be fairly good with balance to begin riding with them.
The biggest issue is space… Do you think you will be able to reach your handlebars around this seat?
MID MOUNT SEAT BUYING GUIDE – Read through all our advice and thoughts on mid seats in our Buying Guide. Compare mid seats and begin to understand if this is a good option for your family.
MID MOUNT SEATS – frequently asked questions. Read through the questions we get asked the most about mid mounting seats.
RIDING SAFELY WITH A MID SEAT – This story helps you to understand what safety elements you need to think about when riding with a child on your bike attached at the mid.
Rear Mount Seats 1-6yr Olds, Junior Seat 4-10yr Olds
This type of seat fits above the rear wheel of your bike attached to the carrier or frame of your bike. A great commute riding option. Helmet shape is important so it doesn’t hit the back of the seat. Generally the more you pay the lighter the seat will be and the better the harness system will be.
It’s also a good multi child option as it leaves the front of the bike for more children – if your riding is up to it!
Best Bike Match = most bikes exception full suspension mountain bikes.
Rear Maxi Seats: Max weight is 22kg, generally children 1 to 6yrs so make sure your seat has adjustable shoulder and footrest heights so that as they grow the seat still works.
Junior Seats: Max weight is 35kg, generally children 4 to 10yrs, the harness is a simple lap belt
The biggest issue is weight to the rear of your bike… You will need to practice riding with the extra weight high at the rear of the bike.
REAR MOUNT SEAT BUYING GUIDE – Read through all our advice and thoughts on rear seats in our Buying Guide. Compare rear seats and begin to understand if this is a good option for your family.
REAR MOUNT SEATS – frequently asked questions. Read through the questions we get asked the most about rear mounting seats.
RIDING SAFELY WITH A REAR SEAT – This story helps you to understand what safety elements you need to think about when riding with a child on your bike attached at the rear.
Towed Solutions:
Bike to Bike Connectors – Kids riding their own bike 4yrs+
Connecting a lead bike and a trailing bike can be so worthwhile in a number of circumstances. Ideal for hill climbing, distances, keeping up with older siblings or in hard weather conditions e.g. wind or rain. You will need a good gear range and good fitness to able to deal with the resistance of the weight of the bike and child you are towing. This type of towing really opens up your family riding options in terms of the places/distances you can choose to go.
Tow Ropes – Incredibly simple to use and because of the good design the experience will be smooth (not jerky as the pull comes on) and enjoyable. A great match to mountain biking and multi day/tour style riding with the family.
Tow Bars – Great for short periods of assistance, good for encouraging or improving your child’s riding ability.
Tow Frames – Best in terms of stability, this low hub to hub connection is ideal for commute riding in traffic.
Best Bike Match = these bike to bike connections will work with most bikes, there are some exceptions so please see our individual ‘Will It Fit ‘advice for a specific product.
Max weights are again dependant on the product being looked at. The biggest limiting factor will be the ability of you the adult to pull weight along for sustained periods of riding, particularly if uphill. If using these towing options with an E-Bike please be aware of the danger of speed and keep to recommendations. Most children are around 4 – 5 years old before they can safely ride their own bike.
The biggest issue is your child understanding how they should ride when being towed… Leaning and swaying can be an issue (Tow Bar) and your child must stay behind you (Tow Rope)
TOWING KIDS WHO RIDE THEIR OWN BIKE BUYING GUIDE – Read through all our advice and thoughts on bike to bike connectors in our Buying Guide. Compare tow ropes, tow bars, tow frames and begin to understand if this is a good option for your family.
Bike Trailers 1-6yr Olds Single, 1-4yr Olds Double
A common towing option bike trailers offer great protection from the weather. Because they are big and close to the ground cars tend to go around them when riding in traffic. Use flags and bright colours to help the cars with this. Trailers can carry more than one child plus nappies, groceries etc and can function as more than one thing bike, stroller & jog options. They are also great for tour riding over multi days.
Interaction with a child or children in a trailer is not great. Consider storage and whether you need to transport the trailer in your car – will it fold down easily and not be too heavy to lift?
Best Bike Match = bike trailers will work with most bikes, there are some exceptions so please see our individual ‘Will It Fit ‘advice for a specific product. You will need low gears to get up even minor hills and good brakes.
Max weights are dependant on the size of the trailer single max weight is 36kg , double max weight is 45kg.
The biggest limiting factor will be the ability of you the adult to pull weight along for sustained periods of riding, particularly if uphill. If using these towing options with an E-Bike please be aware of the danger of speed and keep to recommendations.
BIKE TRAILER BUYING GUIDE – Read through all our advice and thoughts on bike trailers in our Buying Guide. Compare trailers and begin to understand if this is a good option for your family.
BIKE TRAILERS – frequently asked questions. Read through the questions we get asked the most about bike trailers.
RIDE SAFELY WITH A BIKE TRAILER – This story helps you to understand what safety elements you need to think about when towing a child behind your bike.
Trailing Half Bikes – Standard 4-9yrs, Reclined 2-9yrs
Both Trailing half bike options are not available in NZ at time of writing. We are working to solve this issue, please get in contact if you have questions about them, hopefully they will be an option in 2022.
Half bikes are best used when having your child ride independently is not a requirement. So they are a good match to commute riding or long distance touring (the reclined seat has amazing storage). This half bike system allows your child to pedal forward or coast – they don’t have control of the brakes or steering and can choose whether to assist or not.
Best Bike Match = work with most bikes, exceptions carbon seat posts. They attach at your seat post and are compatible with most adult bikes.
Max weight 36kg, a standard half bike suits 4-9year olds and a reclined can be used from 2yrs of age due to its harnessed seat.
The biggest limiting factor with towing is usually weight but with your child being able to assist with pedalling you will find you can manage greater distances.
RECLINED HALF BIKE – these bikes are currently not available in NZ, we are working on solving this issue… please contact us if you have questions about them.
STANDARD HALF BIKE – these bikes are currently not available in NZ, we are working on solving this issue… please contact us if you have questions about them.
Prefer to Understand your options based on the age of your child…then please use our guides
Baby/ 1 year old
2-6 years old
4 plus on own bike
Your bike riding success is different to others… use our stories and support, get the right solutions.
Stories in Types of Riding support you to learn about riding a bike in different environments. So you can successfully choose to ride more place, more often.
Support and inspire other riders and families to ride
Share your riding outings, adventures and experiences on our quick and easy question and answer forms. Join us in helping others ride bikes. All entries receive a free shipping coupon and go into our seasonal prize draw.
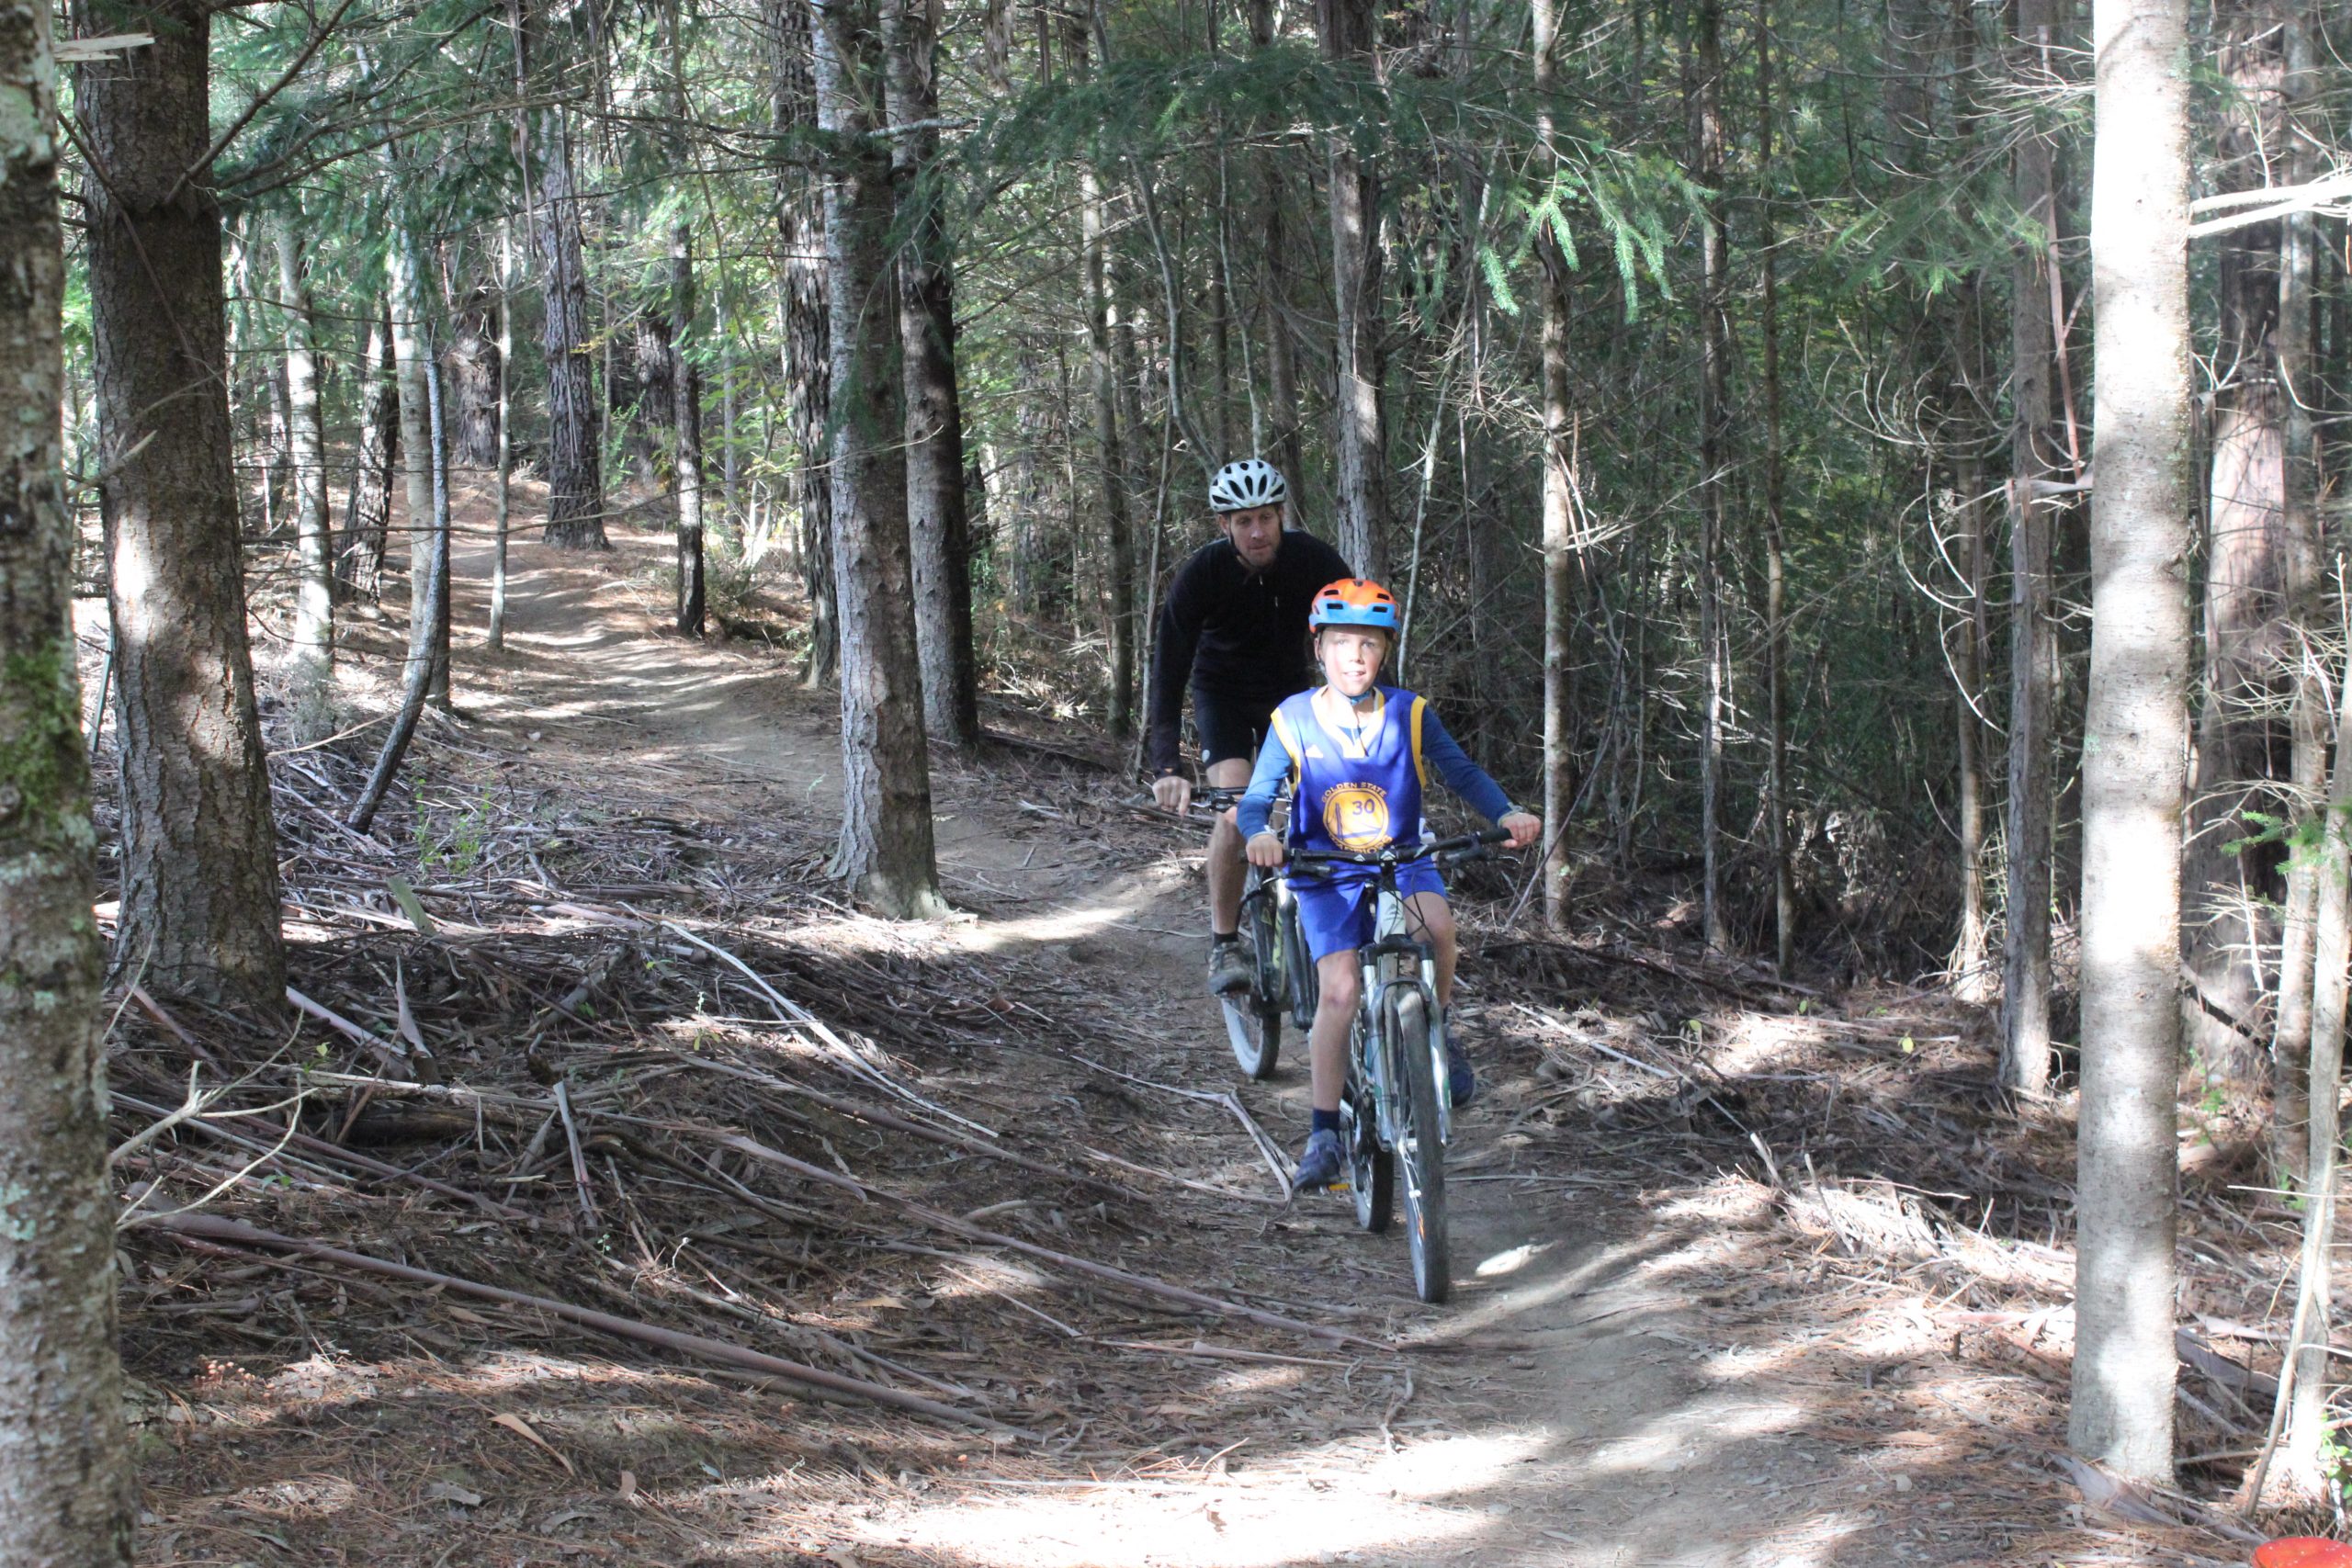
When we make the effort and take the time to go for a ride with kids, we want it to be an enjoyable experience. To have a ‘great day’ on the bike with kids there are simple things to think about, plan and do.
In this story we are riding in the – Hanmer Forest Mountain Bike Park (Whakarewa Forest) in Hanmer Springs on some of the beginner to intermediate tracks with Sam 11 yrs old and Hollie 9yrs old and Mum and Dad.
Supporting you and your family to SMILE when you ride.
The main entry into the Hamner Forest Park is located 1km from the town of Hamner Springs on Jollies Pass Road.
There is parking options at the forest entrance though with its close location to town and the village many choose to ride along Jollies Pass road to the Forest Park. There are a couple of small tracks the run along the road side so the 1 km journey to the Park is a combination of off road and on road.
The ride – is it doable for you?
This park has something for everyone. It is a matter of working out what will work best for your family.
Biking Distance? The length of this ride is entirely at your discretion you have a few kilometers of, easy, intermediate, advanced and expert grade single track trails to choose from. With a larger proportion of the tracks being easy or intermediate it makes the Hamner Forest Park a great playground for families with kids of all ages. If they can ride a bike there is something here for them.
The Park is located on both sides of Jollies pass Road. If heading out of town the tracks on the right are relatively flat and where you will find the easy graded trails and the tracks on the left other than the ones close to the entrance are primarily intermediate and advanced trails.
Biking Surface/Biking Skills required/Level of biking fitness: The surface, the level of skills required as well as your fitness requirement will depend on the level of difficulty of that particular trail. Match the trail to your requirements. Where you ride is totally dependant on your families or your skill level. Choose your ride by understanding and being able interrupt the signs/terminology on the maps. See online map here. The Hamner Forest Park is coded (yellow tracks = beginner/easy, blue tracks = intermediate, red tracks = advanced, black tracks= expert)… is it doable? Remember the weather on the day will effect your ride.
From the forest entrance, on the right there is the 6.5km Easy Rider loop best ridden anticlockwise. This is a relatively flat ride,with some small pitches, trees and tree roots to negotiate. The ‘Easy Rider’ is a perfect introduction to off road riding. You can vary the distance if 6.5km is too long. Ride a certain distance (maybe to the pump track) turn around and ride back or create a shorter loop with Alligator Alley. If they are have not mountain biked before they may not be able to negotiate everything on the track.. let them know it is OK to walk a section that is all part of the fun of mountain biking
If they enjoyed the easy rider and were comfortable with the skills needed to do the trail you could try Camp and Base Camp (this is a new track and currently not shown on the Mountain Bike Map at time of writing) located on the left and both graded easy.
MODERATE SUGGESTED ROUTE
To enter onto any of the other tracks in the park you will need some mountain biking skills. Just be aware that the tracks will be narrower, have more challenging undulations, climbing sections and tighter corners so your kids should be riding a bike with gears and good brakes . The biking surface in the park is varied but mainly compact dirt, pine needle sections, tree roots and rocks to contend with..
Suggested loops
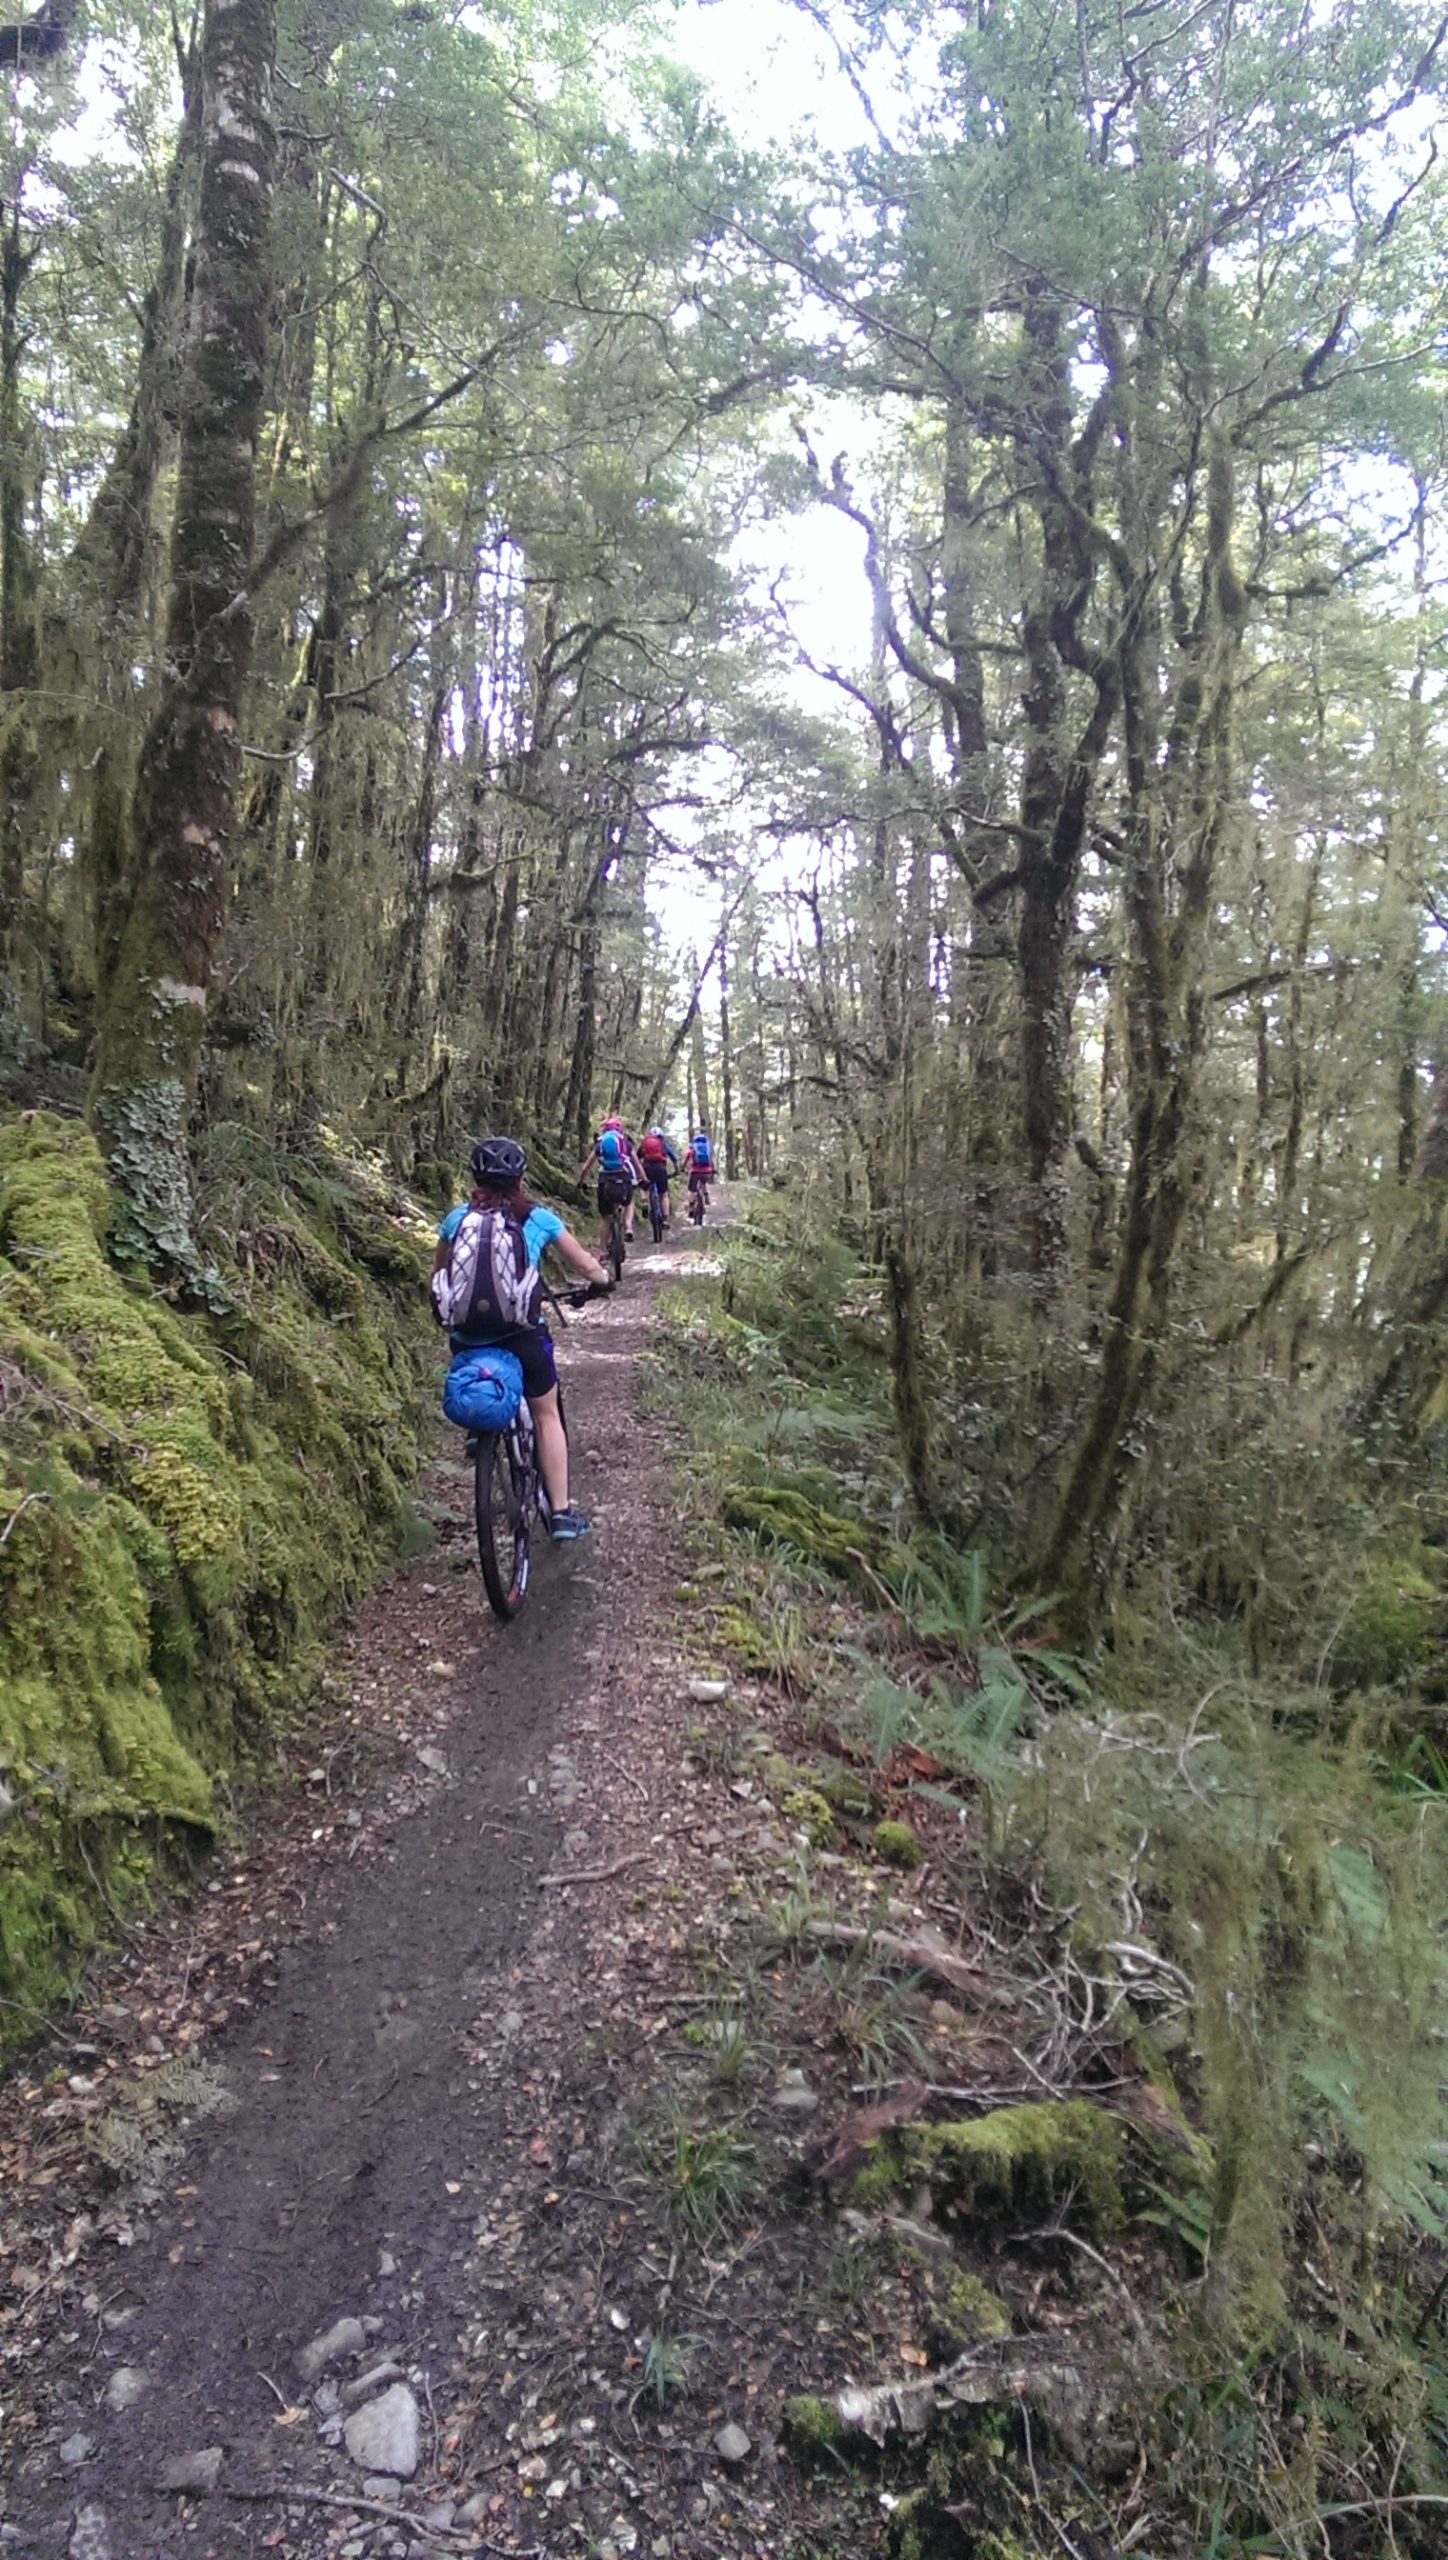
1.Dog Stream(1.65km) / Mach 1(1.85km) and finish with Base Camp (1.6km). To make it a little longer at the top of Dog Stream add in The Fir Trail circuit (860m). We found this to be the easy of the 2 intermediate loops. This ride is not too much of a step up from the easy graded rides. Mach 1 does offer more undulation, tighter corners and tree roots to negotiate. Hollie (9 year old girl) enjoyed following me down as she grew in confidence riding over tree roots and around some tight corners.
2. Swoop (2km)/Swamp (1.9km)via Western link ( 1.2km). There are options at the top to bike up Conical Hill or head out along Flax Gully (1.45km) to Clarence Valley road. This was a steeper track for both uphill and downhill riding and required more technical skills and fitness than the previous intermediate loop with steeper inclines and declines and tighter corners with tree roots and rocks to negotiate. This was Sam’s favourite especially the downhill of Swamp. Hollie was slightly out of her comfort zone, but happily walked on steep uphill section and a couple of the downhill section but she was proud of her acheivement. It was great to expose to what is required for the next level of riding
Both tracks can be ridden in both directions. This offers a different challenge for everyone. However you do need to be aware of bikers that may be traveling in the other direction to you.
Entrance and Map
Sign post with track names and grades
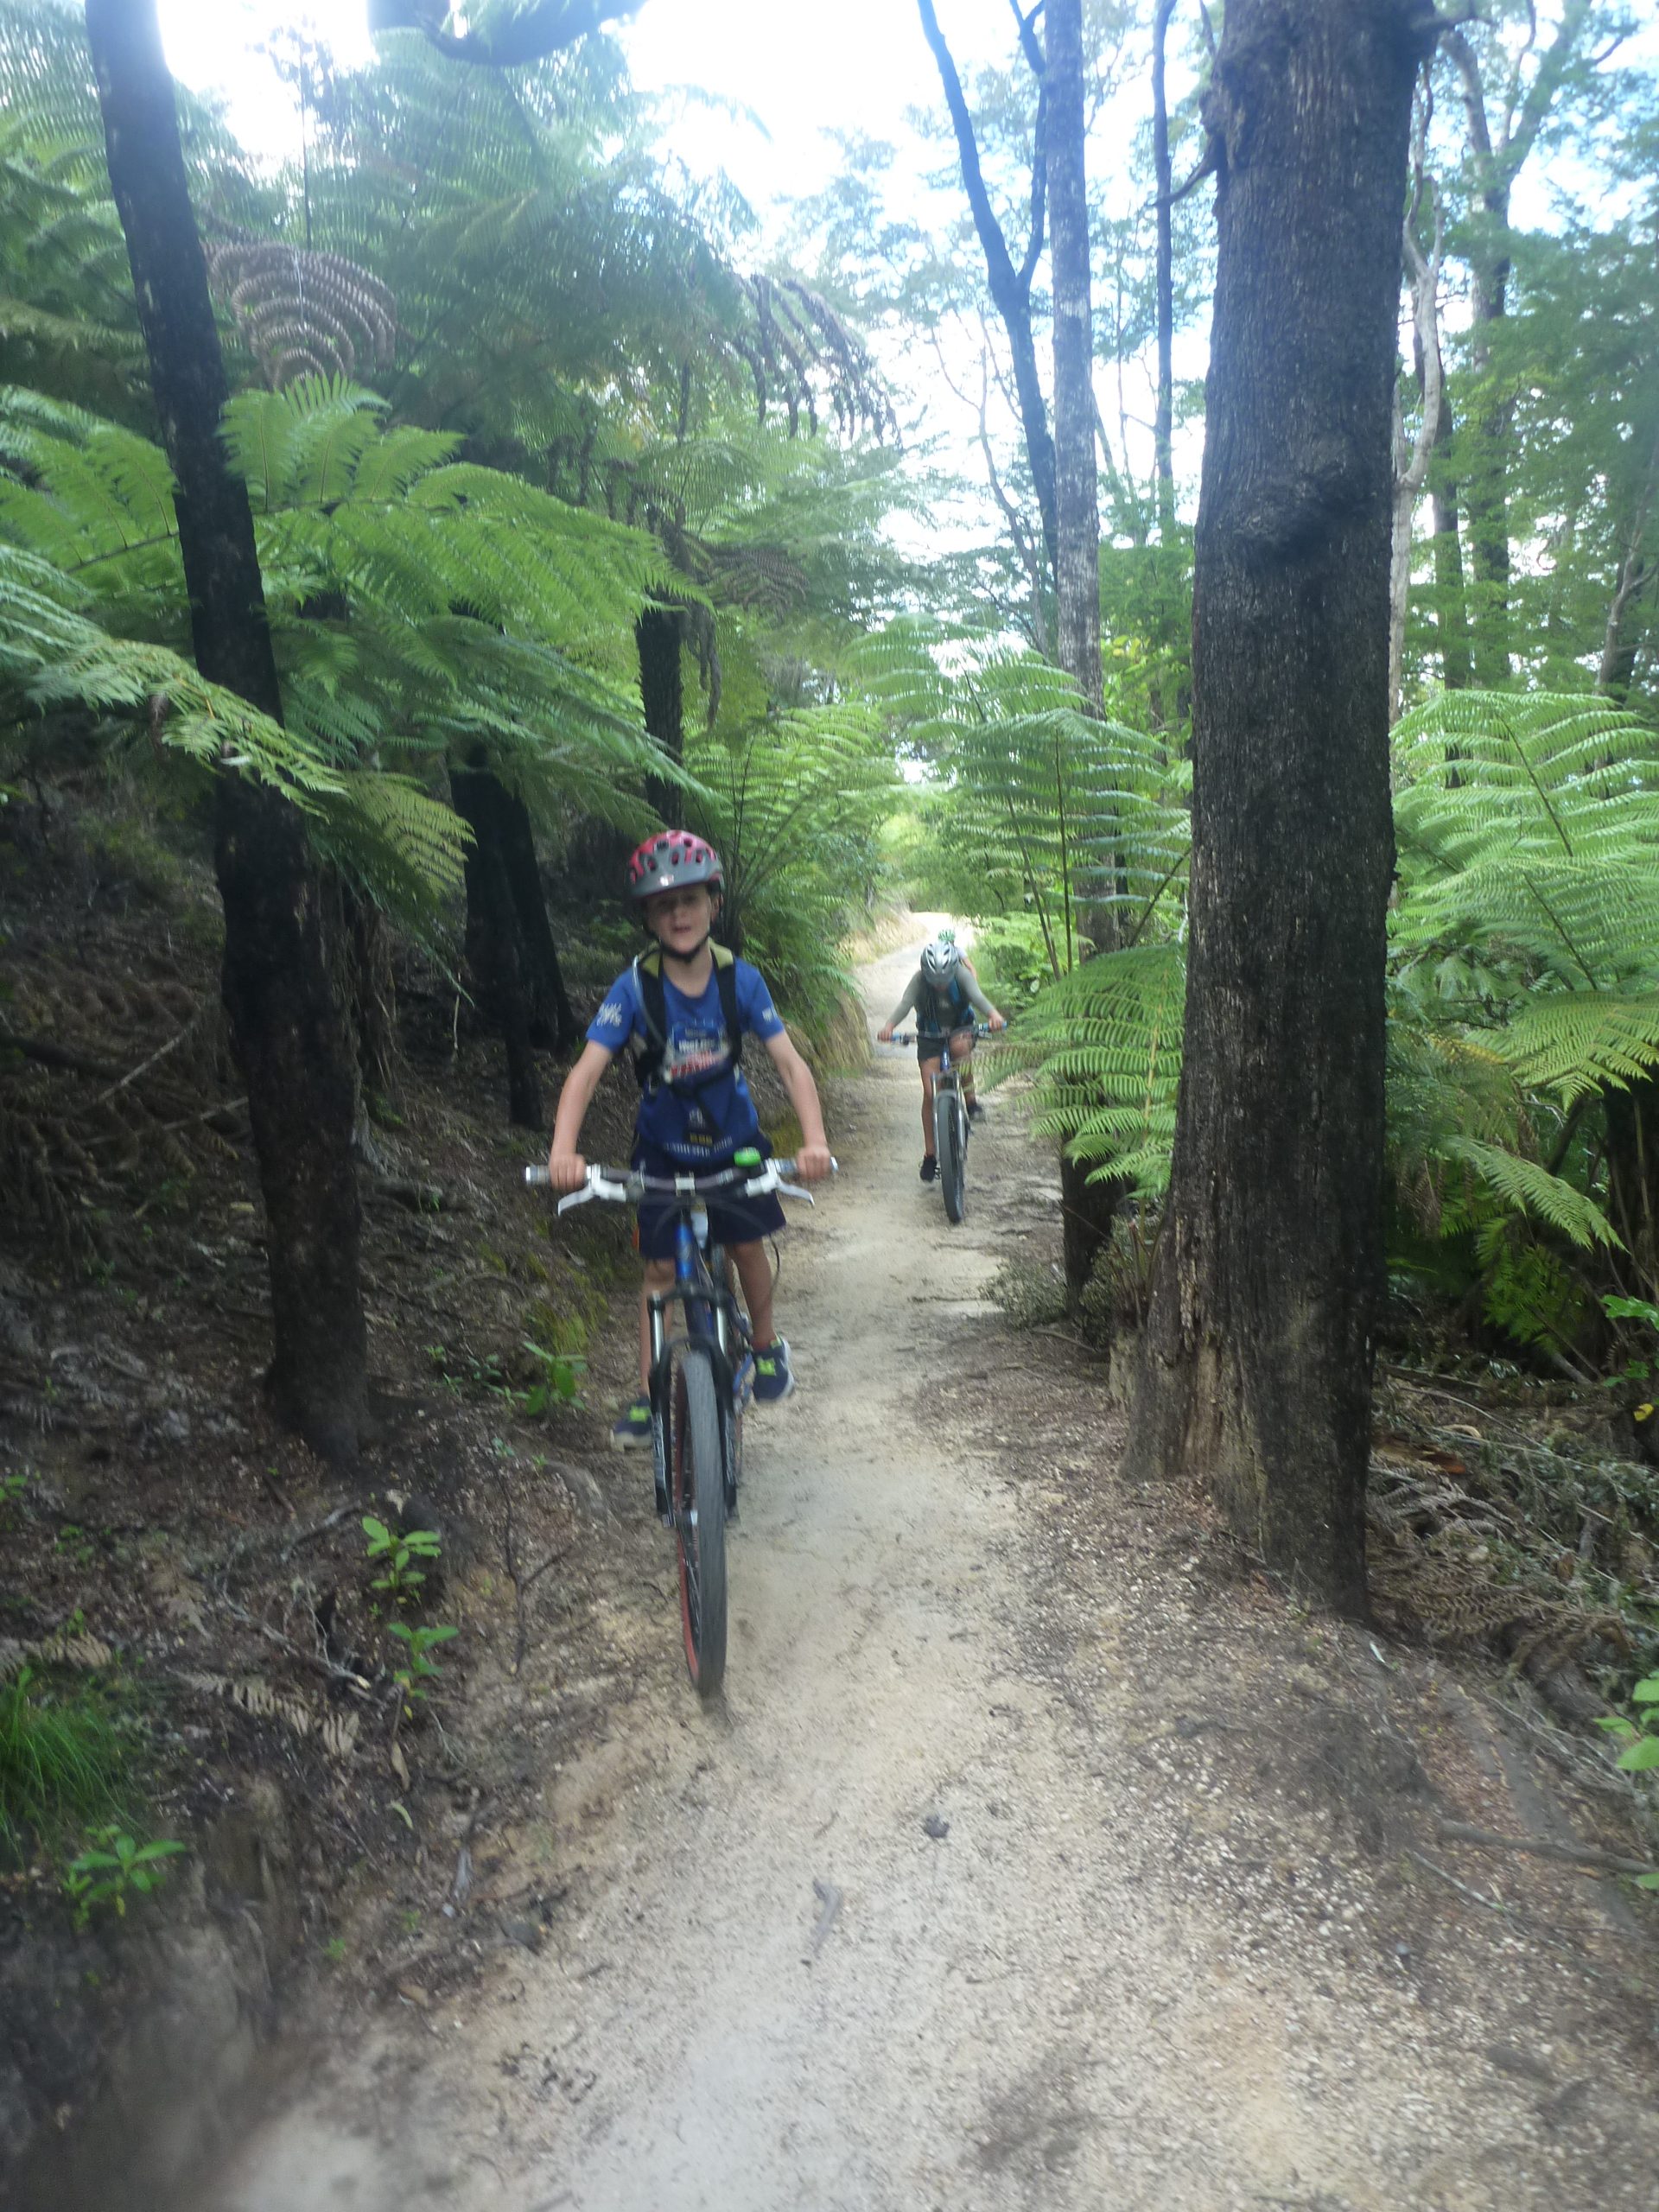
Hollie developing her Mountain Biking Skills
Kids enjoying riding trails to match their level
Be safe and comfortable when riding the Hamner Forest Mountain Bike Park.
How far you are venturing away from your base will determine the amount of gear you need to carry. It is always good to be prepared for any situation. Whether that be an injury,,energy and water requirements. The option of layers to ensure everyone is riding at a comfortable temperature.
Some things you could plan to discover at Hamner Forest Park – Biking with kids
Pump Track at picnic area located 1.5 – 2 km from the start of Easy Rider if riding in an anti-clockwise direction. Pump tracks with changes in terrain offers a good introduction to balance and bike skills . Located at the pump track is a skills board showing you how to get the best out of a pump track and you could learn more about building your skills on these great safe tracks in our story – The Ups of Pump Tracks. The kids rode over and off things that initially looked scary to them – what a great confidence boost. These types of bike skill obstacles create great learning environments – testing balance and decision making skills. The whole idea is to play around and get used to the feel of your bike and body moving together. Also to try things several times and watch what other people do.
Let the kids read the map. Let them find the beginner tracks and work out what signs and names they should look for along the way. The signs in this mountain bike park are really well done so are perfect for those new to map reading and navigating through a forest. Forests can be very disorientating – every tree looks the same and the tracks twist and turn on themselves!
Relax under the shaded picnic table next to the skills area. Munch on some well earned food and watch the kids go around the pump track one more time…
There is no better way than to end some time exercising than enjoying the hot pools, either on the day or maybe if you are enjoying the area on another day. It works as a great bribe as well. As we passed many other families during our riding can report I wasn’t the only Mum handing out that bribe.
Your bike riding success is different to others… use our stories and support, get the right solutions.
Read stories about NZ trails, tracks & parks. Find out what other families & riders are doing. Be inspired! Is this ride an option for you or your family?
A collection of stories that will help you learn about bike gear. goRide supporting you to get the right bike gear solution for the type of riding you do or want to do.
Stories in Types of Riding support you to learn about riding a bike in different environments. So you can successfully choose to ride more place, more often.
Support and inspire other riders and families to ride
Share your riding outings, adventures and experiences on our quick and easy question and answer forms. Join us in helping others ride bikes. All entries receive a free shipping coupon and go into our seasonal prize draw.
When we make the effort and take the time to go for a ride with kids, we want it to be an enjoyable experience. To have a ‘great day’ on the bike with kids there are simple things to think about, plan and do. In this story I am going to introduce you to riding with kids on the Homestead Run, Hanmer Springs, South island, NZ,
Supporting you and your family to SMILE when you ride.
The start and finish is located approximately 12km from Hamner Springs. You need to drive via Jacks Pass and Tophouse Road to the St James Homestead where off road parking is available. This road is primarily a gravel backcountry road, and is suitable for most cars. The St James Homestead is the finish of the St James Cycle Trail.
The ride – is it doable for you?
Biking Distance? The length of The Homestead Run is 15km and is graded easy by St James Cycle Trail. The Homestead Run is a cycle loop (starting and finishing at the St James Homestead) and is a combination of single track and 4WD tracks.
Section One: Involves a 7km ride on single trail up the beautiful Peters Valley to Peters Pass. This is a very gradual sustained climb up the valley. The trail is not technical so the riders need to be capable of a gentle gradual sustained climb for 7km. The views and country side are rewarding as you ride up to the pass…so at least for the adults it doesn’t feel like 7km.
Section Two: Involves a 4.2 km ride on 4WD track and some single track towards Tophouse Road. At the end of the single track up Peters Valley you come to a T intersection. Turning left will take you further into the the St James Cycle Trail heading towards Scotties Hut but The Homestead Run Loop has you turning right and riding towards the adjacent valley – Top House Road and the Clarence River (note the turning right for The Homestead Run is not signposted). Having reached the high point of Peters Pass this section is mainly downhill on compacted gravel and rocky road. After initially biking along the 4WD track you come to a section of single trail which is marked with St James Cycle Trail poles and runs adjacent to Tophouse Road.
Section Three: Involves the final 3km ride along Tophouse Road. This is a back country 4WD road that connects St Arnaud (Lake Rotoiti) through the Rainbow Station to Hanmer Springs. You can therefore encounter 4WD vehicles and dust. This back country road through the Rainbow is well used by bikers so the vehicles are warned and use to encountering bikers.
Biking Surface? The terrain is some gravel and rock but is generally well compacted.
Biking Skills required? This is NOT a technical ride. Some of the skills involved are riding uphill, downhill, cornering. Generally there are not too many obstacles and there is plenty of space to avoid them.
Level of biking fitness? This will either be a 2 hour ride round trip there is a gradual uphill as you head up the valley. My 11 year old boy and 9 year old girl were very comfortable with the technical and fitness demands of the trail. . If the weather allows there are places to stop, rest, enjoy and absorb the magnitude of the back country. Taking time to rest and re-energise will help the kids manage – 2 hours on the bike.
Can you ride with Kids Attached? This is a ride that you can enjoy with kids attached.
Kids riding their own bike. The Towhee Tow Rope could be the asset you need to get some younger kids riding on their own bike through this ride… at least stashed in your bag with the ability to pull it out if needed.
Kids Attached – The Mid mount – Shotgun Mountain Bike Seat is a good option for riding with younger kids attached and a rear bike seat as well as a bike trailer are all options on this trail for those who are experienced riders.
The start of the trail
On the trail
Still headig up thje valley
Safety
It doesn’t matter what ride you are doing or where you are going, you will always want to be safe. Check out the goRide guide How to have a “great day’ on the bike for general information on how to make sure you are safe on the bike.
If you have worked through the points above then you will be more likely to enjoy and have fun on your ride. There is so much fun to be had when out exploring on a bike
Some things you could plan to enjoy on The Homestead Run with Kids
At the St James Homestead there are some historic farm buildings dating back to the 1880s giving a glimpse into the past glories of this high country farming station.
Take time to absorb the magnitude of this high country. Make a half a day excursion and enjoy some food in a great spot- around the top of Peters Pass makes for a good rewarding stop … and the kids know it is mainly downhill from here.
This is a taster of the type of country that you would be exposed to and get to enjoy on the St James Cycle Trail. Maybe it might inspire you… for future rides.
Nearing the top of the valley
Top of the valley.
4WD track down the valley back to the start.
Your bike riding success is different to others… use our stories and support, get the right solutions.
Read stories about NZ trails, tracks & parks. Find out what other families & riders are doing. Be inspired! Is this ride an option for you or your family?
A collection of stories that will help you learn about bike gear. goRide supporting you to get the right bike gear solution for the type of riding you do or want to do.
Stories in Types of Riding support you to learn about riding a bike in different environments. So you can successfully choose to ride more place, more often.
Support and inspire other riders and families to ride
Share your riding outings, adventures and experiences on our quick and easy question and answer forms. Join us in helping others ride bikes. All entries receive a free shipping coupon and go into our seasonal prize draw.
When we make the effort and take the time to go on a biking adventure, we want it to be an enjoyable experience. To help plan your adventure read about goRide’s experience riding the 85km Old Ghost Road, November 2017.
In terms of jaw dropping, awe inspiring multi-use trails in New Zealand. This track is one of, if not, THE best. Run by the Mokihiuni Lyell Backcountry Trust since 2008, it offers you 85km of singletrack riding. Visit the website at www.oldghostroad.org.nz to book huts (essential) and see up to date trail information. Also visit their facebook page “The Old Ghost Road“.
Where is it ?
Because of the slow steady 1200m elevation gain from the Lyell end, it is recommended, for bikers, that the track is tackled from Lyell. Lyell is found on State Highway 6 in the Upper Buller Gorge. It is 35km south of Murchison – the nearest town.
Several transport partners offer a shuttle relocation from Seddonville/Rough & Tumble Lodge, at the end of the trail, back to Lyell. Seddonville is 4km from the end of the Old Ghost Road track and Westport is another 50km to the south. From Westport it is another 62km to the Lyell Reserve where you started.
The Rough & Tumble Bush Lodge is right where the track ends and offers really well thought out accommodation, restaurant, cafe & view over the Mokihinui River… a nice treat at the end of an epic ride.
If completing the whole track is not an option because of the geographical locations of the start and finish consider starting and finishing at the Lyell Reserve end. It still makes for a great trip. From the Lyell end a great day trip can be had up to the Lyell Saddle Hut (12km one way, 24km return). Or if time and fitness permit an in & out adventure to Ghost Lake Hut (30km one way, 60km return).
The ride and is it doable for you?
The Old Ghost Road is 85km. It is suggested that you either complete this over a 2 or 3 day journey.
We have chosen to do it over a 3 day journey which includes 2 days on the trail, one day of travel. With multiple hut options along the track this could easily be ridden over 3 days. Remember you need to carry your own food, so the longer it takes you the more food you will need. Check out the facilities at the huts so you know what you need to carry.
DAY ONE – Travel, then Lyall Reserve to Ghost Lake Hut = 30 km– is it doable?
Half of the first day was spent traveling to the Lyall Reserve. From here the 30km journey is a steady climb gaining 1200m in elevation to the breathtaking top tracks that take you along very exposed singletrack with simply stunning views around every corner to Ghost Lake Hut perched high on the ridge edge.
Accommodation – Ghost Lake Hut
Several of the huts along the trail are category 1 meaning… cooking equipment, plates & utensils are supplied. This is great news in terms of not having to carry too much gear. The category 1 huts are… Lyell Saddle Hut, Ghost Lake Hut, Stern Valley Hut and Specimen Point Hut – is it doable, can you carry what you need to take?
DAY TWO – Ghost Lake Hut to Rough & Tumble Lodge 55km.
This lodge is right at the end of the track – Seddonville is a further 4km (Hotel & campground options)
The second day of riding is incredibly varied and utterly unique. The early morning get away is down some very exposed high in the sky switchbacks – not for unskilled riders – most of our group chose to walk these corners. After this wake up call, there are over 300 steps to carry your bike down. The aptly named Skyline Steps.
Into the Graveyard for a solid climb on tired legs. Awesome flowing downhill single track that eventually meets the river.
DAY THREE – Seddonville to home, Travel Day
Unfortunately the end of this track is in a very remote location making your third day a travel day. We were picked up and returned to our vehicles at Lyell (2hrs). Swapping bikes & gear at Lyell Historic Reserve/Carpark (1hr), Lyell to Nelson via van (2hrs) including lunch stop.
What skills will you need to do this ride? The Old Ghost Road is definitely a mountain bike track – it’s rated grade 4, with two grade 4-5 sections. There are several long grinding climbs, amazingly narrow ridgeline tracks, lots of steps to contend with and technical descents to deal with. A few sections require you to dismount and push your bike between gates otherwise it’s up to your skill level but do expect to be carrying and pushing your bike through sections. This is a multi use, two way track so expect to come across trampers – Is it doable?
What level of fitness will you need to do this ride? I rode The Old Ghost Road with a group of women with really varied mountain biking experience which showed me that maybe life is too short to say no that’s too hard for me. Fitness & food are key components in being able to enjoy your experience. Lack of both means tiredness and this type of track is unforgiving of tired riders – Is it doable?
How could the weather effect the success of your journey? The weather on this trail can be unpredictable so you need to prepare for all conditions. You are going through an alpine area that has been known to experience snow in summer. The West Coast is known as a high rain fall area of NZ. Two sources recommended by the Mokihiuni-Lyell BackCountry Trust are James McGregor’s MetVUW (the South Island wind and precipitation charts are particularly useful) and the Metservice’s mountains and rural forecasts. Because of all this weather we recommend a front mud guard – Is it doable?
What to consider to feel comfortable and safe when riding the The Old Ghost Road
Our comfort and safety tips for the Old Ghost Road
The Old Ghost Road is a back country track so you need to be prepared for all types of weather conditions. You are likely to encounter wet and cold conditions at any time of the year.
You are going to be riding on undulating terrain with many obstacles, so mountain bikes are ideal. Our group all had full suspension mountain bikes
You will be on the bike for a number of hours each day, for consecutive days. The surface is bumpy, being comfortable on the bike is a MUST. Make sure you are comfortable on your bike seat, at your handlebars and on the pedals.
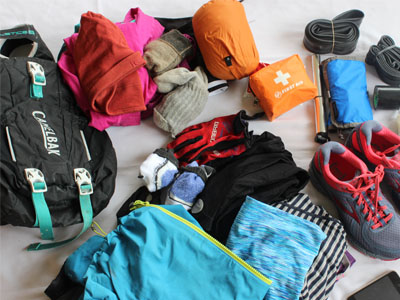
My Gear Set Up
Thule Carrier with rear dry bag #1 and tie downs – clothes and food
Backpack (Camelbak low rider) – warm top, snacks
Drink bottle cage – drink bottle carrying water
Seat tool bag – carrying tools/tube and second spare tube taped to the frame
Dry bag #2 – tie downs used to attach to handlebars – sleeping bag, jacket.
Enjoy the experience and have fun
Riding the Old Ghost Road and experiencing its history and diversity is so memorable. The highlight would be the scenery. At times it seems like every corner gives you another view better than the last. Even when the last view left you speechless. This is truely a track to stop often and enjoy, don’t get caught up in getting to your hut.
If you choose the challenge of The Old Ghost Road you will not be disappointed this track is full of SMILE moments. Promise us you will make it a truly memorable experience by being as prepared as you can be!
Your bike riding success is different to others… use our stories and support, get the right solutions.
Read stories about NZ trails, tracks & parks. Find out what other families & riders are doing. Be inspired! Is this ride an option for you or your family?
A collection of stories that will help you learn about bike gear. goRide supporting you to get the right bike gear solution for the type of riding you do or want to do.
Stories in Types of Riding support you to learn about riding a bike in different environments. So you can successfully choose to ride more place, more often.
Support and inspire other riders and families to ride
Share your riding outings, adventures and experiences on our quick and easy question and answer forms. Join us in helping others ride bikes. All entries receive a free shipping coupon and go into our seasonal prize draw.
When we make the effort and take the time to go for a ride with kids, we want it to be an enjoyable experience. To have a ‘great day’ on the bike with kids there are simple things to think about, plan and do.
In this story we are riding in the – Kaiteriteri Mountain Bike Park (Tasman) on some of the beginner to intermediate tracks with Rhea 11yrs old – mountain bikes occasionally, Isaac 8yrs old – mountain bikes occasionally.
Supporting you and your family to SMILE when you ride.
Located 1km from the Kaiteriteri main beach on Martin Farm Road. Alternative entry/exit at Bethany Park Holiday Camp or on the main road into Kaiteri following The Great Taste Trail.
Parking can be difficult right at the park entrance, 100m further up the road is entry to a trailer park which gives you direct access to the beginning of the tracks. This trailer park can be extremely busy in summer and not open in winter. There is parking on the Kaiteriteri water front – again in summer this is very busy with holiday makers and tourists.
The Kaiteriteri Mountain Bike Park is run by an incorporated society of volunteers and is also part of The Great Taste Trail. It does not require a permit to ride in but donations for track maintenance and development are appreciated. You can either buy a Park Tag for $20 or put a donation into the box at the park entrance.
If you need to hire bikes see Trail Journeys on the Kaiteriteri waterfront….
The ride – is it doable for you?
This park has something for everyone. It is a matter of working out what will work best for your family. For first time riders the layout of the bike park can be confusing so find a map and study it before you go. There is a map board at the main entrance but it’s always a good idea to carry a map the first few times you ride in a new environment. Paper maps are available at the camping ground offices. Forests can be very confusing to ride through and if there are lots of junctions you will soon get lost. Kaiteriteri has great signs and small map boards can be found throughout the park.
The length of this ride is entirely at your discretion you have approximately 30km of grade 2, easy, to grade 5, advanced, single track to choose from but if your kids don’t mountain bike as a sport they will be restricted to the easy to moderate tracks. Where you ride is totally dependant on your families or your skill level as long as you understand the signs/terminology (green tracks = beginner/easy, blue tracks = intermediate, black = advanced, red = jump track)!
Biking Surface/Biking Skills required/Level of biking fitness: Easy Rider is a family friendly beginner track and perfect for first time riding. To enter onto any of the other tracks in the park basic mountain biking skills will be needed but again the easiest tracks are well designed for beginners. Just be aware that the tracks will be narrower, have more challenging undulations, climbing sections and tighter corners so ideally your kids should be riding a bike with gears. The biking surface in mountain bike parks is varied but mainly compact dirt with a few gravel or pine needle sections and some tree roots to contend with.
Can you ride with Kids Attached? This is a ride that you can enjoy with kids being towed or attached to your bike.
Some additional support may help get the kids riding in Codgers Mountain Bike Park.
For independent riders : The Tow Whee Tow Rope may help assist getting them up a hill, or keeping up with older siblings.
Attached to your bike: The Shotgun offers you the ability to enjoy the mountain biking park with your younger kids. You will need to ride to your ability making sure you are keeping them safe.
Some Trails that our group enjoyed.
For younger and/or beginner riders:
From the main entrance, Easy Rider gives you access to the park and as the name suggests ‘Easy Rider’ is wide, smooth and gently undulating – a perfect introduction to off road riding. Easy Rider takes you 3km (6km return) to the eastern edge of the park with the last 500m being a downhill switchback (tight cornering) section until it stops at the road. Your only option here is to continue along The Great Taste Trail cycle track back towards Riwaka (approximately 5km) or to turn around and go back the way you came. So before taking on the down and up assess your kids energy levels!!
Easy Rider is one of the only two way tracks in the park so expect riders coming towards you and use your bike bell on blind corners.
For confident beginners to intermediate riders:
Start off on Easy Rider but at the first junction ride straight ahead following the sign that says To Mtn Bike Tracks. You’re looking for Cruise Control which will take you to the Monster Hub. At the hub you will find water and a great view down onto the beach. If your kids are young or not used to long distances on a bike this may be enough for your family – so return along Swamp Monster.
If they are enjoying themselves and have more energy continue onto Glade Runner. This is Rhea’s (11yrs old) favourite track through a beautiful glade forest. Return via Puff (yes this is a climbing track, see photo) to Monster Hub then along the flowing, fun Swamp Monster to the carpark. Where you will hopefully have some smiling excited kids, talking about what fun that ride was… 20 to 40 mins depending on how often you stop and how fast you are back up the hill.
Section of Easy Rider in beautiful native forest
There is a skill park and pump track at the entrance to the park
Monster Hub has a seat, tap for water and view down into Kaiteriteri
Switchback climbing track called Puff
Be safe and comfortable when riding in Codgers Mountain Bike Park.
How far you are venturing away from your base will determine the amount of gear you need to carry. As the riding network is quite extensive it is good to be prepared so you can manage any situation. Whether that be an injury, energy or water requirements. Also the option of layers to ensure everyone is riding at a comfortable temperature.
Bike Skills & Pump Track at main park entrance. The kids, particularly Isaac, really enjoy the fun and challenge of riding on a pump track. The Bike Skill area is a great way to warm up before heading off into the park. Both the kids rode over and off things that initially looked scary to them – what a great confidence boost. These types of bike skill obstacles create great learning environments – testing balance and decision making skills. The whole idea is to play around and get used to the feel of your bike and body moving together. Also to try things several times and watch what other people do.
Let the kids lead the way. Let them find the tracks and work out what signs and names they should look for along the way. The signs in this mountain bike park are well done so are perfect for those new to map reading.
Isaac also really likes the “jump” right next to the main entrance trailer carpark at the very bottom of Half Pipe. He does this over and over again hoping to get a millimetre or two more air!
This region of Tasman is a holiday destination. There are two camp grounds in Kaiteriteri which are extremely popular in summer
If you are making a day of it Kaiteriteri has a stunning beach, for a post-ride swim and shops restaurants to refill hungry kids
Read stories about NZ trails, tracks & parks. Find out what other families & riders are doing. Be inspired! Is this ride an option for you or your family?
A collection of stories that will help you learn about bike gear. goRide supporting you to get the right bike gear solution for the type of riding you do or want to do.
Stories in Types of Riding support you to learn about riding a bike in different environments. So you can successfully choose to ride more place, more often.
Support and inspire other riders and families to ride
Share your riding outings, adventures and experiences on our quick and easy question and answer forms. Join us in helping others ride bikes. All entries receive a free shipping coupon and go into our seasonal prize draw.
We Did It! The Alps to Ocean Cycle Trail over 4 days & 3 nights – October (Springtime) 2016!
UPDATE: Sections of the track have since been made off road and completed in Feb 2020. In particular Aviemore Dam to Kurow. Please see Alps to Ocean Trail Status page for the latest on the trail.
Rhea, 11yrs & Isaac, 8yrs rode sections on the first 2 days with me. We choose the alternative start point in Tekapo. See our story Alps to Ocean: Planning & Preparation for all the details. Read on for the highlights and our comments about our trip…
Spring time is a fantastic time of year to ride this trail….snow capped mountains reflected in canals and lakes…just breath taking. The down side to this is slightly unstable weather, we had rain overnight on two of our three nights camping and I endured a southerly weather change going into Oamaru making me cold and wet for the end of my ride.
MY HIGHLIGHTS:
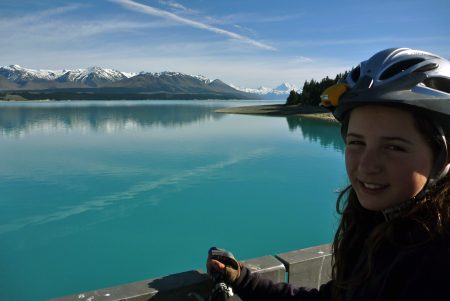
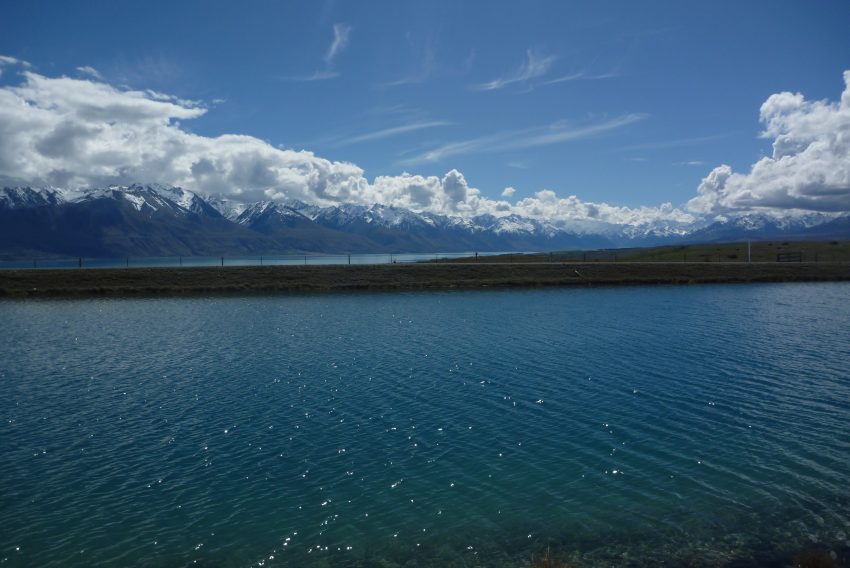
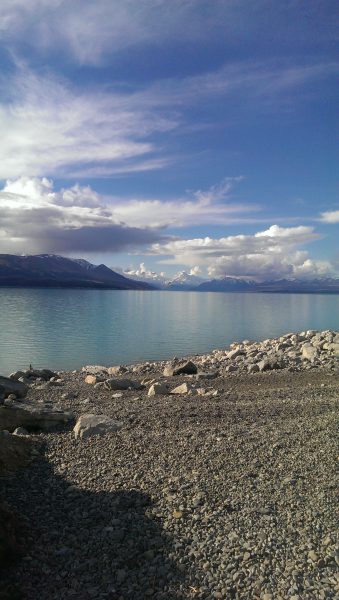
Day One: Tekapo to Lake Pukaki: Riding with the kids, canals and the colour of the water, Mt Cook and surrounding snow capped Southern Alps, just awesome. Also the great little cycle track along Lake Pukaki shore.
[one-third-first]
[/one-third-first]
[one-third]
[/one-third]
[one-third]
[/one-third]
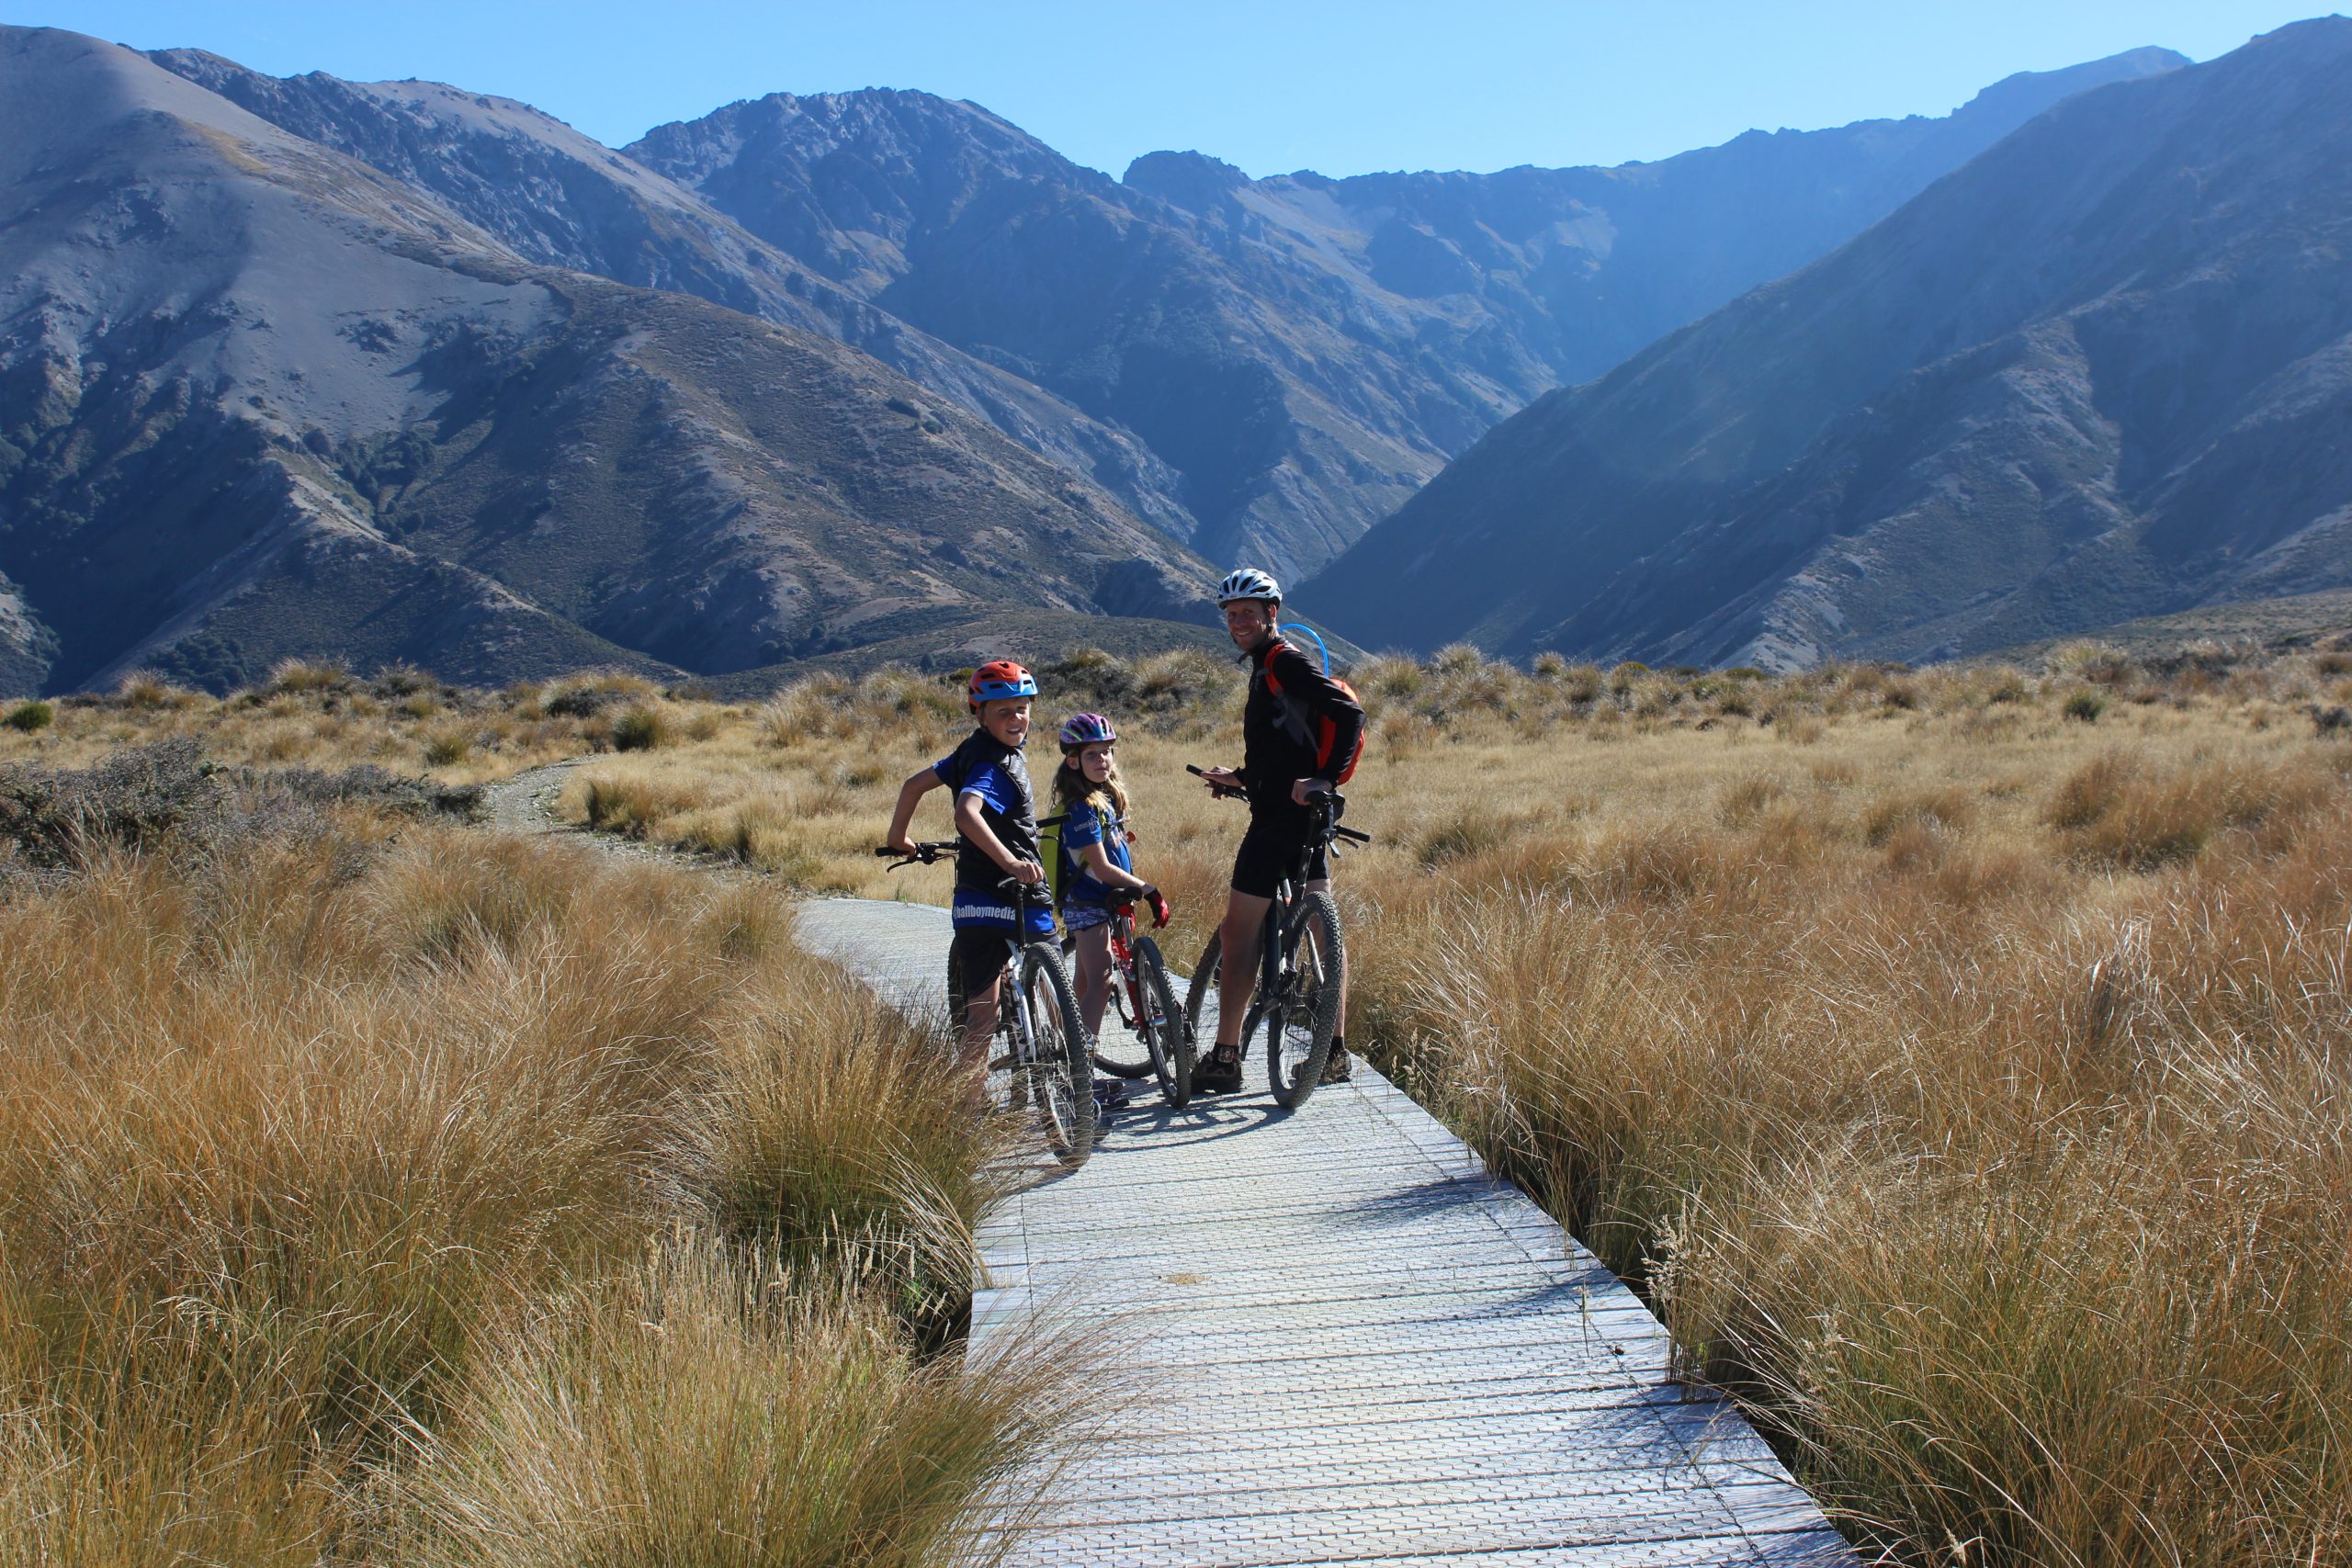
Day Two: Lake Pukaki to Lake Ohau to Omarama: Riding with Rhea to Twizel with stunning views of Mt Cook behind us and the MacKenzie countryside opening up in front of us. The majestic Ben Ohau & stunning views over Lake Ohau from Tarnbrae Track.
[one-third-first]
[/one-third-first]
[one-third]
[/one-third]
[one-third]
[/one-third]
Day Three: Omarama to Otematata to Lake Aviemore Dam: Lovely ride along the shore of Lake Benmore to Sailors Cutting – this would be great for kids. Riding over Benmore Dam and peaceful ride along shores of Lake Aviemore.
[one-third-first]
[/one-third-first]
[one-third]
[/one-third]
[one-third]
[/one-third]
Day Four: Kurow to Duntroon to Oamaru: Great little section through a working vineyard, fun little climb & downhill after Elephant rocks & these amazing rock formations, surprisingly pretty street that is Winsor, Oamaru gardens is stunning and finally the streets and shop fronts of the Oamaru old town – Wow! It just puts a smile on your face when you see the ocean.
[one-third-first]
[/one-third-first]
[one-third]
[/one-third]
[one-third]
[/one-third]
[full_width][/full_width]
MY COMMENTS:
I don’t recommend doing this entire trail over 4 days, it’s meant to be ridden in 6 to 8 for a reason. Instead of spending most of the day on the bike you can rest up and explore the area you have stopped at and enjoy your surroundings in a more relaxed manner than I managed.
I lost count of how many of these I went through.
Sections of this track have not been designed with young families or people towing trailers in mind. Some of it would be really challenging in terms of track widths and surfaces for bikes towing trailers. Every section of track seemed to have multiple gate/vehicle stop barriers – see photo to right. I imagine you would need to unhitch your trailer at all these barriers – depending on its height.
Towing any kind of trailer for gear or for your toddler would be difficult from Ohau over the Tarnbrae Track and there are several gravel road sections that are sluggish and hard going on a bike without the added weight of towing something. Bike tyres can clear patheways but trailer wheels sit wide and don’t follow these lines so would get stuck in gravel & shingle. The river crossings heading to Duntroon where over a foot deep and a couple of metres wide. The two State Highway 83 road sections after Omarama would also prove difficult/dangerous with any added width. NOTE – these sections are now off-road, Feb 2020.
So if you have limited time, want to ride with your kids or want to ride with a trailer behind you I suggest picking out sections to complete.
Kid friendly sections include:
The Canal Roads make for easy, flat riding but could be a bit long depending on the age of your children, two 15km sections at Tekapo, one 12km section after Twizel
The off road section of track next to Lake Pukaki, 13km from Tekapo B Power Station to Lake Pukaki Visitor Centre
The Pukaki Flats Track from Lake Pukaki to Twizel, 11km
The Lake Ohau shore track from the end of Glen Lyon Road to Lake Ohau Road, 11km
Tarnbrae Track from Lake Ohau Lodge to Quailburn Road, 18km – your kids would enjoy this track only if they mountain bike regularly
Omarama to Sailors Cutting, 13km
Otematata to the top of Benmore Dam, 6km – the last 800m is steep! But well worth the effort
Benmore Dam to Aviemore Dam is on an undulating lake side road – watch traffic flow in summer, 22km
Kurow to Duntroon, 28km. Give yourself 3hrs…if this is too far do the beginning and finish just after 15km when the trail comes back next to the highway
Elephant Rocks to Conlans Road, single track through farmland with great little down section, 7km – your kids would enjoy this track if they mountain bike regularly
Pig Island Road just after Winsor to Oamaru, 18km. If this is too far there are a number of places along this section to join the trail at
Isaac, 8yrs said: It was beautiful because there were lots of canals – the colour of the water was beautiful. The mountains were exquiste. The lake was really big and beautiful in front of Mount Cook.
Rhea, 11 yrs said: It was a good challenge and it was satisfying at the end when we finished. You got to see the mountains they were amazing. On the second day the little hilly bit at the start was fun then it was just flat. It was good to be able to see the buildings of Twizel that we were heading to.
My kids road from Tekapo to Hayman Rd on the first day (30km) and then from Lake Pukaki to Twizel on the second day (11km).


 We Did It! The Alps to Ocean Cycle Trail over 4 days & 3 nights – October (Springtime) 2016!
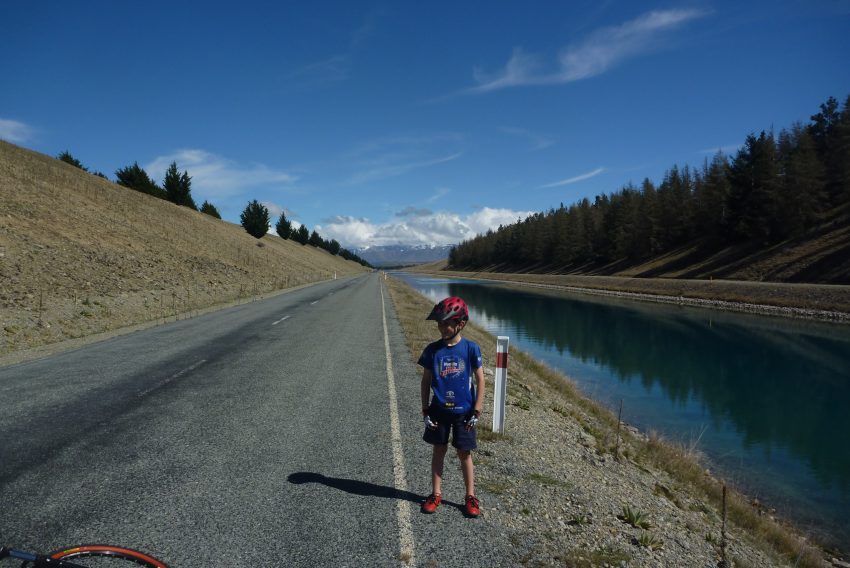
 [/one-third]
 [/one-third]
 [/one-third-first]
 [/one-third]
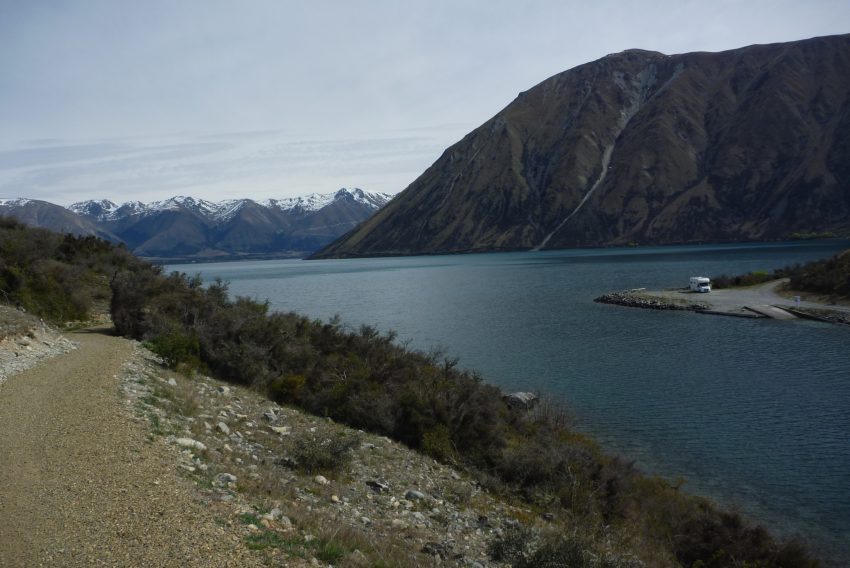
 [/one-third]
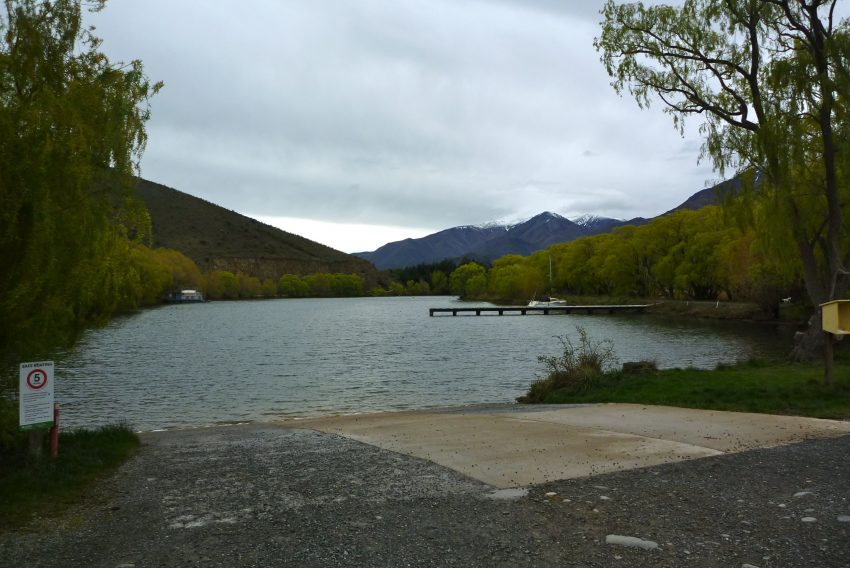 [/one-third-first]
 [/one-third]
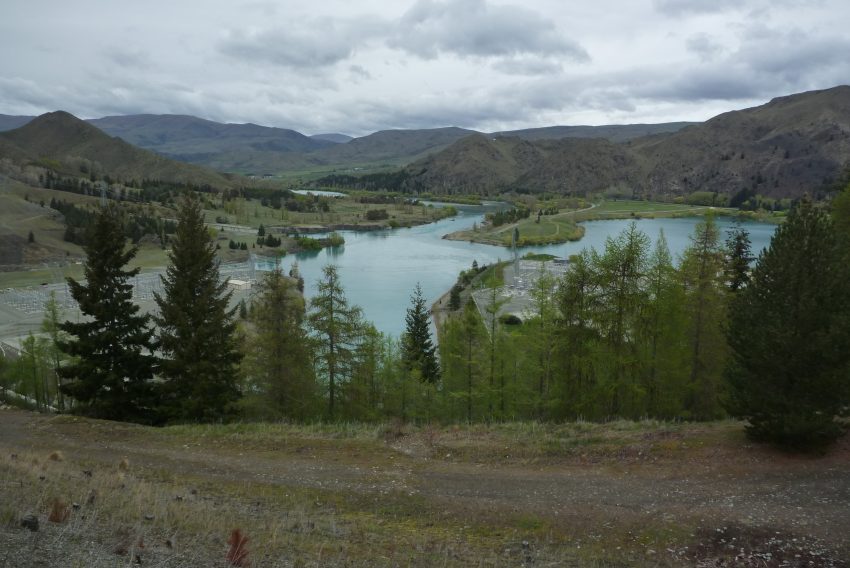 [/one-third]
 [/one-third-first]
 [/one-third]
 [/one-third]
 [/one-half-first]
 [/one-half]