A balance bike gives your young child mobility and speed – providing them with independence, an ability to explore and discover as well as develop motor skills. But this mobility and speed can also put them at risk – they need your help to keep them safe.
Supporting you and your family to SMILE when you ride.
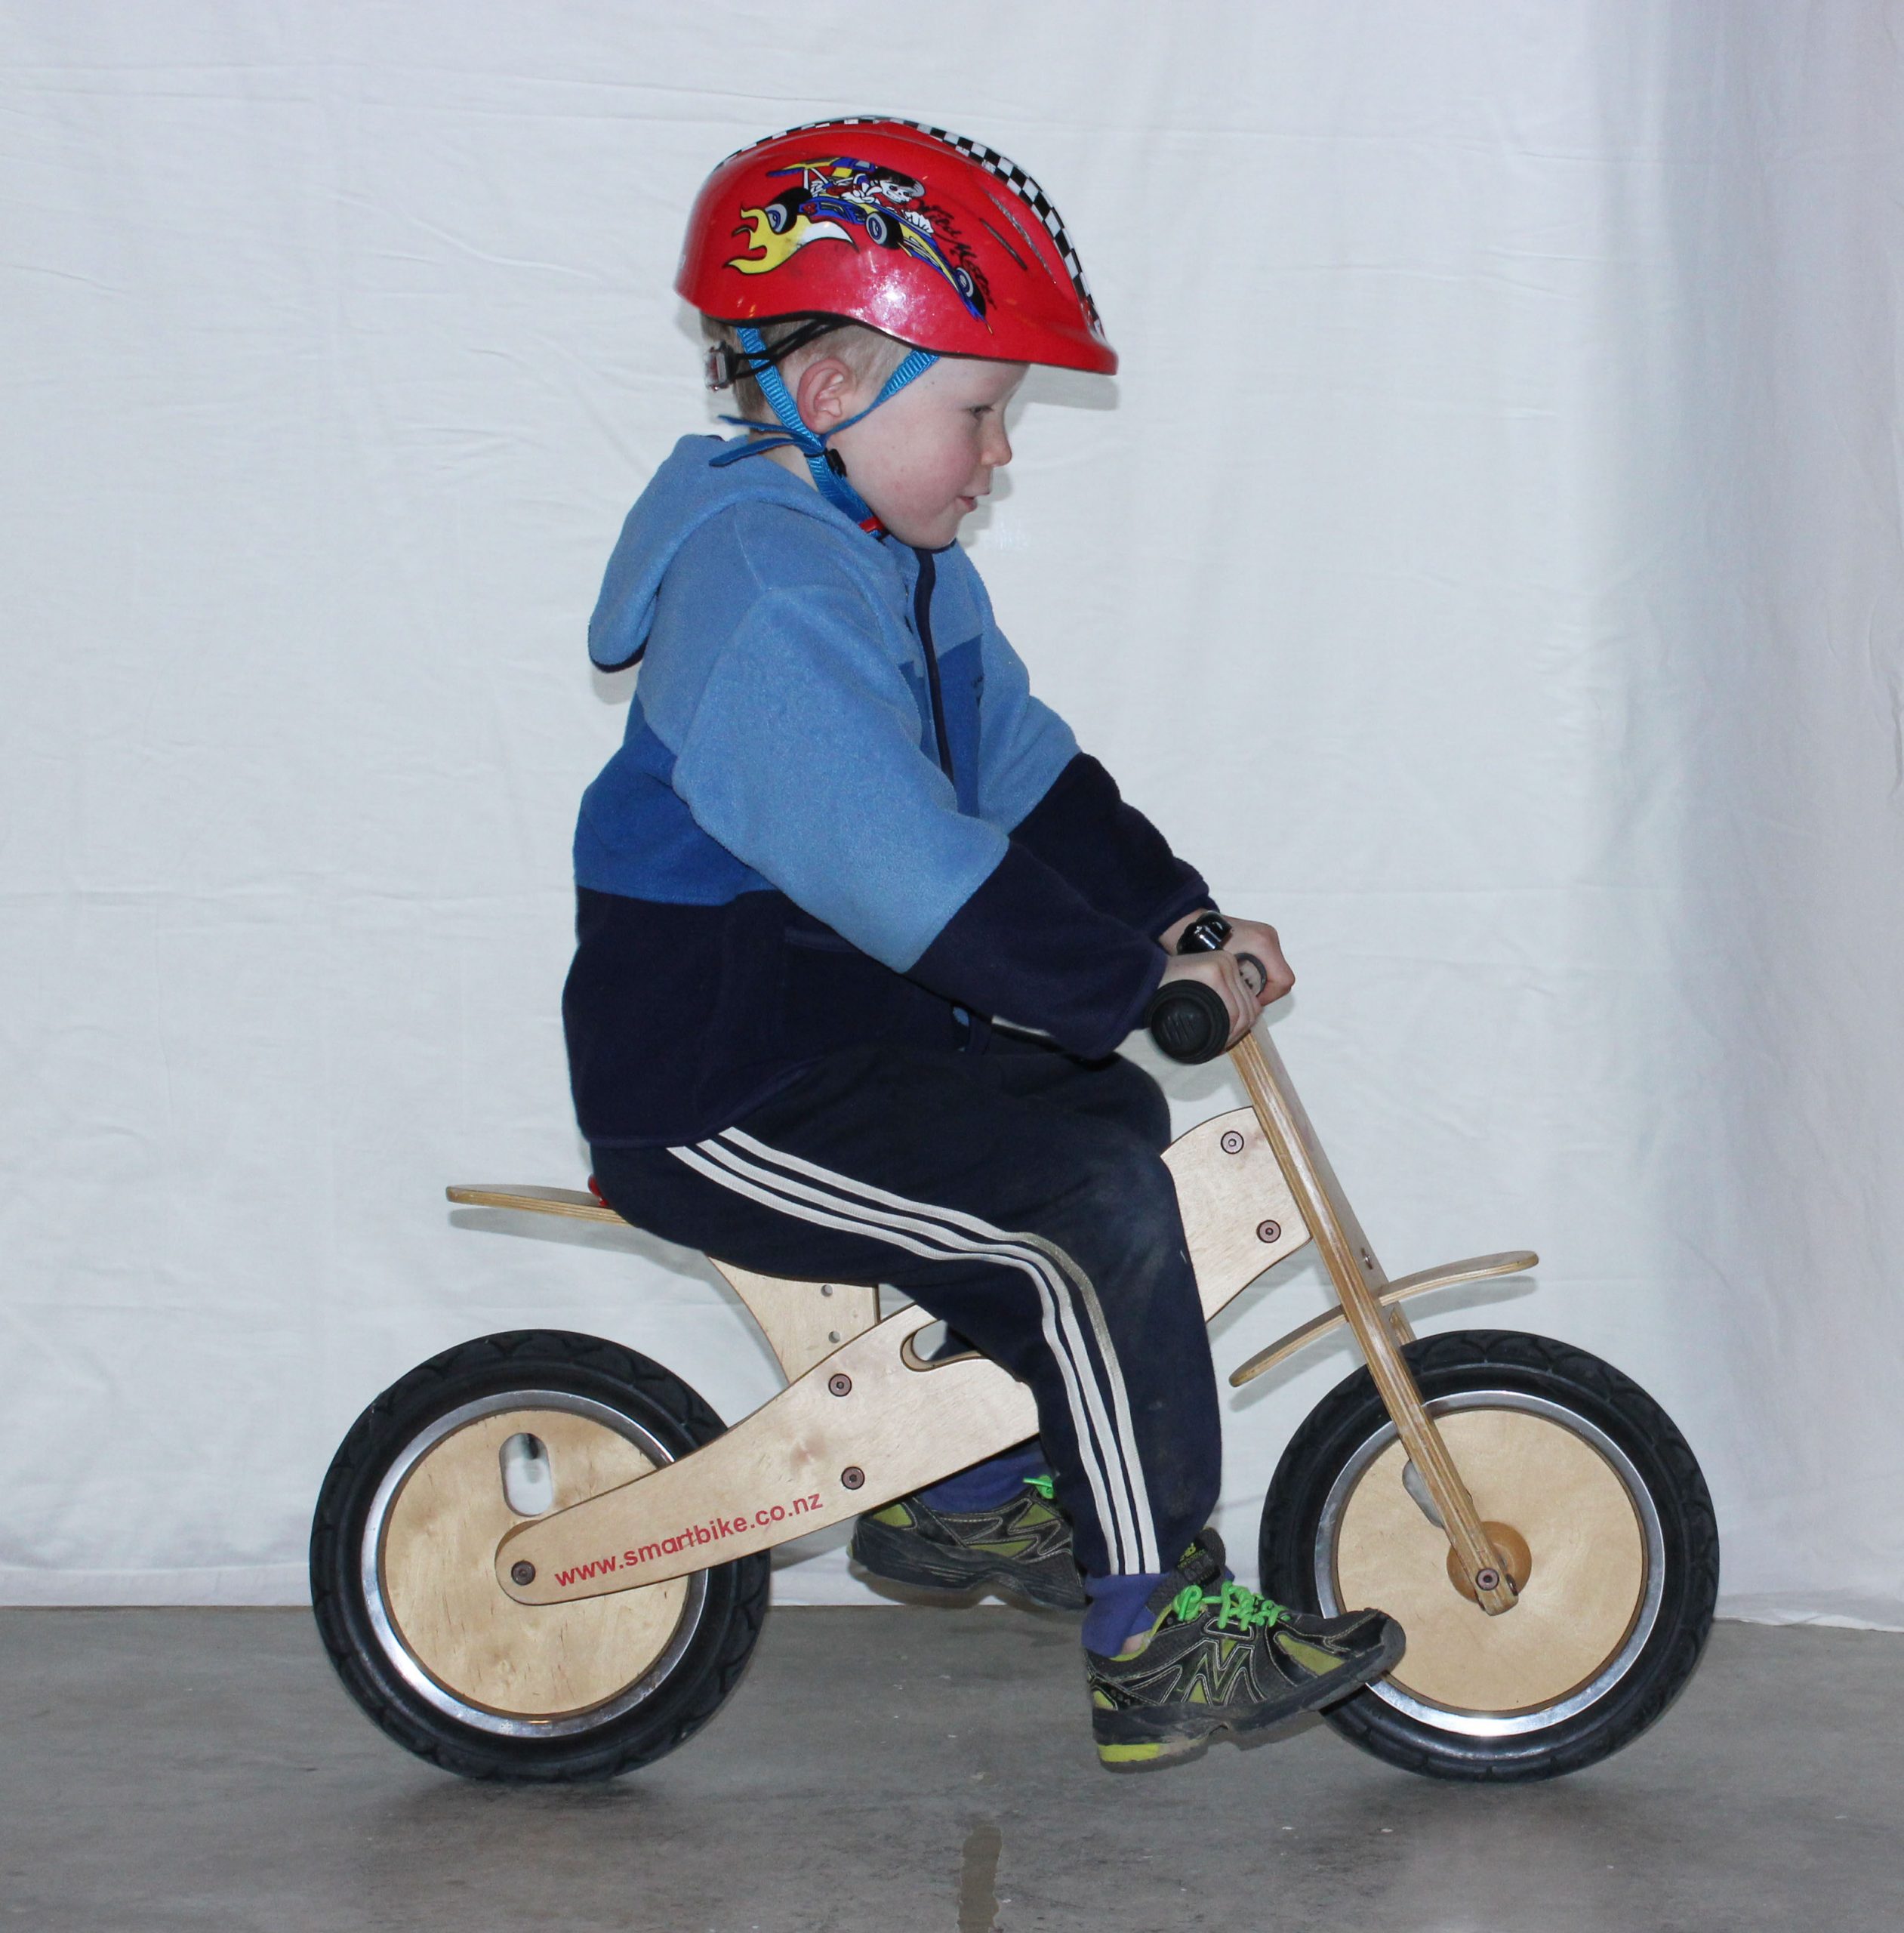
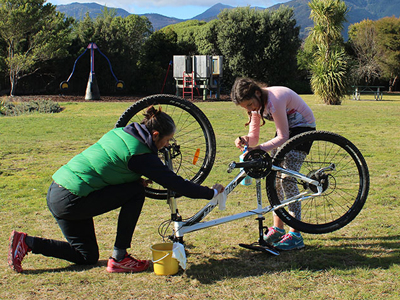
The Balance Bike relies on the kids propelling and stopping the bike using their feet (rather than pedals). Therefore it is very important that the bike is the correct size and the seat is adjusted to the correct height. When sitting on the seat a child needs to be able to touch the ground and have a slight bend at their knees. This will help them be effecient with their leg movement when propeling the bike and makes sure they can slow the momentum of the bike and stop using their feet.
Tip Three – Let them learn in appropriate environments and terrain
Where you ride is vitally important to their safety. Some things to remember.
As they are generally relying on their feet to propel and stop the balance bike the environment should be
the ground relatively flat?
If there is a slope – is there a safe, flat slow down area?
able to stop safely using their feet
Safe environments to consider using; tar sealed areas in schools, tennis courts, walkways, cycleways and some or parts of pump tracks.
Some balance bikes do come with a hand brake however even if it does have a braking mechanism are they old enough to use it? Generally they don’t develop this skill until they are at least 3 and been riding a balance bike for a period of time.
Tip Four – If they are near or around vehicles they must be:
Supervised. Consider your ability to supervise? Do you have other children to watch over? Will or could you be distracted? Is your mobility affected by a buggy or carrying equipment or another child. Consider the child on the bike? How fast can they go? Can you keep up, if you needed to? How well do they respond to verbal instruction, like STOP? You will need to evaluate the situation, each situation will be different, each child will be different and assess whether it is safe to ride in ‘this environment’.
Visible. Your child is small and fast on a balance bike making them difficult to see. Make sure that vehicles are given the best chance to see them. They are particularly vulnerable when riding on footpaths and their size means they often will be out of the vision of a driver backing out of or into a driveway.
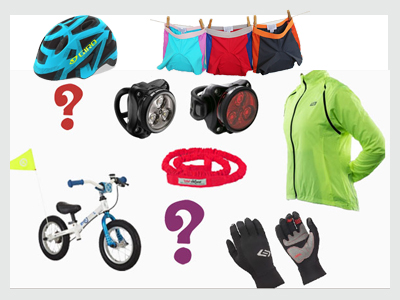
Make them be seen – consider using a flag. Make them visible to the driver., Have your child in bright visible clothing with a bright visible helmet on their head.
Being Heard may also help. A mini hornit is a fun and loud horn that can help children let others know they are here, that they are coming. A horn can initially be a distraction – the 25 sounds are super fun, so why wouldn’t they use it lots. Give them time to overcome the distraction in a safe environment and then that horn will be functional as well as fun.
Tip Five – Wear footwear
The child uses their feet to both propel, slow down and stop on a balance bike. The child should therefore be wearing closed in shoes. You may want to consider teaching them ways to stop without wrecking their shoes if this is important or have designated balance bike shoes. ( that you don’t mind being scuffed etc)
Note: learning to use their legs and feet on a balance bike helps teach children the important safety skill of putting their feet down when they lose balance on a bike.
Kids Learning to Ride
Home or playground based Kids Learn to Ride Programme using a balance bike.
Develop kids motor skills with fun & challenging activities on a balance bike. This is a great learning resource for confidence on a bike.
Improve their Biking Confidence
Give your child an amazing foundation for movement.
Prepare them for an easy transition to a pedal bike.
Hours of fun structured play suitable for 18 months to 5/6 year olds.
Your bike riding success is different to others… use our stories and support, get the right solutions.
Balance Bike Buying Guide
What is the best balance bike for your child? There are many factors to consider in your decision. Use our Buying Guide get the right Balance Bike solution.
Balance Bike -Their First Bike
Understand why the balance bike…is the best way to teach kids to ride.
The Right Balance Bike
Learn about the features of a balance bike. What will be important for your child and the type of balance bike riding they will do?
Balance Bike Riding - How old should they be?
Learn when your child might be ready to start to explore using a balance bike. What skills are compatible with learning to ride a balance bike.
Balance Bike Sizing Guide
Learn about size of a balance bike. Make sure your child can comfortably ride now and as they grow and develop..
Safety Tips for Balance Bike Riders
Balance bikes can give your young child the ability to ride with speed. Make sure you have considered what is important to keep them safe as eraly riders.
Make Balance Bike Riding Fun
Like any skill the more you do it the better they get. Make learning to ride their balance bike fun and they will choose to ride.
Want more from your riding?
Be supported to Ride as a Family,and/or receive Seasonal Inspiration. So you can SMILE when you ride.
Balance bikes, Runna bikes, Glide bikes or pedal free bikes are all names for a bike that has no pedals. Kids use their legs to propel, move and stop the bike. They are a bike designed to teach kids balance. An essential skill for riding a pedal bike.
Supporting you and your family to SMILE when you ride.
The Balance Bike allows you to master the skill of balancing and steering a bike before introducing the more complex task of pedaling. Understand how to support your child to learn to ride a balance bike and the likely phases of development as their skills and time on the balance bike increases
Facilitation
Some simple things to remember here. Let your child guide you and do not have any expectations around their learn to ride journey. Remember all kids learn at different rates . Make it fun, be patient Lots of encouragement on their successes small or big and just love that you are sharing this learning experience together.
Straddling Phase
This phase is about your child learning to handle the balance bike. Getting used to its weight and how it feels. They will need strength to hold the balance bike upright and balance and coordination of their limbs to hold onto the handlebars and lift their leg over the tube so they are straddling the balance bike. This skill needs to be learnt and practised.
Your child stands beside the balance bike holding onto the handlebars with both hands.
Slightly lean the bike into them
Lift the leg closest to the bike up and over the tube so they are stradding the balance bike
Facilitation: : Initially you may need to assist at first as they develop the necessary motor skills to complete this skill. If you are assisting try and support their balance by supporting their trunk and leave their legs and arms free to handle the bike and their leg movement.
Walking Phase
Once they have learnt to straddle the bike they can begin to effectively walk. For some children initially this may be in standing however you are trying to encourage them to walk while seated on the balance bike seat.
(Effectively walking) Start with two feet on the ground.-lift one foot and place it in front of its previous position
Repeat on the other side so they beginning to propel themselves on a balance bike
As they gain in confidence their stride will lengthen and they will alternate between legs more quickly (that is they will have a quicker turn over) and will soon be progressing to the next phase.
Facilitation: as described above initially they might start walking while still standing…this is fine, give them time and just try and encourage them to sit on the balance bike seat and walk. Set up some games from our Learn to Ride Kits to help support confidence and improvement through this phase and progression to the next phase.
Running Phase
As they become more confident on the bike and their balance and coordination improves they will most likely naturally progress to the running phase.
Effectively running while seated on the balance bike seat.
This means your child has only one foot in contact with the ground at any point in time and they will be moving at speed.
When they transition to this phase you need to be very aware of the environment you are riding in and where your child could potentially run to Can you keep up and keep them safe. They will love their new freedom and speed so they likely be riding at speed.
Facilitation: Set up some games from our Learn to Ride Kits to help support confidence and improvement through this phase and progression to the next phase.
Gliding Phase
The final stage of learning to ride a balance bike is the ability to glide between foot contact. Gliding effectively is; they gain speed by running and then they have the speed, balance and coordination to lift both feet off the ground and glide on the balance bike
Again you will need to be aware of the environment they are riding in are they safe
Facilitation: Set up some games from our Learn to Ride Kits to help support confidence and improvement through this phase and working towards progression to a pedal bike.
Once they are competent at gliding they have effectively mastered the skill of balance on a bike so are ready to progress to a pedal bike. But don’t rush it. Let them love riding their balance bike. Let them explore and feel good about being really skilled on their balance bike before tacking the new skill of riding a pedal bike.
Starting & Stoping – incorporate into all of the moving phases – 2, 3 and 4
With each of the learning phases above comes the essential skills of starting and stopping. This is initially done on a balance bike with the feet. As little legs get stronger and confidence builds, speed will build. So safety becomes important and stopping should be practiced. Please read Balance Bike Safety Tips
Facilitation: Set up some games from our Learn to Ride Kits ( coming soon) to help support confidence and improvement of starting & stopping through each of the phases.
Brakes – Not all Balance Bike come with a hand brake but many do. The fine motor skill of using the hands to brake is one of the last things to learn before transitioning to a pedal bike Young children will learn this skill at different times and it is usually only something a 3+yr old can manage.
Facilitation: Set up some games from our Learn to Ride Kits ( coming soon) to help support confidence and improvement of braking to help make riding a balance bike at speed safer and support transition to a pedal bike..
Your bike riding success is different to others… use our stories and support, get the right solutions.
Balance Bike Buying Guide
What is the best balance bike for your child? There are many factors to consider in your decision. Use our Buying Guide get the right Balance Bike solution.
Balance Bike -Their First Bike
Understand why the balance bike…is the best way to teach kids to ride.
The Right Balance Bike
Learn about the features of a balance bike. What will be important for your child and the type of balance bike riding they will do?
Balance Bike Riding - How old should they be?
Learn when your child might be ready to start to explore using a balance bike. What skills are compatible with learning to ride a balance bike.
Balance Bike Sizing Guide
Learn about size of a balance bike. Make sure your child can comfortably ride now and as they grow and develop..
Safety Tips for Balance Bike Riders
Balance bikes can give your young child the ability to ride with speed. Make sure you have considered what is important to keep them safe as eraly riders.
Make Balance Bike Riding Fun
Like any skill the more you do it the better they get. Make learning to ride their balance bike fun and they will choose to ride.
Want more from your riding?
Be supported to Ride as a Family,and/or receive Seasonal Inspiration. So you can SMILE when you ride.
Have you been on a mountain bike course? I love that mountain bike coaches are popping up all over the country, helping all levels of riders gain more skills. Here in Nelson we have the brilliant Wheel Woman Workshops run by Emma Bawtree. My first course with Emma was about 4 years ago and it delivered on all fronts for me. So quite simply if you haven’t been yet now is the time to tap into the knowledge that is right there for the taking. For those of us who have been before – I’ll see you out there because you’re never too good to learn something more. Enjoy reading all about Wheel Woman.
goRide Group/Organisation Profile
Get to know who is actively involved in the female riding community through our group and organisation profiles. Support those who are supporting you. Remember we are all on a riding journey regardless of whether you are a beginner or an experienced rider so be open to learning from others, discover what others are doing and be curious about whether you could too.
How long has your organisation been around and what was the drive for its beginning?
Wheel Woman is celebrating its 5th birthday. The drive is helping women gain confidence. I could see all these women struggling with something that I find easy so I knew I could help.
Can you remember your first day of “work” and describe it for us?
The first Wheel Woman course was run for a friend who got 6 women together. She really drove that beginning as she was confident with road cycling but struggled with the technical aspects of off road riding. She really wanted to be shown some skills so we put together a 2 hour course for her and her friends which flowed really well. I remember being surprised at how much I enjoy it and how natural it was for me – I didn’t stress or get nervy and its just carried on that way from that day.
How many people are involved? How big is your group/business?
It’s just me but I get a lot of local support from the Triathlon and Multisport club, Mountain Bike Club and Kaiteriteri Mountain Bike Park.
What is the group/business trying to achieve at the moment?
Firstly, taking a break for winter. Then in September I am doing a relaunch with more defined courses and a new website. I’ve recently attended a National Mountain Bike Coaching Course and the direction was clear – less information and more time riding during a course. The outcome of that for Wheel Woman is to add another course into what I offer so that the technical information is more spread out. I get great feedback from everyone that comes to a course so this is more about fine tuning what I offer, hoping to cover something for everyone. Of course there is private coaching sessions as well if that works better for someone. It all depends on time, money and energy… what they want to achieve.
What is the thing you like the most about what you do?
Seeing girls absolutely stoked as they ride bits of track they never thought they would.
What is your greatest success to date? What do you hope it to be in the future?
Past: Giving so many women added confidence, knowledge and skill – so they can keep up with their husbands!
Future: Wheel Woman is beginning Youth Coaching in term 4 of this year. For 10 to 15 year olds as an after school mountain biking programme. I’m really excited about doing this and where it might lead.
What do you find the hardest about what you do and why?
Working weekends is hard at times but with that said it does mean my weekdays can be more flexible.
Describe how your group/business feels about riding and what riding can do for people.
Gaining confidence in your riding skills has a big impact on other aspects of your life and just generally gives you more confidence. It’s interesting that men often don’t understand what I teach. They think you should be able to just get on a bike and ride but there is a lot more to technical riding than that – if you want to do it well and make improvements. Some of my beginners gain way more than just riding skills, its quite empowering and something I never expected when I started this. They become stronger and more confident and suddenly have an “I CAN” attitude.
Biking also gives women easy access to fitness and the outdoors. With confidence and knowledge you realise that you can just go off and do it. It gives a real mental break to your day whether you are a Mum who goes riding by herself or with her children, it’s a great release.
What is your vision for riding in NZ in 2025?
The national cycleways funding is exciting and it will be great to watch this develop. It would be great if New Zealand could become more of a Holland in our attitude to bikes as a form of transport. I’d love to see growth in all forms of cycling as a sport, so greater participation and better access for families wanting to ride.
Anything else you would like to add?
Gaining a little bit of confidence and belief in your abilities leads to better participation in riding. Wheel Women does a great job in bridging the gap between women who ride bikes in a spin class to women who safely go out and about to ride… if they feel safe it seems achieveable.
Feeling like you want to gain some confidence on your bike? Check out Wheel Woman at www.wheelwoman.co.nz
[themeone_section type=”full-width” bgcolor=”#fafafa” txtcolor=”dark” decotop=”” decobot=””]
Thanks for reading.Used together our stories and resources support you to achieve and develop as a rider.
goRide is a shared journey, so we would like you to assist in guiding it along the way. Contact goRide. Your thoughts, comments or feedback are welcome. Thank you for being a part of the goRide way.
I get a lot more out of a task or an activity if I have purpose and some goals – it gives me more enjoyment. How about you? Riding a pump track was something fun I did with the kids but now that I have more insight about the purpose of pump tracks and what they can offer my riding – I love them!
In our prevoius story – The Ups of Pump Tracks – we learnt that riding pump tracks will give you a feel for balance. How both your bike and body react as you ride over the differing terrain, slopes, rollers and corners, etc. That improved feel and confidence may be all you want from riding a pump track and that is great. However if you want more – pump tracks can offer you more…
Ultimately gaining and refining skills on the pump track (such as cornering and pumping) will help you learn how to use the terrain to get smoothness, flow and a more constant speed into your ride. Do you have a riding style where you ride heavy and thud over obstacles? Or do you slowdown when you come to an obstacle or change in the terrain? With improved pump track skills you will develop a more flowing style where you will start to glide over obstacles and changes in terrain, be able to maintain a more constant speed and improve your control on the bike.
Sound good? Then lets get you started!
Pump Track Skills – Pumping
Pump tracks are a great safe environment to have a ‘play’. Do not expect to perfect or ace these skills on your first attempt. Like most things, if you give something time, if you practise, the improvements and rewards will come. But first lets…
Set up – the bike
This is not essential but may help with ease and feel when you are learning and developing pump track skills. The ideal for pumping is using a hard tail bike – that is a bike with no rear shocks. If you have rear shocks then lock them out. It means that the energy you are trying to generate by pushing into the terrain will not be absorbed by the bike (because that is what shocks are designed to do). Drop your seat – you drop the seat to get it out of the way during the push down action when you pump.
Remember it is likely that when you are out riding you will not have this set up. For example on the trail your rear shocks may not be locked and your seat may not be dropped – so please don’t get hung up on this, don’t make it a barrier to getting out there and giving it a go. Ultimately, if you want these pump track skills to be transferable to your other riding then you need to learn to ride the pump track on the bike, in the set up, that you normally ride.
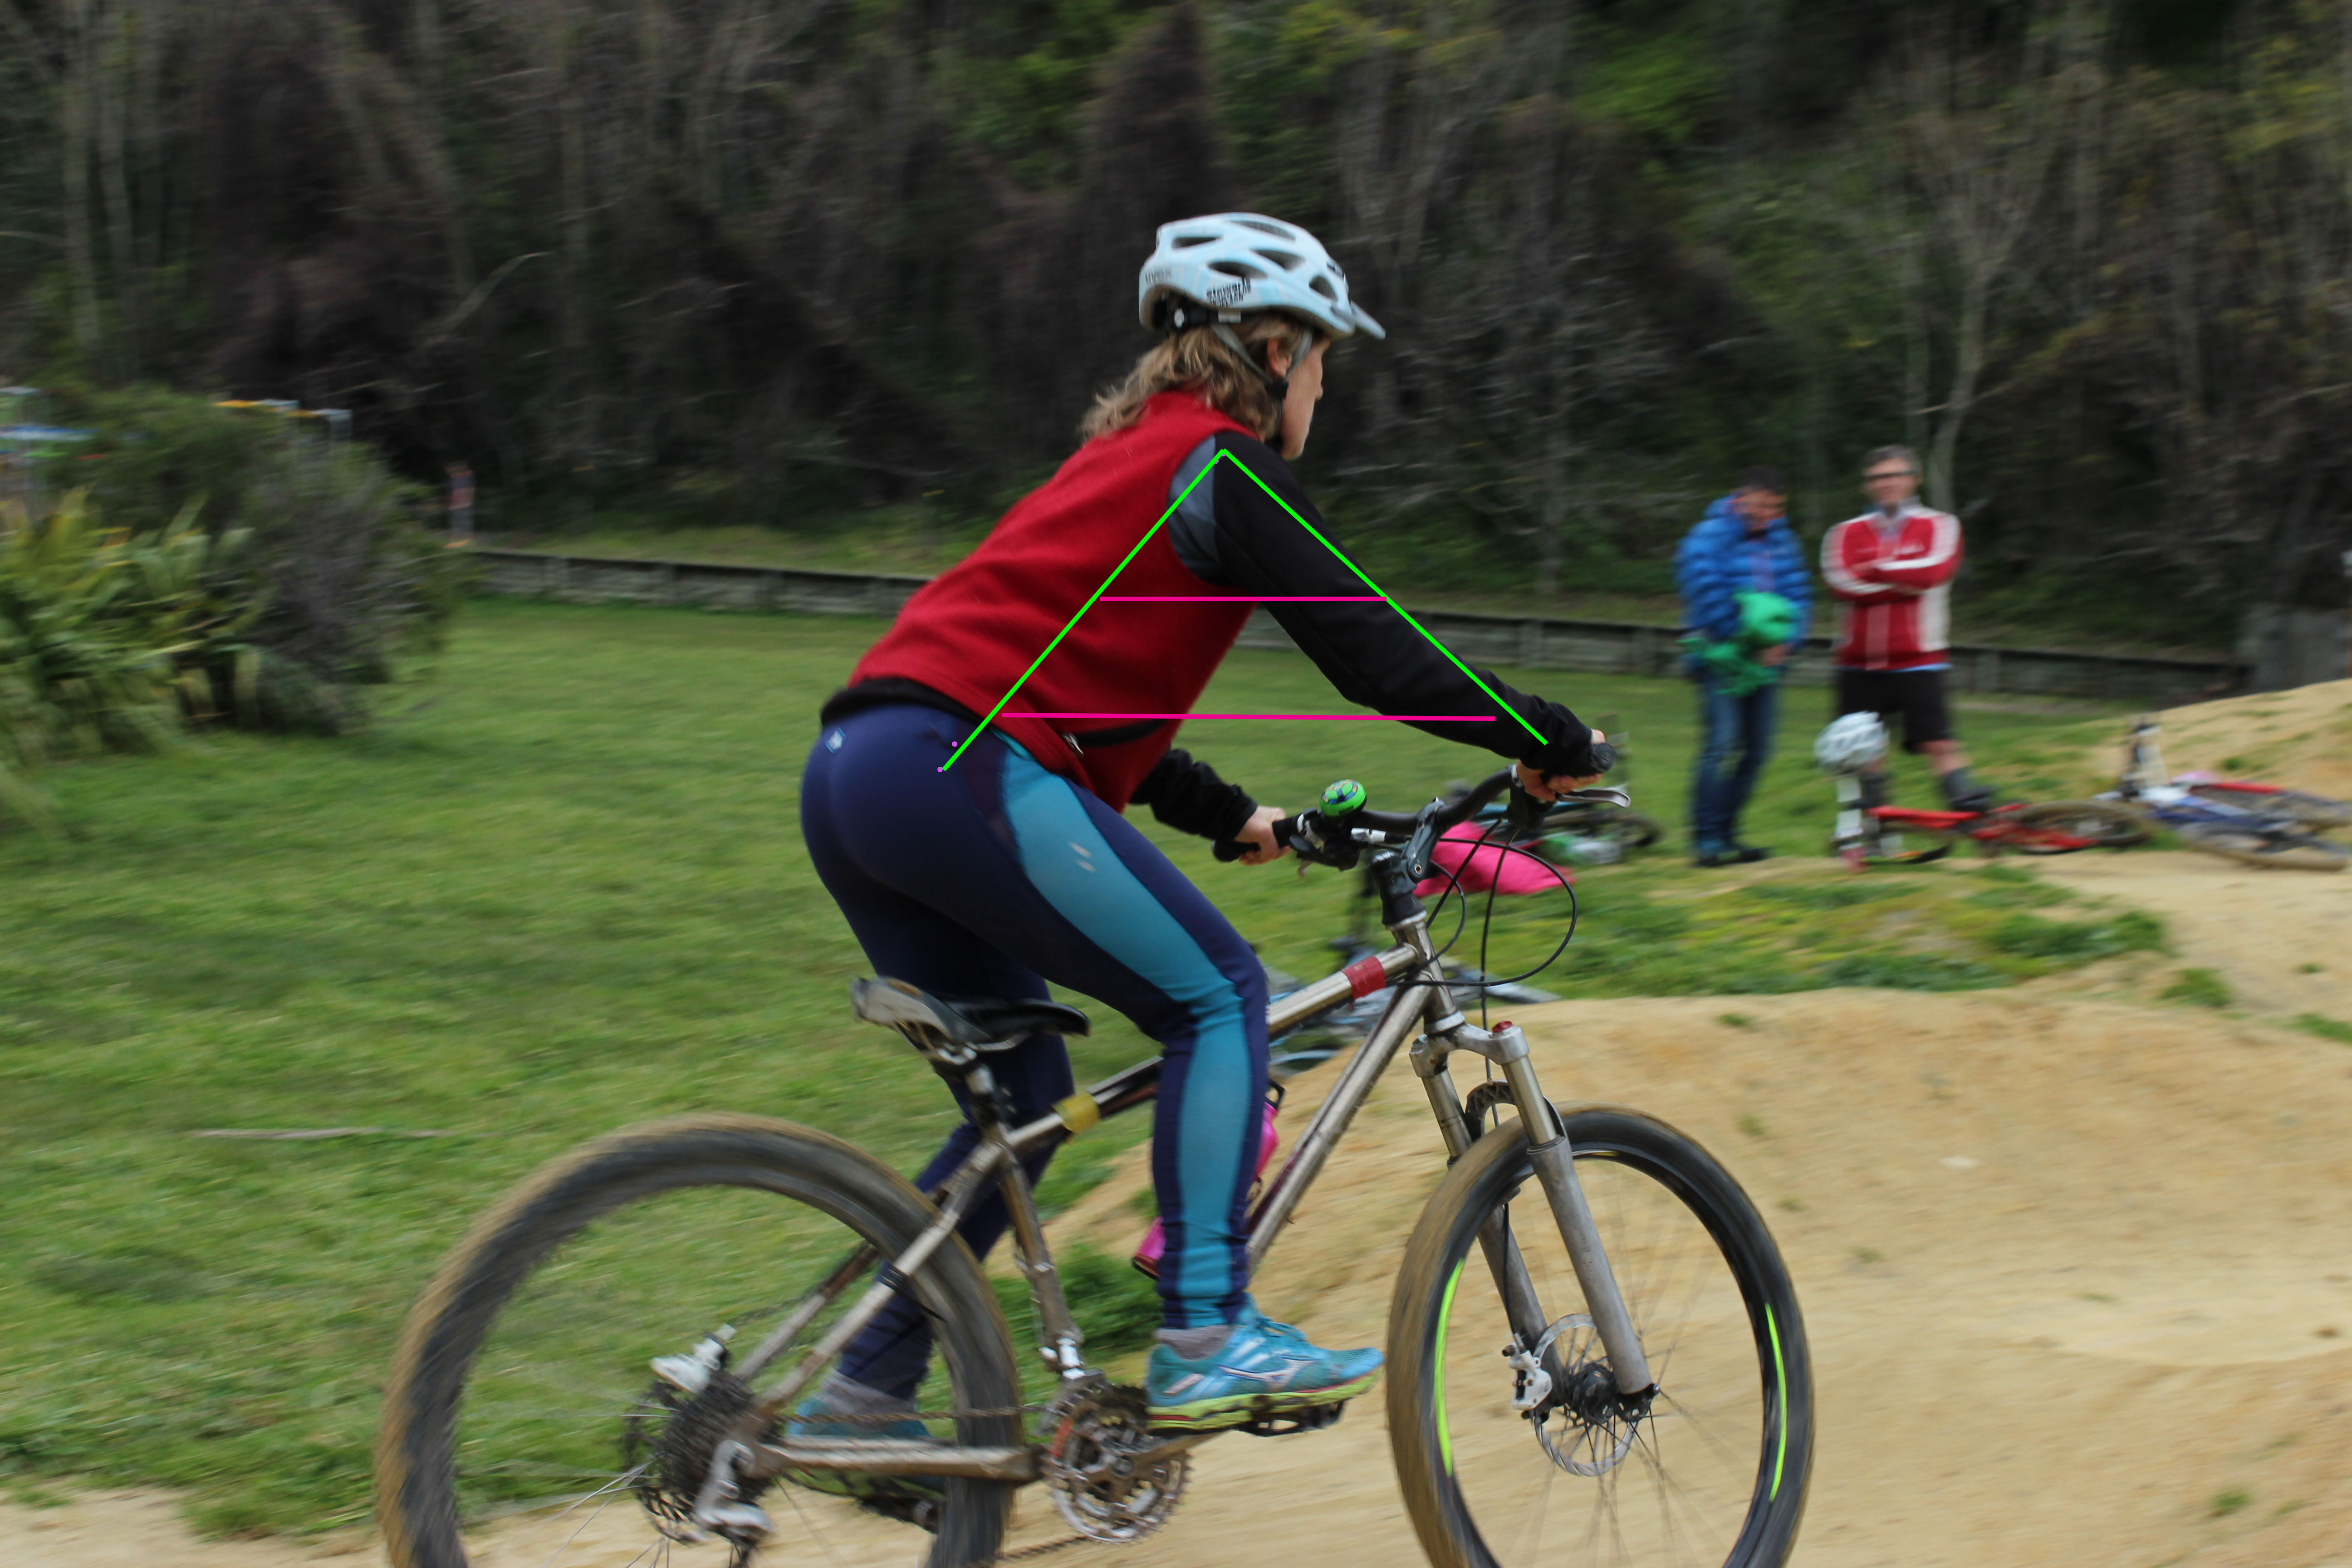
Riding position – You need to ride in the ‘A’ position with a strong core and loose limbs. Your chest should be open and your arms in the relaxed ‘C’ shape. Your legs need to be loose and relaxed to allow for movement at the hip, knee and ankle joints. Basically you are using your chi riding platform. See Tip 1 – Riding position,Tip 2 – Core control, and Tip 4 – Breathing. You are working towards riding pump tracks without sitting on the seat of the bike. That is you will have 2 points of contact with your bike; your feet on the pedals and hands on the handlebars.
Riding line – Your head needs to be up and you need to look ahead (1 to 2 metres) and be chosing your riding line. Look where you want to ride.
If your set up is sorted, lets get into the task.
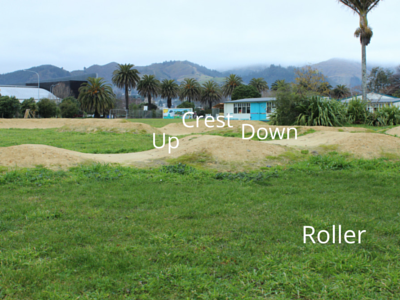
The parts of the roller
Pumping action – this riding technique is used as you go over the rollers. You are wanting to be light on the way up the roller so you are absorbing energy and heavy on the way down the roller. On the way down you are releasing, you are pushing that absorbed energy into the down side of the roller, into the terrain to generate speed and momentum.
Up the roller – think light – shift your body weight slightly backwards on the bike and bend the elbows as you absorb energy going up the roller
Crest – let the bike come up under you with you weight centred and knees bent
Down the roller – think heavy – shift your body weight slightly backwards again and think heavy – push down into the terrain with your legs (your hips, knees and ankles). Your arms can help but the power will come from your legs.
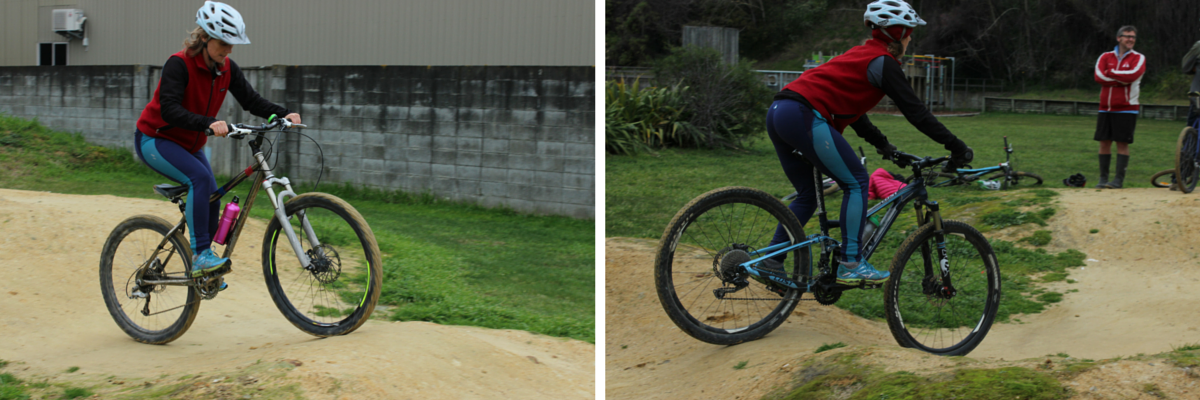
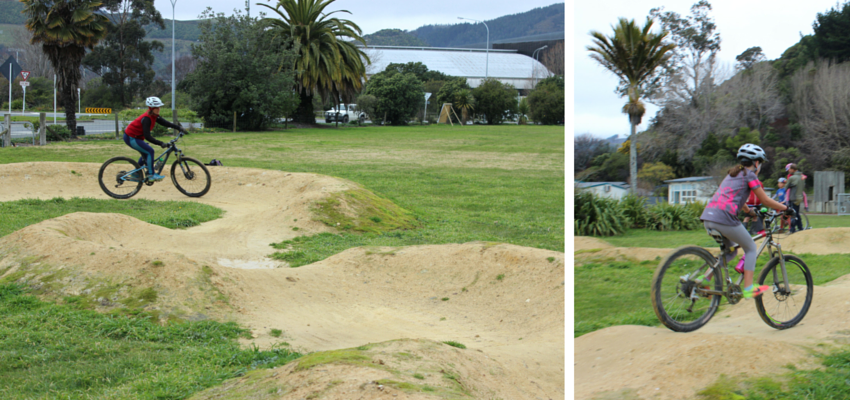
Photo 1 – Light on the way up. Photo 2 – The back wheel is about to come over the crest and then I need to push down heavy into the terrain on the down side of the slope.
Sound challenging? It is – but with practise you start to get the feel of when you generate momentum and speed on the down side of the roller.
I am having heaps of fun on the pump track working on my pumping and my skills are improving. So find a pump track near you and join me.
[themeone_section type=”full-width” bgcolor=”#fafafa” txtcolor=”dark” decotop=”” decobof and pot=””]
Thanks for reading. Used together our stories and resources support you to achieve and develop as a rider.
goRide is a shared journey, so we would like you to assist in guiding it along the way. Contact goRide. Your thoughts, comments or feedback are welcome. Thank you for being a part of the goRide way.
I get a lot more out of a task or an activity if I have purpose and some goals – it gives me more enjoyment. How about you? Riding a pump track was something fun I did with the kids but now that I have more insight about the purpose of pump tracks and what they can offer my riding – I love them!
In our prevoius story – The Ups of Pump Tracks – we learnt that riding pump tracks will give you a feel for balance. How both your bike and body react as you ride over the differing terrain, slopes, rollers and corners etc. That improved feel and confidence may be all you want from riding a pump track and that is great. However if you want more, pump tracks can offer you more…
Ultimately gaining and refining skills on the pump track (such as cornering and pumping) will help you learn how to use the terrain to get smoothness, flow and a more constant speed into your ride. Do you have a riding style where you ride heavy and thud over obstacles? Or are you more the slowdown when you come to an obstacle or change in the terrain type? With improved pump track skills you will develop a more flowing style where you will start to glide over obstacles and changes in terrain, be able to maintain a more constant speed and improve your control on the bike.
Sound good? Then lets get you started!
Pump Track Skills – Cornering
Pump tracks are a great safe environment to have a ‘play’. Do not expect to perfect or ace these skills on your first attempt. But like most things, if you give something time, if you practise, the improvement and the rewards will come.
First you need to set up for the task.
Set up – the bike
Do your 30 second pre-ride check, make sure your bike is safe to ride. You may like to drop your seat so it is not in the way as you change the position of your hips. This may be helpful while you are learning the skill. However if you want these pump track skills to be transferable to your other riding then you should move your seat back up to its normal position once you have the feel for the skill. Alternatively just keep the seat at its normal riding height.
Set up – the rider
‘A’ riding position and looking ahead on the track. With 2 points of contact.
Riding position – You need to ride in the ‘A’ position with a strong core and loose limbs. Your chest should be open and your arms in the relaxed ‘C’ shape. Your legs need to be loose and relaxed to allow for movement at the hip, knee and ankle joints. Basically you are using your chi riding platform. See Tip 1 – Riding position,Tip 2 – Core control, Tip 4- Breathing. You are working towards riding a pump track without sitting on the seat of your bike. That is you will have 2 points of contact with your bike; your feet on the pedals and hands on the handlebars.
Riding line – Your head needs to be up and you need to be looking ahead (1 to 2 metres) and chosing your riding line. Look where you want to ride.
If your set up is sorted, lets get into the task.
Cornering – pump tracks often have lovely ‘c’ shaped corners for you to use to gain confidence and skills in cornering. Make sure you ride the pump track in both directions so you get practise at cornering to the left and the right. Here are some things for you to try and work towards with your cornering;
As mentioned above keep your head up and look ahead into the corner. Your head leads and your shoulders and trunk (upper body) will naturally follow. When in the corner look ahead through the corner and out through the exit.
Try and make the corner as large as possible – this will ensure you start to use as much of the track as possible – you will start to use the berms.
Make your corner as big as possible (the blue curve). You will start to increase your speed and control through the corner and feel comfortable on the berm.
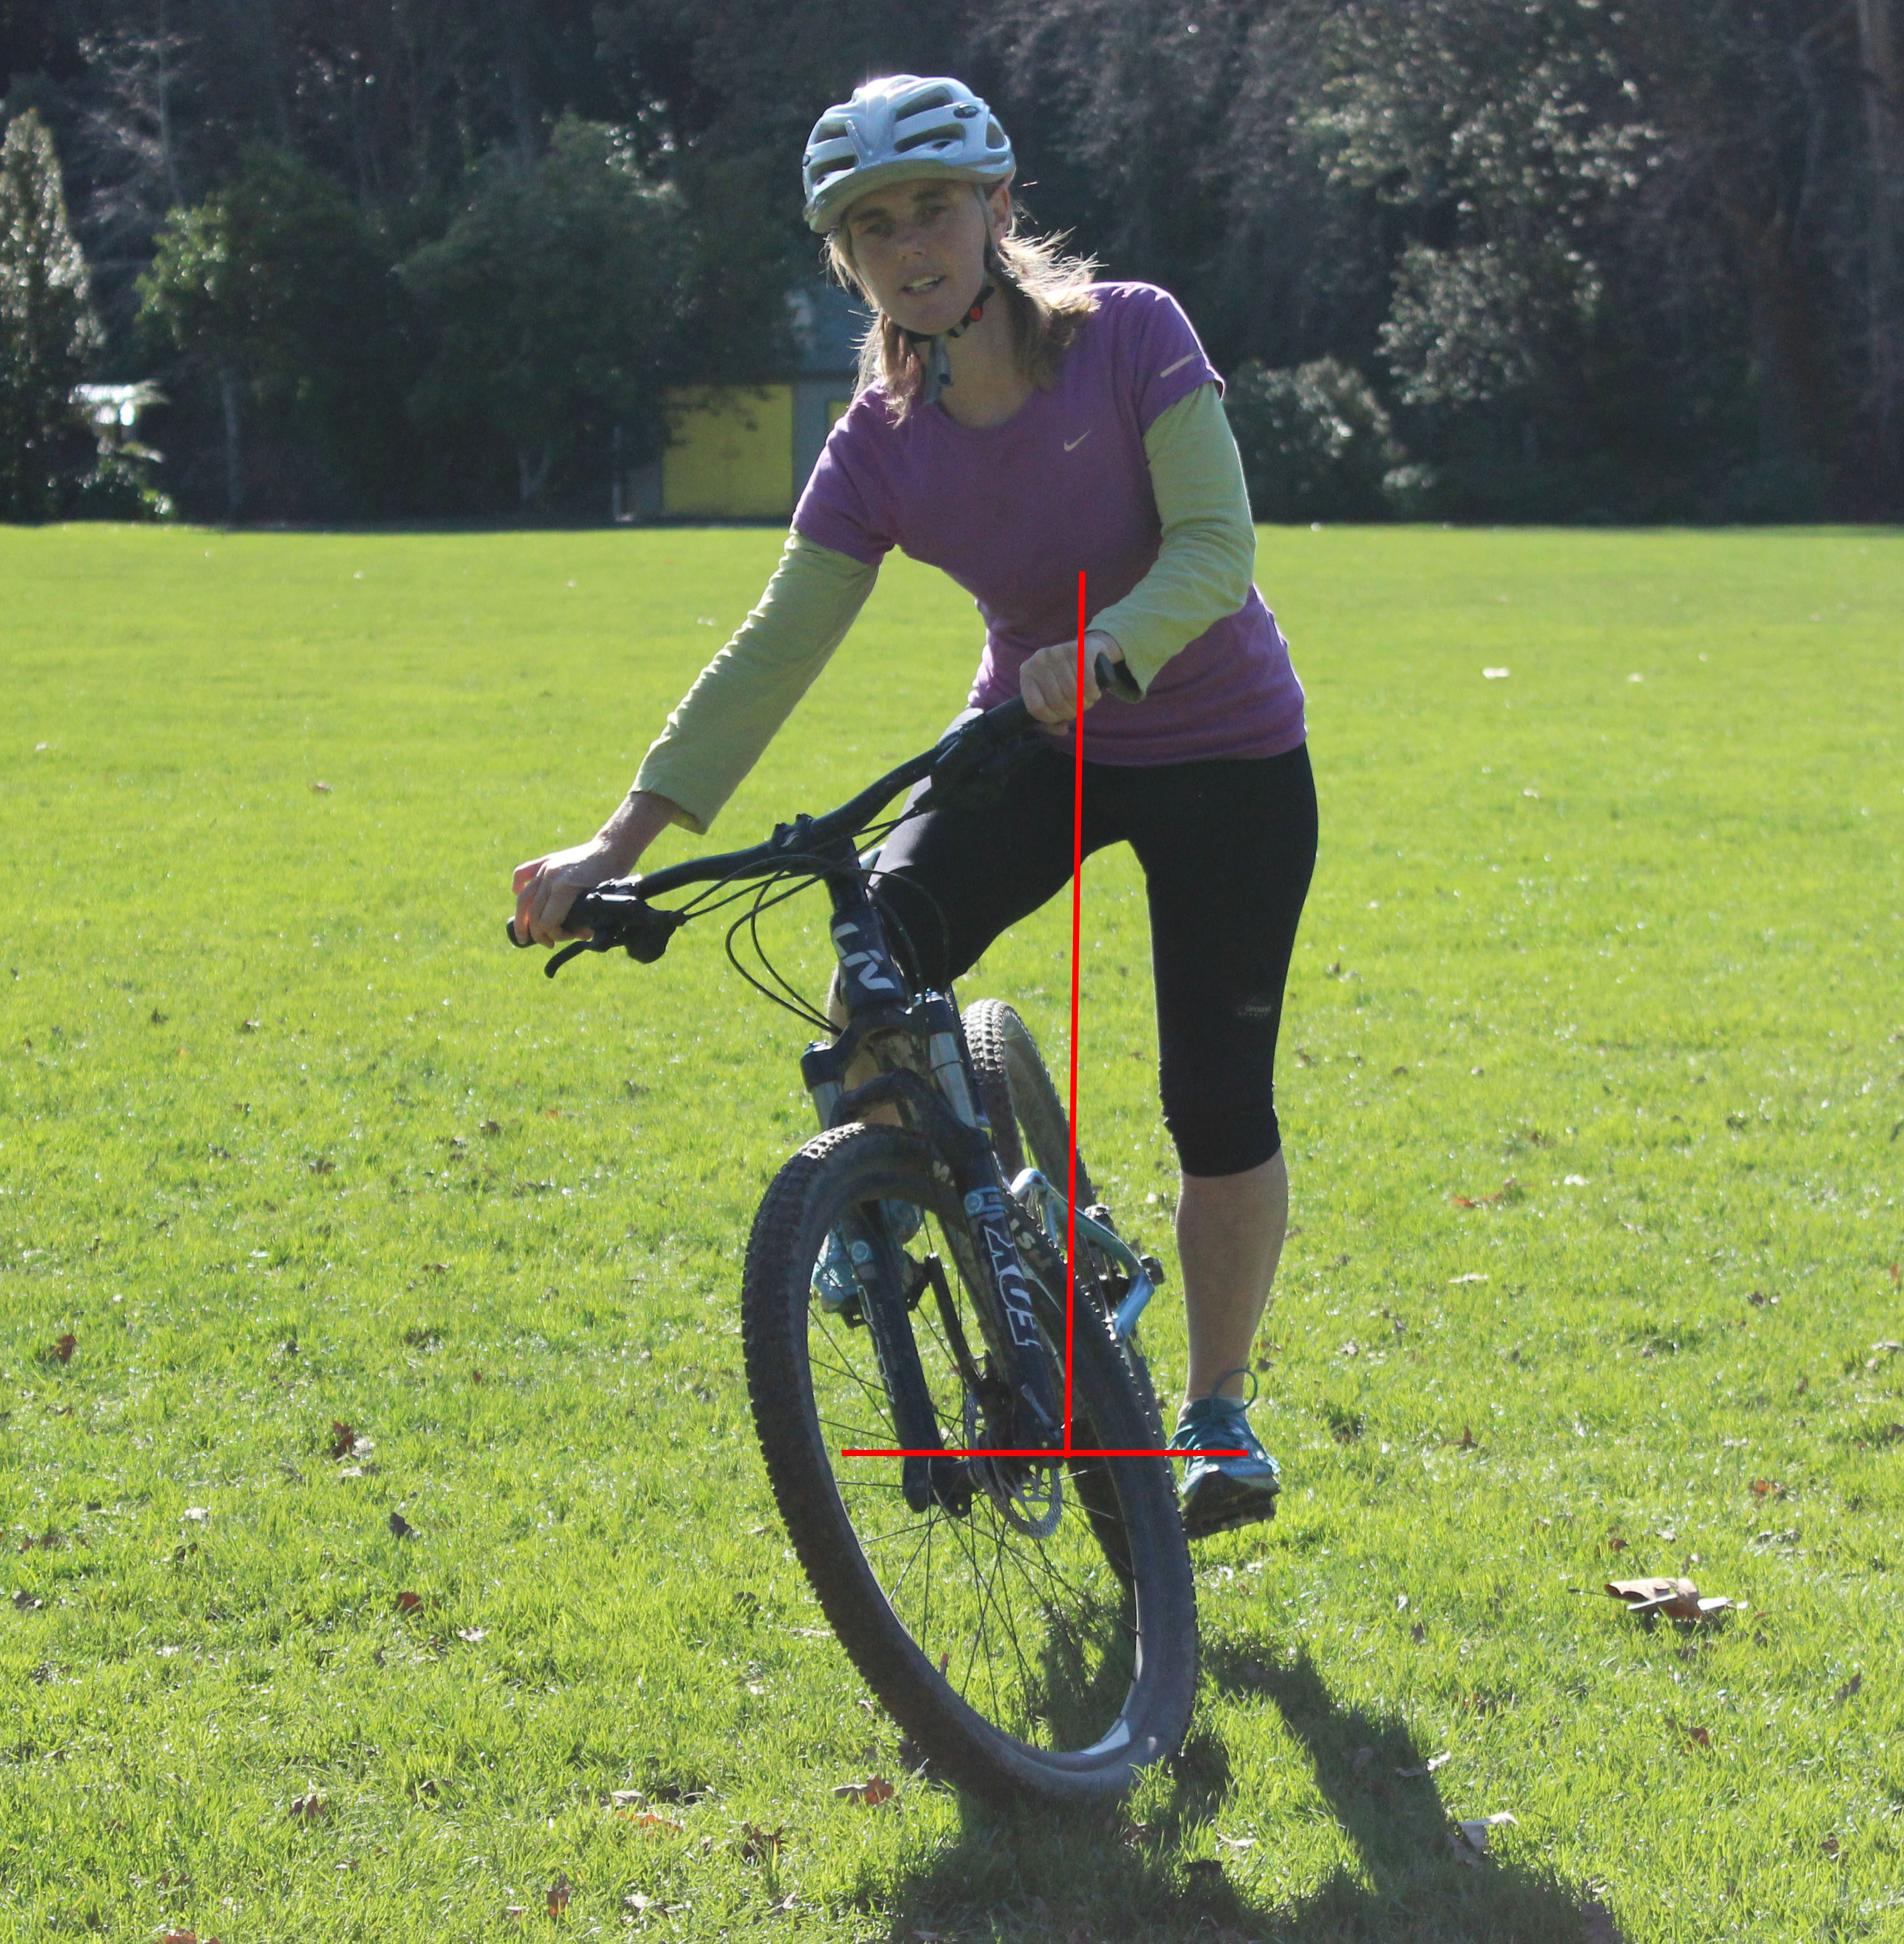
My hips have moved so are now over base of support
Have a go at leaning the bike into the corner. Start small and just get the feel.
To understand how to lean you need to understand balance. To keep balance your centre of mass (think of your centre of mass as your tummy button) has to be over your base of support. If your centre of mass moves outside your base of support you will lose your balance. Try this to help your understanding – stand with both your feet on the ground. Keeping your body straight lean forward from the ankles – what happened? You took a step, I hope. When you leaned forward your centre of mass moved outside your base of support and you needed to react by taking a step to get your base of support back under your centre of mass – to keep your balance. We do this every time we take a step in walking.
In biking, our bike pedals (and the area between them) = our base of support, so we have to keep of centre of mass over this pedal area.. Therefore when we lean our bike we need to alter the position of our centre of mass to match the base of support – to keep balance. Ladies we need to get our hips on the move here – move your hips out and away from the bike seat to bring your centre of mass over the base.
To help you achieve your lean
lean into and push weight down into the inside hand
the inside knee and the is bent and the foot is light on the pedal
the outside foot is down and you should push your heel down and be heavy on the pedal.
Try and maintain speed throughout the corner
When you ride a pump track don’t feel like you need to practise all the parts of cornering. Initially you may like to focus on just one, or some of the points above. As your feel and skills improve all the parts will start to come together.
I am having heaps of fun on the pump track working on my lean and cornering and my skills are improving. So find a pump track near you and join me.
Thanks for reading. Used together our stories and resources support you to achieve and develop as a rider.
goRide is a shared journey, so we would like you to assist in guiding it along the way. Contact goRide. Your thoughts, comments or feedback are welcome. Thank you for being a part of the goRide way.
Pump tracks are appearing all over the place – in council owned parks, in school grounds, campgrounds, mountain bike parks and some lucky people have even made one in their own backyard. With more interest in recreational riding we have seen the development of a lot more. This means there may be one near you! Making riding one easy and accessible so you too can have fun and improve your riding.
What is a pump track? A pump track is a small man made dirt track built with a looping trail system. They are generally designed with different sized dirt mounds/rollers and corners that have a banked outer edge (called berms).
Why is it called a pump track? Because you pump the terrain. Pumping – is a riding technique that allows you to use the track to keep and generate momentum therefore eliminating the need for pedaling. Ultimately you should be able to ride a pump track without pedaling! What?
OK so that is the ultimate goal or the ideal of pump tracks butthere is a lot more to gain from a pump track than being able to ride it without pedaling. Do not let that phase you or intimidate you. If you are anything like me, it is unlikely you will reach that no pedaling goal without a lot of practice.
However understanding the ultimate goal will give you insight on how to get the most out of riding a pump track.
What do pump tracks have to offer ?
They are full of fun.
They are accessible
They offer community. Often there will be other riders there to enjoy, watch and be inspired by. The kids will see and pick up on the skills and techniques that similar aged or older kids are using on the track, and soon enough you will see those skills being used in their riding.
They offer a great safe environment to improve your riding. Pump tracks allow you to get used to the bike moving under you. You will start to get a feel for how both the bike and your body move to maintain balance as you ride over the terrain, differing slopes and corners etc. The more you ride them, the more you will gain confidence in your riding. If you become quite skilled at pump tracks they teach you how to use the terrain to assist your riding – allowing you to ride on trails with more flow, speed and control.
They are great for both strength and fitness improvements.
They suit a wide range of ages as the rider can tailor the pump track to their capability. Finding an activity to suit the different ages of children in families can sometimes be a challenge, the pump track can offer something for every member of the family – especially the adults.
For the younger kids – they can miss out mounds and corners if they are too hard, or focus on just one part of the pump track. Because they are popping up in park like settings for those easily distracted or the not so riding keen there is often other outdoor activities to enjoy like playgrounds or you can take a ball/frisbee for them to kick or throw around. Also they frequently are void from safety concerns like vehicles but every pump track is different and you will need to assess the safety of the environment.
The older kids/ adults – can improve their biking skills, their strength and fitness. Depending on your riding experience and capability like the younger kids you get to tailor it to your needs, and can progressively challenge yourself as your riding confidence grows. That can range from completing a lap pedaling, to completing a lap without pedaling or for some even progressing to a jump.
Think about making an adventure out of your excursion to the pump track. If you have one close by maybe biking there is an option. Consider having morning, afternoon tea or lunch there. It can be a great place to enjoy with other families.
Give it a go, get in on the fun, lets see more of us BIG KIDS, more of us GIRLS on pump tracks. The kids will love that you join in and if you do it, maybe you will inspire another adult or female to give it a go.
Are you interested in learning more? Like -what skills to try out on a pump track? Watch out for future stories on Pump Track Skills.
We would love to hear about your local or favourite pump track. See you out there.
Thanks for reading. Used together our stories and resources support you to achieve and develop as a rider.
goRide is a shared journey, so we would like you to assist in guiding it along the way. Contact goRide. Your thoughts, comments or feedback are welcome. Thank you for being a part of the goRide way.
When we make the effort and take the time to go for a ride with kids, we want it to be an enjoyable experience. To have a ‘great day’ on the bike with kids there are simple things to think about, plan and do. In this story I am going to introduce you to riding with kids to the Pencarrow Lighthouse near Eastbourne, Wellington, North island, NZ,
Supporting you and your family to SMILE when you ride.
This a great family riding trip to New Zealands first permanent lighthouse and the only lighthouse run by a female lighthouse keeper.
Where is it?
The start and finish is located just south of Eastbourne Wellington. Eastbourne is located 40 minutes drive from downtown Wellington or 30 minutes aboard the East By West Ferry.
The ride – is it doable for you?
Biking Distance? The length of ride to Pencarrow Lighthouse is 8km one way . It is an out and back ride making it 16km return trip.
You have options to make your trip longer.:
You can park in Eastbourne Village and ride some of the coastal path and road to the start of the lighthouse ride making it a 22km return trip
You can continue to ride beyond the lighthouse to Baron Head lighthouse ( the current operational lighthouse) and to the Parangarahu Lakes
Parangarahu Lakes and the 2 lighthouses – Pencarrow and Baron Head.
Biking Surface? The surface is flat, wide and well compacted gravel . it is the width of a road.
Biking Skills required? This is NOT a technical ride. It is a flat ride to the lighthouse and the trail is wide. This can be quite a busy trail with other bikers and walkers.
Level of biking fitness? Allow 2 hours to complete this ride with kids. The biggest challenge can be the wind which is often present due to the rides location – coastal and near Wellington. Read how Sam ( 10 year old boy) managed the wind on his ride to the lighthouse. I had to learn to tuck in behind Mum to shelter from the wind and to catch my breath. I also slowed to have a breather in the more secluded bays before I took on biking around the exposed headlands. I quickly learnt that I needed to save my energy when I had the chance.
Can you ride with Kids Attached? This is a ride that you can enjoy with kids attached.
Kids riding their own bike. The Towhee Tow Rope could be the asset you need to get some younger kids riding on their own bike on this ride… and necessary if it is windy
Kids Attached or Towed – This trail is wide and off road making all kids attached or towed options suitable for this ride. Full range of Kids Bike Seats Attached or Towed
The wide flat gravel surface.
Safety
It is best to take a bike locks with you to keep the bikes safe as you walk up the trail to Pencarrow Lighthouse.
Enjoy the experience and have fun
If you have worked through the points above then you will be more likely to enjoy and have fun on your ride. There is so much fun to be had when out exploring on a bike
Some things you could plan to enjoy on Pencarrow Lighthouse Ride
It was great to see all the ferries as they pass going into and out of Wellington Harbour.
You get to walk up a bit of a hill to Pencarrow Lighthouse. There is a whole lot of information and history about the lighthouse and the lighthouse keepers.
The views from the lighthouse are pretty awesome. Wellington and the harbour, and you get great views all the way across to the South Island but only if you manage to pick a good clear Wellington day.
If you choose to go a little further you can see the Barron Head Lighthouse the current lighthouse in operation and a couple of lakes
Icecreams/ Hot Chocolates at Eastbourne Village are always an option after the ride.
Ferries entering/exiting Wellington harbour
Start of the trail to Pencarrow Lighthouse on the hill
Suitable trail to ride with kids attached or towed.
Your bike riding success is different to others… use our stories and support, get the right solutions.
Read stories about NZ trails, tracks & parks. Find out what other families & riders are doing. Be inspired! Is this ride an option for you or your family?
A collection of stories that will help you learn about bike gear. goRide supporting you to get the right bike gear solution for the type of riding you do or want to do.
Stories in Types of Riding support you to learn about riding a bike in different environments. So you can successfully choose to ride more place, more often.
Support and inspire other riders and families to ride
Share your riding outings, adventures and experiences on our quick and easy question and answer forms. Join us in helping others ride bikes. All entries receive a free shipping coupon and go into our seasonal prize draw.
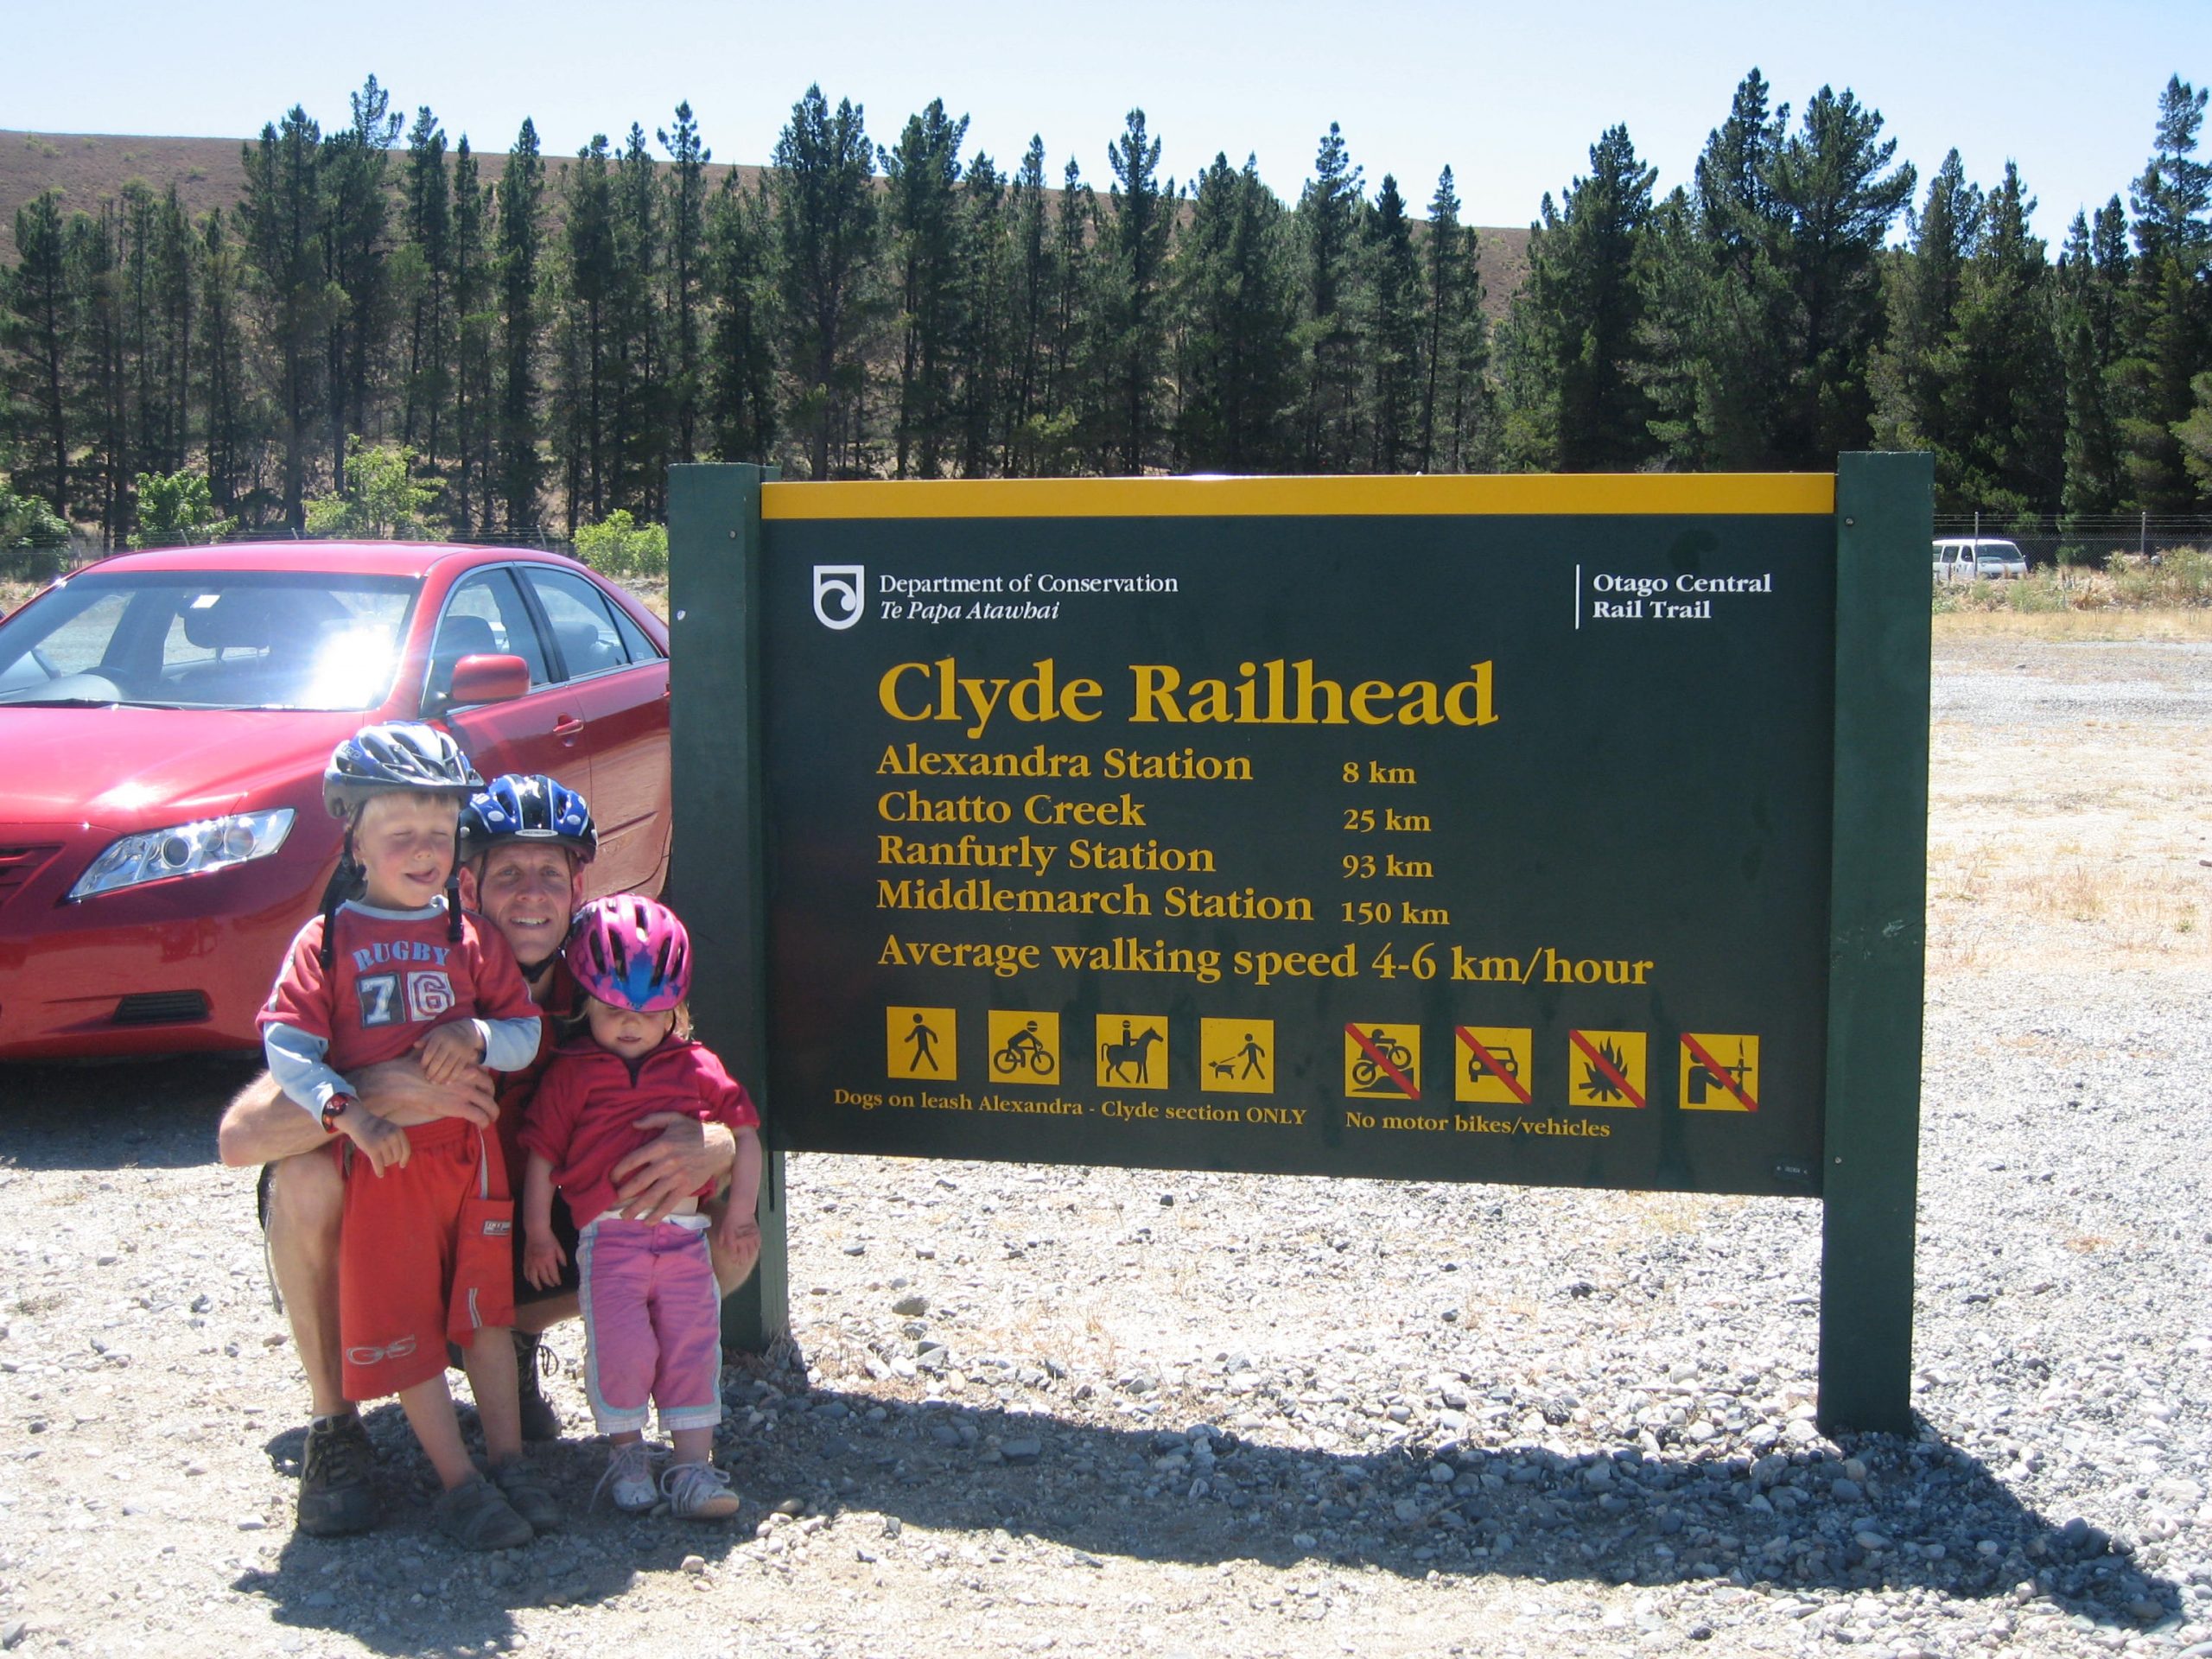
We did it! – riding the Central Otago Rail Trail with 2 kids attached – Sam 4 years old on a trailer bike and Hollie 2 years old on a bike seat – on carrier. Over 5 days and 4 nights! And now the kids are wanting to do it again but this time on their own bikes. When we returned from our journey at Christmas 2009, as a family we wrote a story about the highlights, and thoughts from our adventure. I want to share some photos, and snippets from that story that might inspire you to goRide the Central Otago Rail Trail.
Reading stories about cycling adventures helps to connect you to other women who ride and makes you think about what you and/or your family could achieve. It’s that story of another family or women having completed a bike adventure that makes you wonder if you or your family can. A story that made you believe you can. Its that little piece of advice, or that must do, or must stay, that helps with the planning and preparation and helps make your adventure successful and special.
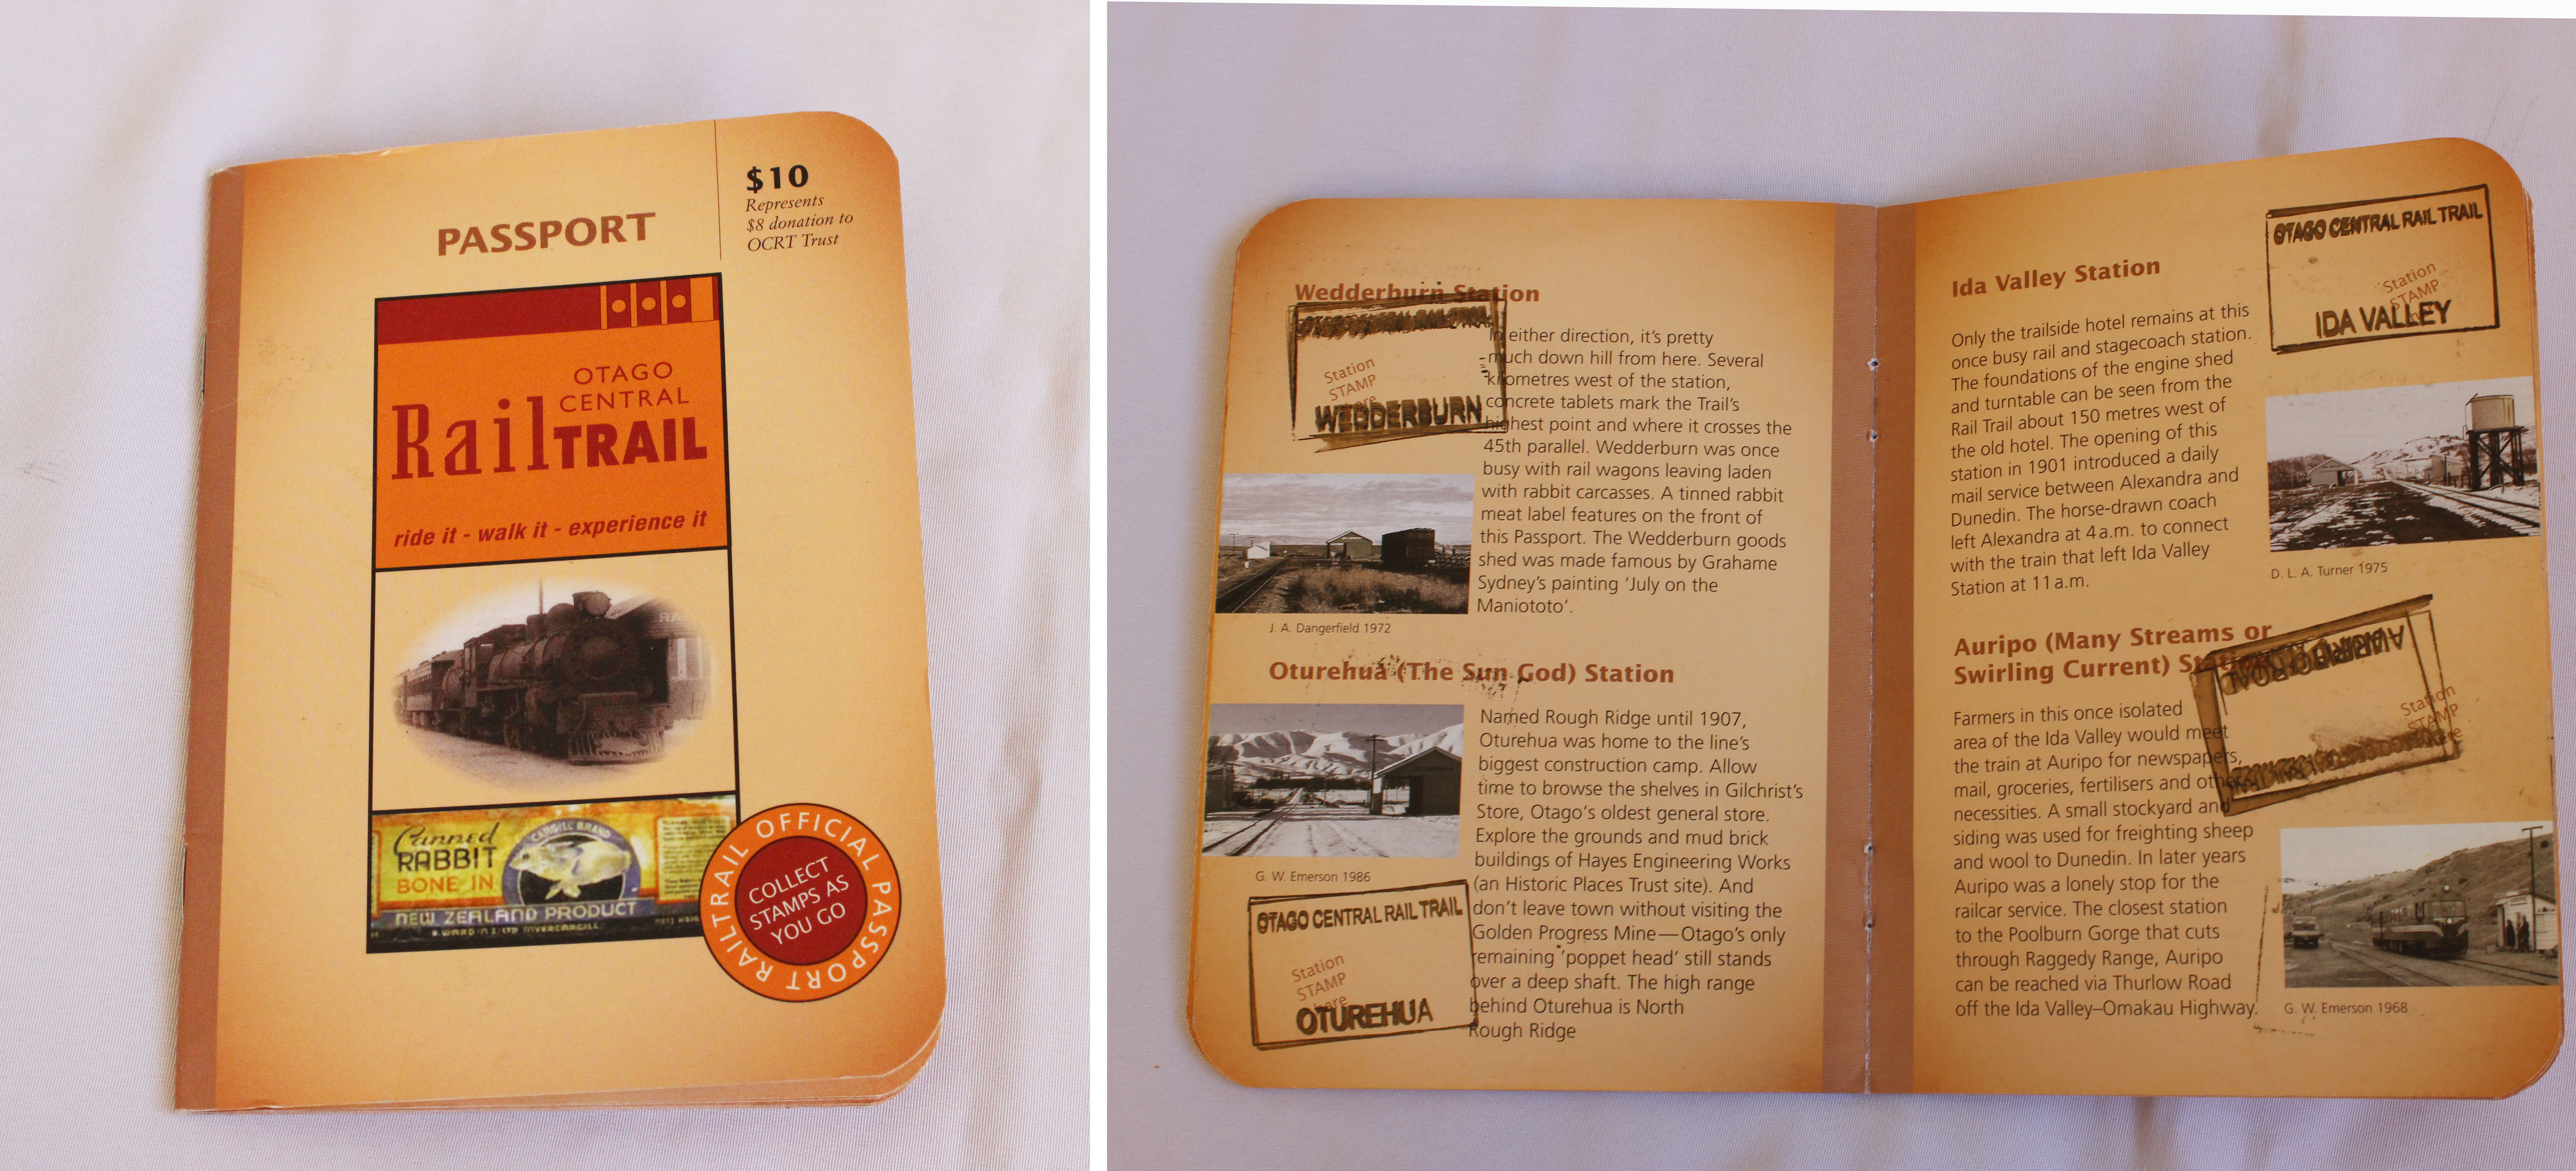
The train to Middlemarch goes chuggedy chuggedy up the gorge tucked in tight against the hill and we got to go over lots of bridges and through lots of tunnels. It was my first train ride and I was amazed where this train managed to go. On the cycle ride there were lots of tunnels along the way. I had my very own torch to help light the way. And a horn on my trailer bike that I liked to push to let people know we were coming and just because it made a noise. I think Mum made sure it wasn’t a really loud horn. The scenery was wonderful sometimes we followed a river, there was often big open spaces, hills and a lot of brown a bit different to where I live. You may notice I am not often in the photos as I am very keen to be the photographer. We found Nelson Rd on the way which I thought was quite funny because I am from Nelson. Sometimes it was windy and it even snowed. I know, in December, luckily the place we were staying in had a great fire and the snow on the hills the next morning looked great. We were well prepared with lots of warm clothes and wooly hats, socks and gloves. Reaching the high point is pretty cool, you get to take a photo and you know it is downhill after that. You can get a small book called a passport and you get to collect stamps from the Railway Stations along the way and I loved doing that.
The Central Otago Rail Trail Passport and stamps collected from the Railway Stations. There are 18 to collect.
Adults highlights:
The train ride was an awesome addition to the journey. It is a great train ride to take kids on, and you will also enjoy the scenery. The train does take a few hours and if you are getting on the bike after the train consider their ability to be able to sustain the time and distance. Seeing this part of New Zealand from a bike is just filling. Fills your soul. Great scenery, great little towns, bits of history (it took sixteen harsh winters/scourching summers for labourers, stonemason, blacksmiths, and engineeers, to build the railway. Starting in Middlemarch 1891 and finishing in Clyde in 1907 – wow and you get to ride it in a few days, and it is so achievable for families with kids of all ages.
Here are some factors that made our bike adventure a success:
Planning and preparation. The distances of the days were about right. The trail is gravel and though reasonably flat it is slower going than you predict because of the gravel surface. Longer distances would have made the trip challenging with windy or cold days. You just cannot pre-order the weather and it certainly can be unpredictable in Central Otago. Having clothing options for all weather conditions and plenty of food and water for the day.
Early starts were important to our trips success. Kids are often at their best in the morning and we generally managed to get most of our biking completed by lunch time/ early afternoon.
Communication and distraction. Keeping their senses stimulated – look, see, feel and hear. The passport enabled your ride to be broken into sections, you always had a railway station and stamp to collect or a town to look forward to. Make it fun and keep the adventure in it.
Regular stops were important for food, a bit of loving, and a stretch for your body off the bike.
Thanks for reading. Used together our stories and resources support you to achieve and develop as a rider. Do it, at your own pace, in your own time, in a fun, supported way – the goRide way.
goRide is a shared journey, so we would like you to assist in guiding it along the way. Contact goRide. Your thoughts, comments or feedback are welcome. Thank you for being a part of the goRide way.[/themeone_section]
Enjoy our story of the John whanau (Mum, Dad, 4 year old boy and a 2 year old girl) riding the Central Otago Rail Trail over 5 days in the South Island of New Zealand
Supporting you and your family to SMILE when you ride.
When we make the effort and take the time to go on a biking adventure with the family we want it to be an enjoyable experience. To help plan your adventure read about the John whanau experience riding the 151km Central Otago Rail Trail with kids attached.
The Trail is located in the amazing Central Otago region of the South Island of New Zealand. The direction you ride in will determine your start and finish point, Starting or Finishing in Middlemarch or Clyde.
The ride and is it doable for you?
The Otago Rail Trail is 151km in length. It a gentle incline up to the highest point and then a gentle incline down. The trains chugged their way up and then down and so can you on your bike. There are a variety of places to stay on the way and so you can choose the distances you ride each day by determining how many days you want to ride the trail in. The guide books say 2-3 days, but with kids attached we decided to do the trail over 5 days of riding,
Car Shuttle – We had Grandma providing car support throughout this trip. So we only every carried day gear.
Highlights – It was great to get the perspective of Greymouth from the top of the stop bank, see the Greymouth bar, and the activity of the river.
DAY ONE – 27.5km Middlemarch to Hyde is it doable?
We traveled in the morning from Dunedin to Middlemarch on the Taieri Gorge Railway. We cycled to Dunedin Railway station then hopped on the train that travels through to Middlemarch
Biking – We didn’t start the trail until the afternoon because we took the train to Middlemarch in the morning. This did make it a long day for the kids. Definitely getting up early and getting through most of our riding in the morning was the best way to manage the kids energy and enthusiasm for biking
Accommodation – stayed overnight at the Hyde Hotel .
DAY TWO – Hyde to Ranfurly.32km – is it doable?
Biking – Hyde tp Ranfurly 32km.
Accommodation –We rented a house/batch for the night. We were thankful for the fire as it snowed that night.
DAY THREE – Ranfurly to Oturehua. 25.5km – is it doable?
Biking – We passed through the high point today …so we know it is ‘downhill’ from here.
Accommodation –we stayed in B&B accommodation
DAY FOUR -Oturehua to Omakau. 29km.- is it doable?
Biking – Oturehua to Omakau. 29km
Accommodation – We rented a house/bach for the night.
DAY FIVE – Omakau to Clyde. 37km – is it doable?
Biking – This was a longer distance day but the biking time was about the same as previous days as the ride was predomanintly downhill or flat.
One of the many tunnels you ride through.
The highest point.
Riding the trail day 5.
The end of teh trail for us.
What skills will you need to do this ride? This track is predominantly loose gravel trail. It s an easy gradual uphill or downhill riding. The trail was slower going than we had planned for. We found we only rode the trail at about 10km/hour with kids attached and the loose gravel also slowed our progress
What level of fitness will you need to do this ride? You can complete the ride over as many days as you like and therefore determine how many kilometres you ride in a day.
How could the weather effect the success of your journey? Wind can be quite a factor on this trail. We choose to only do about 30km a day so that we could make sure the kids wouldn’t be exposed in bad weather for too long if the weather was not great. We rode this in December and we did have snow in Ranfurly and it was cold. Be prepared for all weather no matter when you ride this trail.
Riding with Kids Attached or Towed? This is a trail that you can enjoy with kids attached or towed. We had our 4 year old boy on a half bike and our 2 year old girl on a rear bike seat. A bike trailer would have given us more flexibility on the distances we could ride each day.
If kids are riding their own bike. Having a tow rope – the towhee is certainly a great thing to have as an option in times of need. If they are tired, they need assistance through weather ( wind, rain or cold)
Be safe and comfortable when riding the Otago Rail Trail with Kids Attached
Enjoy our mulltiday bikepath riding pages that introduce gear and stories to get you ready to ride
Throughout this trail there is reasonable support with riding some small towns Ranfurly and Alexandra however there are times of remoteness so being prepared is important. Use our stories for multiday biking to help support you to be prepared to ride the Central Otago Rail Trail.
There were many highlights enjoyed along the way. These are the things that my 4 year old talked about during and after the ride.
The train to Middlemarch goes chuggedy chuggedy up the gorge tucked in tight against the hill and we got to go over lots of bridges and through lots of tunnels. It was my first train ride and I was amazed where this train managed to go.
On the cycle ride there were lots of tunnels along the way. I had my very own torch to help light the way. And a horn on my trailer bike that I liked to push to let people know we were coming. The noise was quite different in the tunnels.
The scenery was wonderful sometimes we followed a river, there was often big open spaces, hills and a lot of brown a bit different to where I live.
You may notice I am not often in the photos as I am very keen to be the photographer. We found Nelson Rd on the way which I thought was quite funny because I am from Nelson.
Sometimes it was windy and it even snowed. I know, in December, luckily the place we were staying in had a great fire and the snow on the hills the next morning looked great. We were well prepared with lots of warm clothes and wooly hats, socks and gloves.
Reaching the high point is pretty cool, you get to take a photo and you know it is downhill after that.
You can get a small book called a passport and you get to collect stamps from the Railway Stations along the way and I loved doing that.
Central Otago Rail Trail with stamps.
Sam and Hollie favourite thing to stamp their passports at each of the stations
I found Nelson Road…funny.
Your bike riding success is different to others… use our stories and support, get the right solutions.
Read stories about NZ trails, tracks & parks. Find out what other families & riders are doing. Be inspired! Is this ride an option for you or your family?
A collection of stories that will help you learn about bike gear. goRide supporting you to get the right bike gear solution for the type of riding you do or want to do.
Stories in Types of Riding support you to learn about riding a bike in different environments. So you can successfully choose to ride more place, more often.
Support and inspire other riders and families to ride
Share your riding outings, adventures and experiences on our quick and easy question and answer forms. Join us in helping others ride bikes. All entries receive a free shipping coupon and go into our seasonal prize draw.
Are you considering getting on a bike with your baby? When is the right time to make the decision to try this type of family riding? Let’s take a look at what you need to know to make this a safe enjoyable experience.
Supporting you and your family to SMILE when you ride.
The ability to jump on a bike with your baby and get out into your community opens up a whole lot of possibilities and is nothing short of liberating. The choices these days for carrying your infant on a bike are comprehensive. If you can think of a scenario chances are someone has designed something that will fit it. From trailers to child seats, to front and back cargo bikes, parents all over the world are riding with infants. As your family grows the fun and adventure that can be had because you are travelling by bike through your community will bring smiles and great memories for everyone.
So what is the answer to the question; When can I ride a bike with my baby in NZ?
When exactly will depend on the development and size of your baby as well as your confidence and comfort/ability as a parent. The best guide is approximately 1 year old (range from 9months to 18months). To follow there is a list of things that you will need to solve or that will influence your decision as to when it is right for your family.
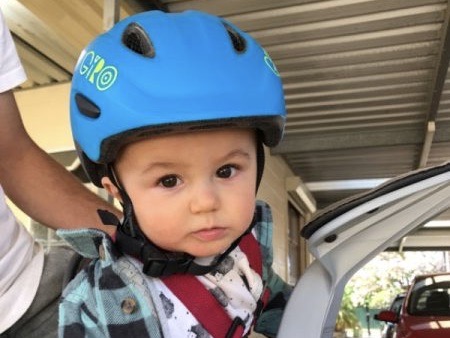
Your Bike Riding Baby must wear a bike helmet
In New Zealand it is law to wear a helmet on a bike, this includes any passengers on a bike. Therefore you cannot ride a bike with a baby until you can find a helmet that will fit correctly and is not too heavy for their neck to support (see below for some tips).
Tips for buying your child’s first bike helmet
Size – for a child around 1 year of age you will need a 45-50cm helmet. Measure with tape one finger width above the eyebrows or use a piece of string then lay it along a ruler.
Coverage – seek out a helmet that covers as much of the head as possible therefore protecting more of it
Weight – the less the better. There are helmets out there that weigh as little as 185 grams, try to find one but don’t comprise with too little coverage
Adjustment – it must have a sizing system for you to adjust it to a perfect fit
Heat & Care – ventilation is good for summer so they don’t get too hot. Washable pads are also good
The biggest determining factor for getting a baby on a bike in New Zealand is having a helmet that fits well and they can safely wear. Apply the low, level, snug and stable rule. See How to Size & Fit a Kids Bike Helmet for more guidance on fit. We have done a lot of research into what we think is the best “First” helmet available in NZ. See the photo and link button.
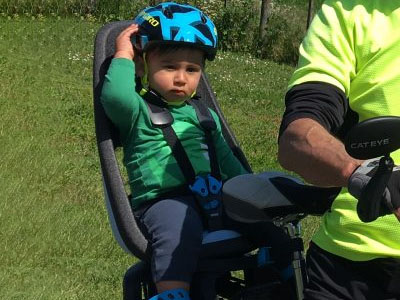
Your Bike Riding Baby must be able to sit unsupported
Children are just learning to sit unsupported at about 9 months of age. Until this age, infants have not developed sufficient bone mass and muscle tone to enable them to sit unsupported with their backs straight. Pediatrician’s advise against having infants sitting in a slumped or curled position for prolonged periods. “This position may even be exacerbated by the added weight of a bicycle helmet on the infant’s head.” The US Consumer Product Safety Commission.
Rider Confidence
A bike feels different with a baby on board. You are responsible for this precious cargo. You will have additional load on the bike. Your balance will be affected due to the increased load and having to work around a bike seat… whether it’s in the front or the rear.
Ability & Bike: are you a confident rider? Do you believe in your own ability to enjoy a ride? Do you want to share this with your child? Could you manage extra weight on your bike or do you want to tow a trailer? How will this effect your balance?
Practice & Process: One of the keys to enjoying your time out on the bike is to practice in a safe environment before you do it for the first time and to know your routine or process.
There are lots of ways to make your initial experience of riding with your toddler a really positive one. Please read the story on Confidently Riding with a Toddler which is full of advice.
Choosing where you ride
Always safety first. Start with route or trails that you know and enjoy. Try to make them wide smooth bike path trails… away from traffic, make it easy in the beginning. Progress as your confidence allows. Avoid excessively bumpy trails in the early days – you don’t want to expose your toddler to a lot of vibration or jostling.
There are lots of options for riding with a 1 year old, have a look at what we think are the best options… Riding With a 1 Year Old
Your baby will be sitting on the bike or trailer while you do the work so it is vitally important to make sure they are kept comfortable while you ride. Think about the weather and how this will effect their comfort and don’t ride for too long, take lots of breaks… Riding with a Toddler – Are They Safe?
Your bike riding success is different to others… use our stories and support, get the right solutions.
Is a front kids bike seat ,,,the right option for your family. Use the goRide Buying Guides to get the right kids front bike seat attached to your bike.
What is the best way to ride with your child? There are many factors to consider in your decision. Use our goRide Buying Guides to get the right kids bike seat attached to your bike.
First Bike Helmet
Everything we ask for your first bike helmet. Lightweight, good head coverage, adjustable, chin pinch guard. The back of this helmet is flat so toddlers can comfortably lean their head on bike seats
Read through this list of questions that many people have when thinking about a front mounting kids bike seat. Is this seat the right solution for your family?
What is the best way to ride with your child? There are many factors to consider in your decision. Use our goRide Buying Guides to get the right bike seat – towed by the bike.
What is the best balance bike for your child? There are many factors to consider in your decision. Use our goRide Buying Guides get the right Balance Bike.
We love this seat. Super lightweight, quick, & easy to attach to a carrier and change between bikes. Suitable for a wide age range – 1-6 year olds.
Biking with Babies
When is it safe to start riding with your young child? Learn what the NZ laws are and what the experts recommend and why? Be safe and your first riding experiences will be good ones.
Read stories about riding trails, tracks and mountain bike parks in beautiful NZ. Be inspired and learn whether this may be an option for you or your family.
Support and inspire other riders and families to ride
Share your riding outings, adventures and experiences on our quick and easy question and answer forms. Join us in helping others ride bikes. All entries receive a free shipping coupon and go into our seasonal prize draw.